https://www.howtoforge.com/tutorial/build-your-own-cloud-on-debian-wheezy
40'000+ searches over 8 years! That's my Google Search history. How about yours? (you can find out for yourself
here) With so many data points across such a long time, Google has a very precise idea of what you've been interested in, what's been on your mind, what you are worried about, and how that all changed over the years since you first got that Google account.
Some of the most personal pieces of your identity are stored on servers around the world beyond your control
Let's say you've been a Gmail user between 2006 and 2013 like me, meaning you received 30'000+ emails and wrote about 5000 emails over that 7 year period. Some of the emails you sent or received are very personal, maybe so personal that you probably wouldn't like even some family members or close friends to go through them systematically. Maybe you also drafted a few emails that you never sent because you changed your mind at the last minute. But even if you never sent them, these emails are still stored somewhere on a server. As a result, it's fair to say that Google servers know more about your personal life than your closest friends or your family.
Statistically, it's a safe bet to consider that you've got a smartphone. You can barely use the phone without using the contacts app which stores your contacts in Google Contact on Google servers by default. So not only does Google know about your emails, but also about your offline contacts: who you like to call, who calls you, whom you text, and what you text them about. You don't have to take my word for it, you can verify for yourself by taking a look at the permissions you gave apps such as the Google Play Service to read the list of people that called you and the SMS you got. Do you also use the calendar app that comes with your phone? Unless you explicitly opted out while setting up your calendar, this means that Google knows precisely what you're up to, at every time of the day, day after day, year after year. The same applies if you chose an iPhone over an Android phone, except Apple gets to know about your correspondance, contacts and schedule instead of Google.
Do you also take great care to keep the contacts in your directory up-to-date, updating your friend's, colleagues's and and family's email addresses and phone numbers when they move to a new job or change carrier? That gives Google an extraordinarily accurate, up-to-date picture of your social network. And you love the GPS of your smartphone which you use a lot together with Google Maps.
This means Google not only knows what you do from your calendar but also where you are, where you live, where you work. And by correlating GPS location data across users, Google can also tell with whom you may socializing with right now.
Your daily habit of handing out your most personal information will impact your life in a way that no one can even forsee
To summarize, if you are an average internet user, Google has up-to-date, in-depth information about your interests, worries, passions, questions, over almost 10 years. It has a collection of some of your most personal messages (emails, SMS), an hour-by-hour detail of your daily activities and location, and a high-quality picture of your social network. Such an intimate knowledge of you likely goes beyond what your closest friends, family, or your sweetheart know of you.
It wouldn't come to mind to give this mass of deeply personal information to complete strangers, for instance by putting it all on a USB key and leaving it on a table in a random cafe with a note saying 'Personal data of Olivier Martin, use as you please'. Who knows who might find it and what they would do with it? Yet, we have no problem handing in core pieces of your identity to strangers at IT companies with a strong interest in our data (that's how they make their bread) and
world-class experts in data analysis, perhaps just because it happens by default without us thinking about it when we hit that green 'Accept' button.
With so much high-quality information, over the years, Google may well get to know you better than you can ever hope to know yourself: heck, crawling through my digital past right now, I can't remember having written half of the emails I sent five years ago. I am surprised and pleased to rediscover my interest in marxism back in 2005 and my joining
ATTAC (an organization which strives to limit speculation and improve social justice by taxing financial transactions) the next year.
And god knows why I was so much into dancing shoes back in 2007. These is pretty harmless information (you wouldn't have expected me to reveal something embarassing here, would you? ;-). But by connecting the dots between high-quality data over different aspects of your life (what, when, with whom, where, ...) over such time spans, one may extrapolate predictive statements about you.
For instance, from the shopping habits of a 17-year-old girl, supermarkets can tell that she is pregnant before her dad even hears about it (
true story). Who knows what will become possible with high-quality data the like Google has, which goes well beyond shopping habits? By connecting the dots, maybe one can predict how your tastes or political views will change in the coming years.
Today,
companies you have never heard of claim to have 500 data points about you, including religion, sexual orientation and political views. Speaking of politics, what if you decide to go into politics in 10 years from now? Your life may change, your views too, and you may even forget, but Google won't. Will you have to worry that your opponent is in touch with someone who has access to your data at Google and can dig up something embarassing on you from those bottomless wells of personal data you gave away over the years? How long until Google or Facebook get hacked
just like Sony was recently hacked and all your personal data end up in the public sphere forever?
One of the reason most of us have entrusted our personal data to these companies is that they provide their services for free. But how free is it really? The value of the average Google account varies depending on the method used to estimate it:
1000 USD/year accounts for the amount of time you invest in writing emails, while the value of your account for the advertisement industry is somewhere between
220 USD/year and
500 USD/year. So the service is not exactly free: you pay for it through advertisement and the yet unknown uses that our data may find in the future.
I've been writing about Google mostly because that's the company I've entrusted most of my digital identify to so far and hence the one I know best. But I may well have written Apple or Facebook.
These companies truly changed the world with their fantastic advances in design, engineering and services we love(d) to use, every day. But it doesn't mean we should stack up all our most personal data in their servers and entrust them with our digital lives: the potential for harm is just too large.
Claim back your privacy and that of people you care for in just 5h
It does not have to be this way. You can live in the 21st century, have a smartphone, use email and GPS on daily basis, and still retain your privacy. All you need to do is get back control over your personal data: emails, calendar, contacts, files, etc.. The
Prism-Break.org website lists software that help controlling the fate of your personal data. Beyond these options, the safest and most powerful way to get back control over your personal data is to host your cloud yourself, by building your own server. But you may just not have the time and energy to research how exactly to do that and make it work smoothly.
That's where the present article fits in. In just 5 hours, we will set up a server to host your emails, contacts, calendars and files for you, your friends and your family. The server is designed to act as a hub or cloud for your personal data, so that you always retain full control over it. The data will automatically be synchronized between your PC/laptop, your phone and your tablet. Essentially,
we will set up a system that replaces Gmail, Google Drive / Dropbox, Google Contacts, Google Calendar and Picasa.
Just doing this for yourself will already be a big step. But then, a significant fraction of your personal information will still leak out and end up on some servers in the silicon valley, just because so many of the people you interact with every day use Gmail and have smartphones. So it's a good idea to have some of the people you are closest to join the adventure.
We will build a system that
- supports an arbitrary number of domains and users. This makes it easy to share your server with family and friends, so that they get control over their personal data too and can share the cost of the server with you. The people sharing your server can use their own domain name or share yours.
- lets you send and receive your emails from any network upon successfully logging in onto the server. This way, you can send your emails from any of your email addresses, from any device (PC, phone, tablet), and any network (at home, at work, from a public network, ...)
- encrypts network traffic when sending and receiving emails so people you don't trust won't fish out your password and won't be able to read your private emails.
- offers state-of-the-art antispam, combining black lists of known spammers, automatic greylisting, and adaptative spam filtering. Re-training the adaptative spam filter if an email is misclassified is simply done by moving spam in or out of the Junk/Spam folder. Also, the server will contribute to community-based spam fighting efforts.
- requires just a few minutes of maintenance once in a while, basically to install security updates and briefly check the server logs. Adding a new email address boils down to adding one record to a database. Apart from that, you can just forget about it and live your life. I set up the system described in this article 14 months ago and the thing has just been running smoothly since then. So I completely forgot about it, until I recently smiled at the thought that casually pressing the 'Check email' button of my phone caused electrons to travel all the way to Iceland (where my server sits) and back.
To go through this article, you'll need a minimum of technical capabilities. If you know what is the difference between SMTP and IMAP, what is a DNS, and have a basic understanding of TCP/IP, you know enough to follow through. You will also need a basic working knowledge of Unix (working with files from the command line, basic system administration). And you'll need a total of 5 hours of time to set it up.
Here's an overview what we will do:
- Get a Virtual Private Server, a domain name, and set them up
- Set up postfix and dovecot to send and receive email
- Prevent SPAM from reaching your INBOX
- Make sure the emails you send get through spam filters
- Host calendars, contacts, files with Owncloud and set up webmail
- Sync your devices to the cloud
This article was inspired by and builds upon previous work
This article draws heavily from two other articles, namely
Xavier Claude's and
Drew Crawford's introduction to email self-hosting.
The article includes all the features of Xavier's and Draw's articles, except from three features that Drew had and which I didn't need, namely push support for email (I like to check email only when I decide to, otherwise I get distracted all the time), fulltext search in email (which I don't have a use for), and storing emails in an encrypted form (my emails and data are not critical to the point that I have to encrypt them locally on the server). If you need any of these features, feel free to just add them by following to the respective section of Drew's article, which is compatible with the present one.
Compared to Xavier's and Drew's work, the present article improves on several aspects:
- it fixes bugs and typos based on my experience with Drew's article and the numerous comments on his original article. I also went through the present article, setting up the server from scratch several times to replicate it and make sure it would work right out of the box.
- low maintenance: compared to Xavier's work, the present article adds support for multiple email domains on the server. It does so by requiring the minimum amount of server maintenance possible: basically, to add a domain or a user, just add one row to a mysql table and that's it (no need to add sieve scripts, ...).
- I added webmail.
- I added a section on setting up a cloud, to host not just your emails but also your files, your addressbook / contacts (emails, phone numbers, birthdays, ...), calendars and pictures for use across your devices.
Get a Virtual Private Server, a domain name, and set them up
Let's start by setting the basic infrastructure: our virtual private server and our domain name.
I've had an excellent experience with the Virtual Private Servers (VPS) of
1984.is and
Linode. In this article, we will use
Debian Wheezy, for which both 1984 and Linode provide ready-made images to deploy on your VPS. I like 1984 because the servers are hosted in Iceland which run exclusively on renewable energy (geothermical and hydropower) and hence does not contribute to the climate change, unlike
the coal power plants on which most US-based datacenters currently run on. Also, they put emphasis on
civil liberties, transparency, freedom and
Free Software.
It could be a good idea to start a file to store the various passwords we will need to set on the server (user accounts, mail accounts, cloud accounts, database accounts). It's definitely a good idea to encrypt this file (maybe with
GnuPG), so that it won't be too easy to attack your server even if the computer you use to set up your server gets stolen or compromised.
For registering a domain name, I've been using the services of
gandi for over 10 years now, also with satisfaction. For this article, we will set up a zone with the name
jhausse.net. We then add a host named
cloud.jhausse.net to it, set the MX record to that host. While you're at it, set short Time To Lives (TTL) to your records like 300 seconds so that you'll be able to make changes to your zone and test the result rapidly while you're setting up the server.
Finally, set the
PTR record (reverse DNS) so that the IP address of the host maps back to its name. If you don't understand the previous sentence, read
this article to get the background. If you use Linode, you can set the PTR record in the control panel in the Remote Access section. With 1984, contact the tech support who will help you with it.
On the server, we will start by adding a non-privledged user, so that we don't end up working as root all the time. Also, to log in as root will require an extra layer of security.
adduser roudy
Then, in
/etc/ssh/sshd_config, we set
PermitRootLogin no
and reload the ssh server
service ssh reload
Then, we'll need to change the hostname of the server. Edit
/etc/hostname so that it has just a single line with your hostname, in our case
cloud
Then, edit the ssh server's public key files
/etc/ssh/ssh_host_rsa_key.pub,
/etc/ssh/ssh_host_dsa_key.pub,
/etc/ssh/ssh_host_ecdsa_key.pub so that the end of the file reflects your hostname, or instance
root@cloud. Then restart the system to make sure the hostname is fixed wherever is should be
reboot
We will update the system and remove services we don't need to reduce the risk of remote attacks.
apt-get update
apt-get dist-upgrade
service exim4 stop
apt-get remove exim4 rpcbind
apt-get autoremove
apt-get install vim
I like to use vim for editing config files remotely. For this, it helps to automatically turn on syntax highlighting. We do so by adding
syn on
to
~/.vimrc.
Set up postfix and dovecot to send and receive email
apt-get install postfix postfix-mysql dovecot-core dovecot-imapd dovecot-mysql mysql-server dovecot-lmtpd postgrey
In the
Postfix configuration menu, we select
Internet Site, and set the system mail name to
jhausse.net.
We will now set up a database to store the list of domains hosted on our server, the list of users for each of these domains (together with their password), and a list of mail aliases (to forward email from a given address to another one).
mysqladmin -p create mailserver
mysql -p mailserver
mysql> GRANT SELECT ON mailserver.* TO 'mailuser'@'localhost' IDENTIFIED BY 'mailuserpass';
mysql> FLUSH PRIVILEGES;
mysql> CREATE TABLE `virtual_domains` (
  `id` int(11) NOT NULL auto_increment,
  `name` varchar(50) NOT NULL,
  PRIMARY KEY (`id`)
  ) ENGINE=InnoDB DEFAULT CHARSET=utf8;
mysql> CREATE TABLE `virtual_users` (
  `id` int(11) NOT NULL auto_increment,
  `domain_id` int(11) NOT NULL,
  `password` varchar(106) NOT NULL,
  `email` varchar(100) NOT NULL,
  PRIMARY KEY (`id`),
  UNIQUE KEY `email` (`email`),
  FOREIGN KEY (domain_id) REFERENCES virtual_domains(id) ON DELETE CASCADE
  ) ENGINE=InnoDB DEFAULT CHARSET=utf8;
mysql> CREATE TABLE `virtual_aliases` (
  `id` int(11) NOT NULL auto_increment,
  `domain_id` int(11) NOT NULL,
  `source` varchar(100) NOT NULL,
  `destination` varchar(100) NOT NULL,
  PRIMARY KEY (`id`),
  FOREIGN KEY (domain_id) REFERENCES virtual_domains(id) ON DELETE CASCADE
  ) ENGINE=InnoDB DEFAULT CHARSET=utf8;
We will host the
jhausse.net domain. If there are other domains you'd like to host, you can also add them. We also set up a postmaster address for each domain, which forwards to
roudy@jhausse.net.
mysql> INSERT INTO virtual_domains (`name`) VALUES ('jhausse.net');
mysql> INSERT INTO virtual_domains (`name`) VALUES ('otherdomain.net');
mysql> INSERT INTO virtual_aliases (`domain_id`, `source`, `destination`) VALUES ('1', 'postmaster', 'roudy@jhausse.net');
mysql> INSERT INTO virtual_aliases (`domain_id`, `source`, `destination`) VALUES ('2', 'postmaster', 'roudy@jhausse.net');
We now add a locally hosted email account
roudy@jhausse.net. First, we generate a password hash for it:
doveadm pw -s SHA512-CRYPT
and then add the hash to the database
mysql> INSERT INTO `mailserver`.`virtual_users` (`domain_id`, `password`, `email`) VALUES ('1', '$6$YOURPASSWORDHASH', 'roudy@jhausse.net');
Now that our list of domains, aliases and users are in place, we will set up postfix (SMTP server, for outgoing mail). Replace the contents of
/etc/postfix/main.cf with the following:
myhostname = cloud.jhausse.net
myorigin = /etc/mailname
mydestination = localhost.localdomain, localhost
mynetworks_style = host

# We disable relaying in the general case
smtpd_recipient_restrictions = permit_mynetworks, reject_unauth_destination
# Requirements on servers that contact us: we verify the client is not a
# known spammer (reject_rbl_client) and use a graylist mechanism
# (postgrey) to help reducing spam (check_policy_service)
smtpd_client_restrictions = permit_mynetworks, reject_rbl_client zen.spamhaus.org, check_policy_service inet:127.0.0.1:10023
disable_vrfy_command = yes
inet_interfaces = all
smtpd_banner = $myhostname ESMTP $mail_name (Debian/GNU)
biff = no
append_dot_mydomain = no
readme_directory = no

# TLS parameters
smtpd_tls_cert_file=/etc/ssl/certs/cloud.crt
smtpd_tls_key_file=/etc/ssl/private/cloud.key
smtpd_use_tls=yes
smtpd_tls_auth_only = yes
smtp_tls_security_level=may
smtp_tls_loglevel = 1
smtpd_tls_loglevel = 1
smtpd_tls_received_header = yes
smtpd_tls_session_cache_database = btree:${data_directory}/smtpd_scache
smtp_tls_session_cache_database = btree:${data_directory}/smtp_scache

# Delivery
alias_maps = hash:/etc/aliases
alias_database = hash:/etc/aliases
message_size_limit = 50000000
recipient_delimiter = +

# The next lines are useful to set up a backup MX for myfriendsdomain.org
# relay_domains = myfriendsdomain.org
# relay_recipient_maps =

# Virtual domains
virtual_transport = lmtp:unix:private/dovecot-lmtp
virtual_mailbox_domains = mysql:/etc/postfix/mysql-virtual-mailbox-domains.cf
virtual_mailbox_maps = mysql:/etc/postfix/mysql-virtual-mailbox-maps.cf
virtual_alias_maps = mysql:/etc/postfix/mysql-virtual-alias-maps.cf
local_recipient_maps = $virtual_mailbox_maps
Now we need to teach postfix to figure out which domains we would like him to accept emails for using the database we just set up. Create a new file
/etc/postfix/mysql-virtual-mailbox-domains.cf and add the following:
user = mailuser
password = mailuserpass
hosts = 127.0.0.1
dbname = mailserver
query = SELECT 1 FROM virtual_domains WHERE name='%s'
We teach postfix to find out whether a given email account exists by creating
/etc/postfix/mysql-virtual-mailbox-maps.cf with the following content
user = mailuser
password = mailuserpass
hosts = 127.0.0.1
dbname = mailserver
query = SELECT 1 FROM virtual_users WHERE email='%s'
Finally, postfix will use
/etc/postfix/mysql-virtual-alias-maps.cf to look up mail aliases
user = mailuser
password = mailuserpass
hosts = 127.0.0.1
dbname = mailserver
query = SELECT virtual_aliases.destination as destination FROM virtual_aliases, virtual_domains WHERE virtual_aliases.source='%u' AND virtual_aliases.domain_id = virtual_domains.id AND virtual_domains.name='%d'
With all this in place, it is now time to test if postfix can query our database properly. We can do this using
postmap:
postmap -q jhausse.net mysql:/etc/postfix/mysql-virtual-mailbox-domains.cf
postmap -q roudy@jhausse.net mysql:/etc/postfix/mysql-virtual-mailbox-maps.cf
postmap -q postmaster@jhausse.net mysql:/etc/postfix/mysql-virtual-alias-maps.cf
postmap -q bob@jhausse.net mysql:/etc/postfix/mysql-virtual-alias-maps.cf
If you set up everything properly, the first two queries should return
1, the third query should return
roudy@jhausse.net and the last one should return nothing at all.
Now, let's set up dovecot (the IMAP server, to fetch incoming mail on the server from our devices).
Edit
/etc/dovecot/dovecot.conf to set the following parameters:
# Enable installed protocol
# !include_try /usr/share/dovecot/protocols.d/*.protocol
protocols = imap lmtp
which will only enable imap (to let us fetch emails) and lmtp (which postfix will use to pass incoming emails to dovecot). Edit
/etc/dovecot/conf.d/10-mail.conf to set the following parameters:
mail_location = maildir:/var/mail/%d/%n
[...]
mail_privileged_group = mail
[...]
first_valid_uid = 0
which will store emails in /var/mail/domainname/username. Note that these settings are spread at different locations in the file, and are sometimes already there for us to set: we just need to comment them out. The other settings which are already in the file, you can leave as is. We will have to do the same to update settings in many more files in the remaining of this article. In
/etc/dovecot/conf.d/10-auth.conf, set the parameters:
disable_plaintext_auth = yes
auth_mechanisms = plain
#!include auth-system.conf.ext
!include auth-sql.conf.ext
In
/etc/dovecot/conf.d/auth-sql.conf.ext, set the following parameters:
passdb {
  driver = sql
  args = /etc/dovecot/dovecot-sql.conf.ext
}
userdb {
  driver = static
  args = uid=mail gid=mail home=/var/mail/%d/%n
}
where we just taught dovecot that users have their emails in /var/mail/domainname/username and to look up passwords from the database we just created. Now we still need to teach dovecot how exactly to use the database. To do so, put the following into
/etc/dovecot/dovecot-sql.conf.ext:
driver = mysql
connect = host=localhost dbname=mailserver user=mailuser password=mailuserpass
default_pass_scheme = SHA512-CRYPT
password_query = SELECT email as user, password FROM virtual_users WHERE email='%u';
We now fix permissions on config files
chown -R mail:dovecot /etc/dovecot
chmod -R o-rwx /etc/dovecot
Almost there! We just need to edit a couple files more. In
/etc/dovecot/conf.d/10-master.conf, set the following parameters:
service imap-login {
  inet_listener imap {
    #port = 143
    port = 0
  }
  inet_listener imaps {
    port = 993
    ssl = yes
  }
}

service pop3-login {
 inet_listener pop3 {
    #port = 110
    port = 0
  }
  inet_listener pop3s {
    #port = 995
    #ssl = yes
    port = 0
  }
}

service lmtp {
  unix_listener /var/spool/postfix/private/dovecot-lmtp {
    mode = 0666
    group = postfix
    user = postfix
  }
  user = mail
}

service auth {
  unix_listener auth-userdb {
    mode = 0600
    user = mail
    #group =
  }

  # Postfix smtp-auth
  unix_listener /var/spool/postfix/private/auth {
    mode = 0666
    user = postfix
    group = postfix
  }

  # Auth process is run as this user.
  #user = $default_internal_user
  user = dovecot
}

service auth-worker {
  user = mail
}
Note that we set ports for all services but imaps to 0, which effectively disables them. Then, in
/etc/dovecot/conf.d/15-lda.conf, specify an email address for the postmaster:
postmaster_address = postmaster@jhausse.net
Last but not least, we need to generate a pair of public and private key for the server, which we will use both in dovecot and postfix:
openssl req -new -newkey rsa:4096 -x509 -days 365 -nodes -out "/etc/ssl/certs/cloud.crt" -keyout "/etc/ssl/private/cloud.key"
Make sure that you specify your the Fully Qualified Domain Name (FQDN) of the server, in our case:
Common Name (e.g. server FQDN or YOUR name) []:cloud.jhausse.net
If you don't, our clients may complain that the server name in the SSL certificate does not match the name of the server they are connecting to. We tell dovecot to use these keys by setting the following parameters in
/etc/dovecot/conf.d/10-ssl.conf:
ssl = required
ssl_cert =
That's it! Now on to testing the postfix and dovecot servers!
service dovecot restart
service postfix restart
From the server itself, try to send an email to a local user:
telnet localhost 25
EHLO cloud.jhausse.net
MAIL FROM:youremail@domain.com
rcpt to:roudy@jhausse.net
data
Subject: Hallo!

This is a test, to check if cloud.jhausse.net is ready to be an MX!

Cheers, Roudy
.
QUIT
The server should accept our email with a message like
250 2.0.0 Ok: queued as 58D54101DB
Check the logs in
/var/log/mail.log if everything went fine. There should be line saying something like
Nov 14 07:57:06 cloud dovecot: lmtp(4375, roudy@jhausse.net): ... saved mail to INBOX
So far so good? Good. Now, let's try the same from a different machine, like the computer we are using to set up the server. We'll talk to the server using encryption (TLS) this time:
openssl s_client -connect cloud.jhausse.net:25 -starttls smtp
EHLO cloud.jhausse.net
MAIL FROM:roudy@jhausse.net
rcpt to:bob@gmail.com
to which the server should respond
554 5.7.1 : Relay access denied
That's good: had the server accepted the mail, it would have meant that we set up postfix as an open relay for all the spammers of the world and beyhond to use. Instead of the 'Relay access denied' message, you may instead get the message
554 5.7.1 Service unavailable; Client host [87.68.61.119] blocked using zen.spamhaus.org; http://www.spamhaus.org/query/bl?ip=87.68.61.119
This means that you are trying to contact the server from an IP address that is considered as a spammer's address. I got this message while trying to connect to the server through my regular Internet Service Provider (ISP). To fix this issue, you can try to connect from another host, maybe another server you have access to through SSH. Alternatively, you can reconfigure Postfix's
main.cf not to use Spamhaus's RBL, reload postfix, and verify that the above test works. In both cases, it's important that you find a solution that works for you because we'll test other things in a minute. If you chose to reconfigure Postfix not to use RBLs, don't forget to put the RBLs back in and to reload postfix after finishing the article to avoid getting more spam than necessary.
Now let's
try to send a valid email by SMTP on port 25, which regular mail servers use to talk to each other:
openssl s_client -connect cloud.jhausse.net:25 -starttls smtp
EHLO cloud.jhausse.net
MAIL FROM:youremail@domain.com
rcpt to:roudy@jhausse.net
to which the server should respond
Client host rejected: Greylisted, see http://postgrey.schweikert.ch/help/jhausse.net.html
which shows that
postgrey is working as it should. What postgrey does it to reject emails with a temporary error if the sender has never been seen before. The technical rules of email require email servers to try to deliver the email again. After five minutes, postgrey will accept the email. Legit email servers around the world will try repeatidly to redeliver the email to us, but most spammers won't. So, wait for 5 minutes, try to send the email again using the command above, and verify that postfix now accepts the email.
Afterwards, we'll check that we can fetch the two emails that we just sent ourselves by talking IMAP to dovecot:
openssl s_client -crlf -connect cloud.jhausse.net:993
1 login roudy@jhausse.net "mypassword"
2 LIST """*"
3 SELECT INBOX
4 UID fetch 1:1 (UID RFC822.SIZE FLAGS BODY.PEEK[])
5 LOGOUT
where you should replace mypassword with the password you set for this email account. If that works, we basically have a functional email server which can receive our incoming emails, and from which we get retreive these emails from our devices (PC/laptop, tablets, phones, ...). But we can't give it our emails to send unless we send them from the server itself. We'll now allow postfix to forward our emails, but only upon successful authentification, that is after it could make sure that the email comes from someone who has a valid account on the server. To do so, we'll open a special, SSL-only, SASL-authentified email submission service. Set the following parameters in
/etc/postfix/master.cf:
submission inet n       -       -       -       -       smtpd
  -o syslog_name=postfix/submission
  -o smtpd_tls_security_level=encrypt
  -o smtpd_sasl_auth_enable=yes
  -o smtpd_client_restrictions=permit_sasl_authenticated,reject
  -o smtpd_sasl_type=dovecot
  -o smtpd_sasl_path=private/auth
  -o smtpd_sasl_security_options=noanonymous
  -o smtpd_recipient_restrictions=permit_sasl_authenticated,reject_non_fqdn_recipient,reject_unauth_destination
and reload postfix
service postfix reload
Now, let's try to use this service from a different machine than than the server, to verify postfix will now relay our emails and nobody else's:
openssl s_client -connect cloud.jhausse.net:587 -starttls smtp
EHLO cloud.jhausse.net
Notice the '250-AUTH PLAIN' capabilities advertized by server, which doesn't appear when we connect to port 25.
MAIL FROM:asdf@jkl.net
rcpt to:bob@gmail.com
554 5.7.1 : Relay access denied
QUIT
That's good, postfix won't relay our emails if he doesn't know us. So let's authentify ourselves first.
To do so, we first need to generate an authentification string:
echo -ne '\000roudy@jhausse.net\000mypassword'|base64
and let's try to send emails through the server again:
openssl s_client -connect cloud.jhausse.net:587 -starttls smtp
EHLO cloud.jhausse.net
AUTH PLAIN DGplYW5AMTk4NGNsb3VQLm5ldAA4bmFmNGNvNG5jOA==
MAIL FROM:asdf@jkl.net
rcpt to:bob@gmail.com
which postfix should now accept. To complete the test, let's verify that our virtual aliases work by sending an email to postmaster@jhausse.net and making sure it goes to roudy@jhausse.net:
telnet cloud.jhausse.net 25
EHLO cloud.jhausse.net
MAIL FROM:youremail@domain.com
rcpt to:postmaster@jhausse.net
data
Subject: Virtual alias test

Dear postmaster,
Long time no hear! I hope your MX is working smoothly and securely.
Yours sincerely, Roudy
.
QUIT
Let's check the mail made it all the way to the right inbox:
openssl s_client -crlf -connect cloud.jhausse.net:993
1 login roudy@jhausse.net "mypassword"
2 LIST """*"
3 SELECT INBOX
* 2 EXISTS
* 2 RECENT
4 LOGOUT
At this point, we have a functional email server, both for incoming and outgoing mails. We can set up our devices to use it.
PS: did you remember to
try sending an email to an account hosted by the server through port 25 again, to verify that you are not longer blocked by postgrey?
Prevent SPAM from reaching your INBOX
For the sake of SPAM filtering, we already have Realtime BlackLists (RBLs) and greylisting (postgrey) in place. We'll now take our spam fighting capabilities up a notch by adding adaptative spam filtering. This means we'll add artificial intelligence to our email server, so that it can learn from experience what is spam and what is not. We will use
dspam for that.
apt-get install dspam dovecot-antispam postfix-pcre dovecot-sieve
dovecot-antispam is a package that allows dovecot to retrain the spam filter if we find an email that is misclassified by dspam. Basically, all we need to do is to move emails in or out of the Junk/Spam folder. dovecot-antispam will then take care of calling dspam to retrain the filter. As for postfix-pcre and dovecot-sieve, we will use them respectively to pass incoming emails through the spam filter and to automatically move spam to the user's Junk/Spam folder.
In
/etc/dspam/dspam.conf, set the following parameters to these values:
TrustedDeliveryAgent "/usr/sbin/sendmail"
UntrustedDeliveryAgent "/usr/lib/dovecot/deliver -d %u"
Tokenizer osb
IgnoreHeader X-Spam-Status
IgnoreHeader X-Spam-Scanned
IgnoreHeader X-Virus-Scanner-Result
IgnoreHeader X-Virus-Scanned
IgnoreHeader X-DKIM
IgnoreHeader DKIM-Signature
IgnoreHeader DomainKey-Signature
IgnoreHeader X-Google-Dkim-Signature
ParseToHeaders on
ChangeModeOnParse off
ChangeUserOnParse full
ServerPID               /var/run/dspam/dspam.pid
ServerDomainSocketPath  "/var/run/dspam/dspam.sock"
ClientHost      /var/run/dspam/dspam.sock
Then, in
/etc/dspam/default.prefs, change the following parameters to:
spamAction=deliver         # { quarantine | tag | deliver } -> default:quarantine
signatureLocation=headers  # { message | headers } -> default:message
showFactors=on
Now we need to connect dspam to postfix and dovecot by adding these two lines at the end of
/etc/postfix/master.cf:
dspam     unix  -       n       n       -       10      pipe
  flags=Ru user=dspam argv=/usr/bin/dspam --deliver=innocent,spam --user $recipient -i -f $sender -- $recipient
dovecot   unix  -       n       n       -       -       pipe
  flags=DRhu user=mail:mail argv=/usr/lib/dovecot/deliver -f ${sender} -d ${recipient}
Now we will tell postfix to filter every new email that gets submitted to the server on port 25 (normal SMTP traffic) through dspam, except if the email is submitted from the server itself (permit_mynetworks). Note that the emails we submit to postfix with SASL authentication won't be filtered through dspam either, as we set up a separate submission service for those in the previous section. Edit
/etc/postfix/main.cf to change the
smtpd_client_restrictions to the following:
smtpd_client_restrictions = permit_mynetworks, reject_rbl_client zen.spamhaus.org, check_policy_service inet:127.0.0.1:10023, check_client_access pcre:/etc/postfix/dspam_filter_access
At the end of the file, also also add:
# For DSPAM, only scan one mail at a time
dspam_destination_recipient_limit = 1
We now need to specify the filter we defined. Basically, we will tell postfix to send all emails (/./) to dspam through a unix socket. Create a new file
/etc/postfix/dspam_filter_access and put the following line into it:
/./ FILTER dspam:unix:/run/dspam/dspam.sock
That's it for the postfix part. Now let's set up dovecot for spam filtering. In
/etc/dovecot/conf.d/20-imap.conf, edit the
imap mail_plugins plugins parameter such that:
mail_plugins = $mail_plugins antispam
and add a section for lmtp:
protocol lmtp {
# Space separated list of plugins to load (default is global mail_plugins).
  mail_plugins = $mail_plugins sieve
}
We now configure the dovecot-antispam plugin. Edit
/etc/dovecot/conf.d/90-plugin.conf to add the following content to the plugin section:
plugin {
  ...
  # Antispam (DSPAM)
  antispam_backend = dspam
  antispam_allow_append_to_spam = YES
  antispam_spam = Junk;Spam
  antispam_trash = Trash;trash
  antispam_signature = X-DSPAM-Signature
  antispam_signature_missing = error
  antispam_dspam_binary = /usr/bin/dspam
  antispam_dspam_args = --user;%u;--deliver=;--source=error
  antispam_dspam_spam = --class=spam
  antispam_dspam_notspam = --class=innocent
  antispam_dspam_result_header = X-DSPAM-Result
}
and in
/etc/dovecot/conf.d/90-sieve.conf, specify a default sieve script which will apply to all users of the server:
sieve_default = /etc/dovecot/default.sieve
What is sieve and why do we need a default script for all users? Sieve lets us automatize tasks on the IMAP server. In our case, we won't all emails identified as spam to be put in the Junk folder instead of in the Inbox. We would like this to be the default behavior for all users on the server; that's why we just set this script as default script. Let's create this script now, by creating a new file
/etc/dovecot/default.sieve with the following content:
require ["regex", "fileinto", "imap4flags"];
# Catch mail tagged as Spam, except Spam retrained and delivered to the mailbox
if allof (header :regex "X-DSPAM-Result""^(Spam|Virus|Bl[ao]cklisted)$",
          not header :contains "X-DSPAM-Reclassified""Innocent") {
  # Mark as read
  # setflag "\\Seen";
  # Move into the Junk folder
  fileinto "Junk";
  # Stop processing here
  stop;
}
Now we need to compile this script so that dovecot can run it. We also need to give it appropriate permissions.
cd /etc/dovecot
sievec .
chown mail.dovecot default.siev*
chmod 0640 default.sieve
chmod 0750 default.svbin
Finally, we need to fix permissions on two postfix config files that dspam needs to read from:
chmod 0644 /etc/postfix/dynamicmaps.cf /etc/postfix/main.cf
That's it! Let's restart dovecot and postfix
service dovecot restart
service postfix restart
and test the antispam, by contacting the server from a remote host (e.g. the computer we are using to set the server):
openssl s_client -connect cloud.jhausse.net:25 -starttls smtp
EHLO cloud.jhausse.net
MAIL FROM:youremail@domain.com
rcpt to:roudy@jhausse.net
DATA
Subject: DSPAM test

Hi Roudy, how'd you like to eat some ham tonight? Yours, J
.
QUIT
Let's check if the mail arrived:
openssl s_client -crlf -connect cloud.jhausse.net:993
1 login roudy@jhausse.net "mypassword"
2 LIST """*"
3 SELECT INBOX
4 UID fetch 3:3 (UID RFC822.SIZE FLAGS BODY.PEEK[])
Which should return something the email with a collection of flag set by SPAM which look like this:
X-DSPAM-Result: Innocent
X-DSPAM-Processed: Sun Oct  5 16:25:48 2014
X-DSPAM-Confidence: 1.0000
X-DSPAM-Probability: 0.0023
X-DSPAM-Signature: 5431710c178911166011737
X-DSPAM-Factors: 27,
	Received*Postfix+with, 0.40000,
	Received*with+#+id, 0.40000,
	like+#+#+#+ham, 0.40000,
	some+#+tonight, 0.40000,
	Received*certificate+requested, 0.40000,
	Received*client+certificate, 0.40000,
	Received*for+roudy, 0.40000,
	Received*Sun+#+#+#+16, 0.40000,
	Received*Sun+#+Oct, 0.40000,
	Received*roudy+#+#+#+Oct, 0.40000,
	eat+some, 0.40000,
	Received*5+#+#+16, 0.40000,
	Received*cloud.jhausse.net+#+#+#+id, 0.40000,
	Roudy+#+#+#+to, 0.40000,
	Received*Oct+#+16, 0.40000,
	to+#+#+ham, 0.40000,
	Received*No+#+#+requested, 0.40000,
	Received*jhausse.net+#+#+Oct, 0.40000,
	Received*256+256, 0.40000,
	like+#+#+some, 0.40000,
	Received*ESMTPS+id, 0.40000,
	how'd+#+#+to, 0.40000,
	tonight+Yours, 0.40000,
	Received*with+cipher, 0.40000
5 LOGOUT
Good! You now have adaptive spam filtering set up for the users of your server. Of course, each user will need to train the filter in the first few weeks. To train a message as spam, just move it to a folder called "Spam" or "Junk" using any of your devices (PC, tablet, phone). Otherwise it'll be trained as ham.
Make sure the emails you send get through spam filters
Our goal in this section will be to make our mail server appear as clean as possible to the world and to make it harder for spammers to send emails in our name. As a side-effect, this will help us get our emails through the spam filters of other mail servers.
Sender Policy Framework
Sender Policy Framework (SPF) is a record that your add to your zone which declares which mail servers on the whole internet can send emails for your domain name. Setting it up is very easy, use the SPF wizard at
microsoft.com to generate your SPF record, and then add it to your zone as a TXT record. It will look like this:
jhausse.net. 300 IN TXT v=spf1 mx mx:cloud.jhausse.net -all
Reverse PTR
We discussed this point
earlier in this article, it's a good idea that you set up the reverse DNS for your server correctly, so that doing a reverse lookup on the IP address of your server returns the actual name of your server.
OpenDKIM
When we activate
OpenDKIM, postfix will sign every outgoing email using a cryptographic key. We will then deposit that key in our zone, on the DNS. That way, every mail server in the world will be able to verify if the email actually came from us, or if it was forged by a spammer. Let's install opendkim:
apt-get install opendkim opendkim-tools
And set it up by editing
/etc/opendkim.conf so that it looks like this:
##
## opendkim.conf -- configuration file for OpenDKIM filter
##
Canonicalization        relaxed/relaxed
ExternalIgnoreList      refile:/etc/opendkim/TrustedHosts
InternalHosts           refile:/etc/opendkim/TrustedHosts
KeyTable                refile:/etc/opendkim/KeyTable
LogWhy                  Yes
MinimumKeyBits          1024
Mode                    sv
PidFile                 /var/run/opendkim/opendkim.pid
SigningTable            refile:/etc/opendkim/SigningTable
Socket                  inet:8891@localhost
Syslog                  Yes
SyslogSuccess           Yes
TemporaryDirectory      /var/tmp
UMask                   022
UserID                  opendkim:opendkim
We'll need a couple of additional files which we will store in
/etc/opendkim:
mkdir -pv /etc/opendkim/
cd /etc/opendkim/
Let's create a new file
/etc/opendkim/TrustedHosts with the following content
127.0.0.1
and a new file called
/etc/opendkim/KeyTable with the following content
cloudkey jhausse.net:mail:/etc/opendkim/mail.private
This tells OpenDKIM that we want to use an encryption key named 'cloudkey' whose contents can be found in /etc/opendkim/mail.private. We will create another file named
/etc/opendkim/SigningTable and add the following line:
*@jhausse.net cloudkey
which tells OpenDKIM that every emails of the jhausse.net domain should be signed using the key 'cloudkey'. If we have other domains which we want to sign, we can add them here too.
The next step is to generate that key and fix permissions on OpenDKIM's config files.
opendkim-genkey -r -s mail [-t]
chown -Rv opendkim:opendkim /etc/opendkim
chmod 0600 /etc/opendkim/*
chmod 0700 /etc/opendkim
At first, it's a good idea to use the
-t which will signal to other mail servers that you are just in testing mode, and that they shouldn't discard emails based on your OpenDKIM signature (yet). You can get your OpenDKIM key from the mail.txt file:
cat mail.txt
and then add it to your zone file as TXT record, which should look like this
mail._domainkey.cloud1984.net. 300 IN TXT v=DKIM1; k=rsa; p=MIGfMA0GCSqG...
Finally, we need to tell postfix to sign outgoing emails. At the end of
/etc/postfix/main.cf, add:
# Now for OpenDKIM: we'll sign all outgoing emails
smtpd_milters = inet:127.0.0.1:8891
non_smtpd_milters = $smtpd_milters
milter_default_action = accept
And reload the corresponding services
service postfix reload
service opendkim restart
Now let's test if our OpenDKIM public key can be found and matches the private key:
opendkim-testkey -d jhausse.net -s mail -k mail.private -vvv
which should return
opendkim-testkey: key OK
For this, you may need to wait a bit until the name server has reloaded the zone (on Linode, this happens every 15min). You can use
dig to check if the zone was reloaded yet.
If this works, let's test if other servers can validate our OpenDKIM signatures and SPF record. To do this, we can use
Brandon Checkett's email test. To send an email to a test address given to us on
Brandon's webpage, we can run the following command on the server
mail -s CloudCheck ihAdmTBmUH@www.brandonchecketts.com
On Brandon's webpage, you should then see
result = pass in the 'DKIM Signature' section, and
Result: pass in the 'SPF Information' section. If our emails pass this test, just regenerate an OpenDKIM key without the
-t switch, upload the new key to the zone file, and retest to still if it still passes the tests. If so, congrats! You just successfully set up OpenDKIM and SPF on your server!
Host calendars, contacts, files with Owncloud and set up a webmail with Roundcube
Now that we have a top-notch email server, let's add to it the possibility to store your contacts, calendars, and files in the cloud. These are services that the
Owncloud provides out of the box. While we're at it, we'll also set up a webmail, so you can check email even if you're travelling without electronics, or in case your phone and laptop run out of battery.
Installing Owncloud is straighforward and is well described
here. On Debian, it boils down to adding the owncloud repository to your apt sources, downloading owncloud's release key and adding it to your apt keyring, and then installing owncloud itself using apt-get:
echo 'deb http://download.opensuse.org/repositories/isv:/ownCloud:/community/Debian_7.0/ /'>> /etc/apt/sources.list.d/owncloud.list
wget http://download.opensuse.org/repositories/isv:ownCloud:community/Debian_6.0/Release.key
apt-key add - < Release.key
apt-get update
apt-get install apache2 owncloud roundcube
When prompted for it, choose
dbconfig and then say you want
roundcube to use
mysql. Then, provide the mysql root password and set a good password for the roundcube mysql user. Then, edit the roundcube config file
/etc/roundcube/main.inc.php so that logging in on roundcube will default to using your IMAP server:
$rcmail_config['default_host'] = 'ssl://localhost';
$rcmail_config['default_port'] = 993;
Now we will set up the apache2 webserver with SSL so that we can talk to Owncloud and Roundcube using encryption for our passwords and data. Let's turn on Apache's ssl module:
a2enmod ssl
and edit
/etc/apache2/ports.conf to set the following parameters:
NameVirtualHost *:80
Listen 80
ServerName www.jhausse.net


    # If you add NameVirtualHost *:443 here, you will also have to change
    # the VirtualHost statement in /etc/apache2/sites-available/default-ssl
    # to
    # Server Name Indication for SSL named virtual hosts is currently not
    # supported by MSIE on Windows XP.
    NameVirtualHost *:443
    Listen 443


    Listen 443
We'll set up a default website for encrypted connections to the webserver as
https://www.jhausse.net under
/var/www. Edit
/etc/apache2/sites-available/default-ssl:
        ServerAdmin webmaster@localhost

        DocumentRoot /var/www
        ServerName www.jhausse.net
        [...]

          Deny from all

        [...]
        SSLCertificateFile    /etc/ssl/certs/cloud.crt
        SSLCertificateKeyFile /etc/ssl/private/cloud.key
        [...]
and let's also set up a website for unencrypted connections to
http://www.jhausse.net under
/var/www.
Edit
/etc/apache2/sites-available/default:
        DocumentRoot /var/www
        ServerName www.jhausse.net
        [...]

          Deny from all
That way, we can serve pages for www.jhausse.net by putting them in /var/www. The 'Deny from all' directive prevents access to Owncloud through www.jhausse.net: we will set it up to access it through
https://cloud.jhausse.net instead.
We will now set up the webmail (roundcube) so that it will be accessed through
https://webmail.jhausse.net. Edit
/etc/apache2/sites-available/roundcube to have the following content:
        ServerAdmin webmaster@localhost

        DocumentRoot /var/lib/roundcube
	# The host name under which you'd like to access the webmail
        ServerName webmail.jhausse.net

                Options FollowSymLinks
                AllowOverride None


        ErrorLog ${APACHE_LOG_DIR}/error.log

        # Possible values include: debug, info, notice, warn, error, crit,
        # alert, emerg.
        LogLevel warn

        CustomLog ${APACHE_LOG_DIR}/ssl_access.log combined

        #   SSL Engine Switch:
        #   Enable/Disable SSL for this virtual host.
        SSLEngine on

        # do not allow unsecured connections
        # SSLRequireSSL
        SSLCipherSuite HIGH:MEDIUM

        #   A self-signed (snakeoil) certificate can be created by installing
        #   the ssl-cert package. See
        #   /usr/share/doc/apache2.2-common/README.Debian.gz for more info.
        #   If both key and certificate are stored in the same file, only the
        #   SSLCertificateFile directive is needed.
        SSLCertificateFile    /etc/ssl/certs/cloud.crt
        SSLCertificateKeyFile /etc/ssl/private/cloud.key

        # Those aliases do not work properly with several hosts on your apache server
        # Uncomment them to use it or adapt them to your configuration
        Alias /program/js/tiny_mce/ /usr/share/tinymce/www/

        # Access to tinymce files

                Options Indexes MultiViews FollowSymLinks
                AllowOverride None
                Order allow,deny
                allow from all


                Options +FollowSymLinks
                # This is needed to parse /var/lib/roundcube/.htaccess. See its
                # content before setting AllowOverride to None.
                AllowOverride All
                order allow,deny
                allow from all


        # Protecting basic directories:

                Options -FollowSymLinks
                AllowOverride None


                Options -FollowSymLinks
                AllowOverride None
                Order allow,deny
                Deny from all


                Options -FollowSymLinks
                AllowOverride None
                Order allow,deny
                Deny from all


                SSLOptions +StdEnvVars


                SSLOptions +StdEnvVars

        #   SSL Protocol Adjustments:
        #   The safe and default but still SSL/TLS standard compliant shutdown
        #   approach is that mod_ssl sends the close notify alert but doesn't wait for
        #   the close notify alert from client. When you need a different shutdown
        #   approach you can use one of the following variables:
        #   o ssl-unclean-shutdown:
        #     This forces an unclean shutdown when the connection is closed, i.e. no
        #     SSL close notify alert is send or allowed to received.  This violates
        #     the SSL/TLS standard but is needed for some brain-dead browsers. Use
        #     this when you receive I/O errors because of the standard approach where
        #     mod_ssl sends the close notify alert.
        #   o ssl-accurate-shutdown:
        #     This forces an accurate shutdown when the connection is closed, i.e. a
        #     SSL close notify alert is send and mod_ssl waits for the close notify
        #     alert of the client. This is 100% SSL/TLS standard compliant, but in
        #     practice often causes hanging connections with brain-dead browsers. Use
        #     this only for browsers where you know that their SSL implementation
        #     works correctly.
        #   Notice: Most problems of broken clients are also related to the HTTP
        #   keep-alive facility, so you usually additionally want to disable
        #   keep-alive for those clients, too. Use variable "nokeepalive" for this.
        #   Similarly, one has to force some clients to use HTTP/1.0 to workaround
        #   their broken HTTP/1.1 implementation. Use variables "downgrade-1.0" and
        #   "force-response-1.0" for this.
        BrowserMatch "MSIE [2-6]" \
                nokeepalive ssl-unclean-shutdown \
                downgrade-1.0 force-response-1.0
        # MSIE 7 and newer should be able to use keepalive
        BrowserMatch "MSIE [17-9]" ssl-unclean-shutdown
and declare the server in your DNS, for instance:
webmail.jhausse.net. 300 IN CNAME cloud.jhausse.net.
Now let's enable these three websites
a2ensite default default-ssl roundcube
service apache2 restart
and the webmail, accessible under
https://webmail.jhausse.net, should basically work. Log in using the full email (e.g. roudy@jhausse.net) and the password you set in mailserver DB at the beginning of this article. The first time you connect, the browser will warn you that the certificate was not signed by a certification authority. That's fine, just add an exception.
Last but not least, we will create a virtual host for owncloud by putting the following content in
/etc/apache2/sites-available/owncloud:
        ServerAdmin webmaster@localhost

        DocumentRoot /var/www/owncloud
        ServerName cloud.jhausse.net

                Options FollowSymLinks
                AllowOverride None


                Options Indexes FollowSymLinks MultiViews
                AllowOverride All
                Order allow,deny
                allow from all


        ScriptAlias /cgi-bin/ /usr/lib/cgi-bin/

                AllowOverride None
                Options +ExecCGI -MultiViews +SymLinksIfOwnerMatch
                Order allow,deny
                Allow from all


        ErrorLog ${APACHE_LOG_DIR}/error.log

        # Possible values include: debug, info, notice, warn, error, crit,
        # alert, emerg.
        LogLevel warn

        CustomLog ${APACHE_LOG_DIR}/ssl_access.log combined

        #   SSL Engine Switch:
        #   Enable/Disable SSL for this virtual host.
        SSLEngine on

        # do not allow unsecured connections
        # SSLRequireSSL
        SSLCipherSuite HIGH:MEDIUM
        SSLCertificateFile    /etc/ssl/certs/cloud.crt
        SSLCertificateKeyFile /etc/ssl/private/cloud.key


                SSLOptions +StdEnvVars


                SSLOptions +StdEnvVars


        BrowserMatch "MSIE [2-6]" \
                nokeepalive ssl-unclean-shutdown \
                downgrade-1.0 force-response-1.0
        # MSIE 7 and newer should be able to use keepalive
        BrowserMatch "MSIE [17-9]" ssl-unclean-shutdown
and activate owncloud by running
a2ensite owncloud
service apache2 reload
Then go ahead an configure owncloud by connecting to
https://cloud.jhausse.net/ in a web browswer.
That's it! Now you've got your own Google Drive, Calendar, Contacts, Dropbox, and Gmail! Enjoy your freshly recovered privacy! :-)
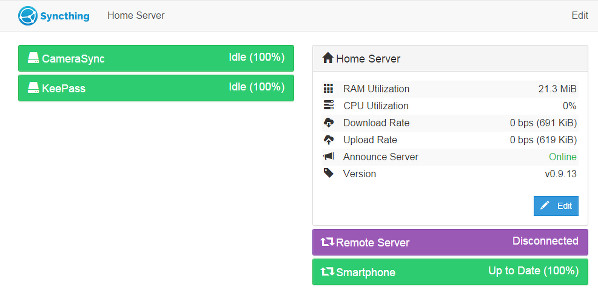
Sync your devices to the cloud
To sync your emails, you can just use your favorite email client: the standard email program on Android or iOS,
k9mail, or Thunderbird on your PC. Or you can also use the webmail we set up.
How to sync your calendar and contacts with the cloud is described in the doc of owncloud. On Android, I'm using the CalDAV-Sync and CardDAV-Sync apps which act as bridges between the Android calendar and contacts apps of the phone and the owncloud server.
For files, there is an Android app called Owncloud to access your files from your phone and automatically upload pictures and videos you take to your cloud. Accessing your files on the your Mac/PC is easy and
well described in the Owncloud documentation.
Last tips
During the first few weeks, it's a good idea to monitor
/var/log/syslog and
/var/log/mail.log on a daily basis and make sure everything everything is running smoothly. It's important to do so before you invite others (friends, family, ...) to be hosted on your server; you might loose their trust in self-hosting for good if they trust you with their data and the server suddently becomes unavailable.
To add another email user, just add a row to the
virtual_users table of the
mailserver DB.
To add a domain, just add a row to the
virtual_domains table. Then update
/etc/opendkim/SigningTable to get outgoing emails signed, upload the OpenDKIM key to the zone, and reload OpenDKIM.
Owncloud has its own user DB which can be managed by logging in in Owncloud as administrator.
Finally, it's important to think in advance of a solution in case your server becomes temporarily unavailable. For instance, where would your mails go until your server returns? One solution would be to find a friend who can act as your backup MX, while you act as his backup MX (see the
relay_domains and
relay_recipient_maps setting in Postfix's
main.cf file). Similarly, what if your server is compromised and a malicious individual erases all your files there? For that, it's important to think of a regular backup system. Linode offers backups as an option. On 1984.is, I set up a basic but sufficient automatic backup system using on crontabs and scp.


 Figure 1. The Bitcoin dæmon is notorious for using a lot of disk I/O.