Quantcast
Channel: Sameh Attia
Viewing all 1409 articles
Browse latest View live

Hating the Touchpad

$
0
0
http://marcelgagne.com/content/hating-touchpad


I hate touchpads. I sincerely hate the things. Maybe it's because I have big gorilla hands, but when I am trying to write at the keyboard, the darn things always pick up the slightest brush from my apparently huge, verging on monstrous, hands and translate those inadvertent touches into the most egregious of errors. Words, and sometimes whole sentences, are selected, to be overwritten by the next character I type at the keyboard. If I'm not paying attention, such as when I am looking away from the keyboard as I type, I have to go back several levels of "undo" in order to recapture the lost text, the net effect of which is that I lose the new text. I hate those things. And so I always plug in an external mouse and turn off the touchpad. But I digress . . .
My old Acer laptop's hard drive crashed over the holidays. This is, remarkably, the first time in some 30 plus years that I've owned computers in which a hard drive actually crashed. In those many years, I've seen many crashed drives, including one belonging to Sally's PC, but never to mine. In my first book on Linux, back in 2001, I wrote that it wasn't a question of if your hard drive would eventually fail, but when. Marcel, meet "when".
I actually liked my Acer notebook and I've had excellent luck with Acer products over the years, so despite the crashed hard drive, I decided to buy another Acer notebook. This one, the one I am writing on, is an Aspire V3-771 with an Intel i3-2370M processor, a 750 GB hard drive, 6 GB of RAM, and a bright 17 inch LED display. At $499, I simply could not pass it up.
The notebook came with Windows 7 but I erased it when I loaded the latest Linux Mint (based on Ubuntu Quetzal). It worked beautifully except for one thing. The touchpad wasn't being reported by the system as a touchpad. It worked fine in that I could use it to navigate the desktop, right-click here, left click there. Except that since I don't want the thing; remember, I want to use an external mouse. The trouble is that I just couldn't turn the thing off using the standard touchpad control programs. What to do, oh what to do?
We can find out how the X window system sees the various devices it works with by using the xinput command.  I opened a terminal session and typed "xinput list" at the shell prompt.
$ xinput list
⎡ Virtual core pointer id=2 [master pointer (3)]
⎜ ↳ Virtual core XTEST pointer id=4 [slave pointer (2)]
⎜ ↳ Logitech USB Optical Mouse id=11 [slave pointer (2)]
↳ PS/2 Generic Mouse id=13 [slave pointer (2)]
⎣ Virtual core keyboard id=3 [master keyboard (2)]
↳ Virtual core XTEST keyboard id=5 [slave keyboard (3)]
↳ Power Button id=6 [slave keyboard (3)]
↳ Video Bus id=7 [slave keyboard (3)]
↳ Power Button id=8 [slave keyboard (3)]
↳ Sleep Button id=9 [slave keyboard (3)]
↳ HD Webcam id=10 [slave keyboard (3)]
↳ AT Translated Set 2 keyboard id=12 [slave keyboard (3)]
↳ Acer WMI hotkeys id=14 [slave keyboard (3)]
As you can see, the touchpad is being recognized as a generic PS/2 mouse and not as a touchpad (I've bolded the appropriate line for emphasis). This is all fine and dandy except that I can't use touchpad control software to turn the thing off as I usually do when I load up a new notebook. This is a known issue for this particular chipset, and not just for Acer.  Luckily, the above command told me everything I needed to know in order to write a script that would do the job for me. I called my script, "disable_touchpad".
$ cat disable_touchpad 
#!/bin/bash
#
echo "Disabling touchpad"
xinput set-prop 13 "Device Enabled" 0
The "0" at the end of the xinput line at the end of the script tells X to disable the device at id #13, which the "xinput list" command told us about. If you rerun the same command but add a 1 at the end of it instead of the 0, you will reactivate the touchpad. Consequently, I have a second script called "enable_touchpad" that does just that.
Now I can happily type away, with my touchpad safely locked away where it won't accidentally destroy all the work I've done.

13 Things People Hate about Your Open Source Docs

$
0
0
http://blog.smartbear.com/software-quality/bid/256072/13-reasons-your-open-source-docs-make-people-want-to-scream


Most open source developers like to think about the quality of the software they build, but the quality of the documentation is often forgotten. Nobody talks about how great a project’s docs are, and yet documentation has a direct impact on your project’s success. Without good documentation, people either do not use your project, or they do not enjoy using it. Happy users are the ones who spread the news about your project – which they do only after they understand how it works, which they learn from the software’s documentation.
Yet, too many open source projects have disappointing documentation. And it can be disappointing in several ways.
The examples I give below are hardly authoritative, and I don’t mean to pick on any particular project. They're only those that I've used recently, and not meant to be exemplars of awfulness. Every project has committed at least a few of these sins. See how many your favorite software is guilty of (whether you are user or developer), and how many you personally can help fix.

1. Lacking a good README or introduction

The README is the first impression that potential users get about your project. If the project is on GitHub, the README is automatically displayed on the project home page. If you get it wrong, they might never come back. You want to grab the reader's attention and encourage them to continue investigating the project.
The README should explain, at least:
  • What the project does
  • Whom it's for
  • On what hardware or other platform it runs
  • Any major dependencies, such as "Requires Python 2.6 and libxml"
  • How to install it, or a pointer to in-depth directions
All this has to be written for someone who never heard of your project before, and may never even have considered something like your project. If you've got a module that calculates Levenshtein distance, don't assume that everyone reading your README knows what that is. Explain that the Levenshtein distance is used to compare differences between strings, and link to more detailed explanation for someone who wants to explore its uses.
Don't describe your project in relation to another project, such as "NumberDoodle is like BongoCalc, but better!" That's no help to someone who's never heard of BongoCalc.

2. Docs not available online

Although I haven't seen any studies on the topic, I'd bet that 90% of documentation lookups are done with Google and a browser over the Internet. Your project's docs have to be online and available. Given that, it's embarrassing that my own project, ack, would neglect having the docs available where most people would look for them. My assumption was based on my own use case, that if I want to know how a command line tool works, I'll check its man page.
How was this brought to my attention? Users wrote to me asking questions that were answered in the FAQ, which made me annoyed that they weren't reading my FAQ. Turns out they were looking at the website, but I hadn't posted the FAQ there. It's an easy mistake to make. I'm close to the project and I never actually use the FAQ myself, so I don't notice it missing online. Many problems fall into this trap: Authors not putting themselves in the users' shoes.

3. Docs only available online

The flipside of this problem is to have the documentation only online. Some projects do not ship the documentation with the project's deliverables, or include a substandard version of the docs.
The search engine Solr, for example, has an excellent wiki that is effectively the project’s documentation. Unfortunately, the docs that ship with the download are 2,200 pages of autogenerated API Javadocs. The only documentation for the end user is a single page tutorial.
The PHP language doesn't ship with any documentation. If you want the docs, you have to go to a separate page to get them. Worse, only the core docs are available for download, without the helpful annotations from users (see "Not accepting user input" below), and they're not in the same easy-to-navigate format that's available online.
Open source projects can't assume that users have Internet access when they need docs. Airplane mode still exists. Even then, you don't want the user to rely on your project's website being up. At least twice over the past few months I've found the Solr wiki to be down in the middle of the workday while I was hunting for information on a tricky configuration problem.
One project that gets it right is Perl and its CPAN module repository. Documentation for each module is available at either search.cpan.org or metacpan.org in an easy-to-read hyperlinked format. For offline needs, the documentation for each module is embedded in the code itself, and when the module is installed on a user's system, local documentation is created as man pages. Users can also use `perldoc Module::Name` to get the docs from the shell. Online or offline: It's your choice.

4. Docs not installed with the package

This problem is usually a failing of the package creators, not the project authors. For example, in Ubuntu Linux, the documentation for the Perl language is a separate, optional package from the language itself. The user must know she has to explicitly install the documentation as well as the core language or she won't have the documentation when she needs it. This trade-off of a few megabytes of disk space at the expense of documentation-at-hand on the user's system serves everyone poorly.

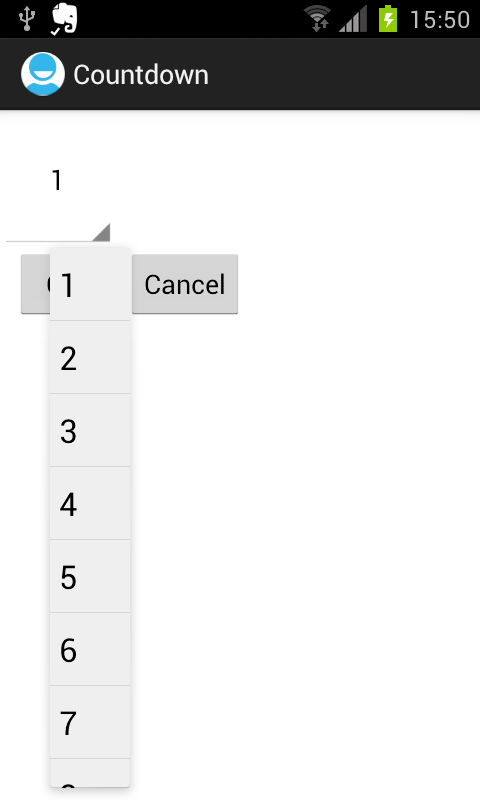
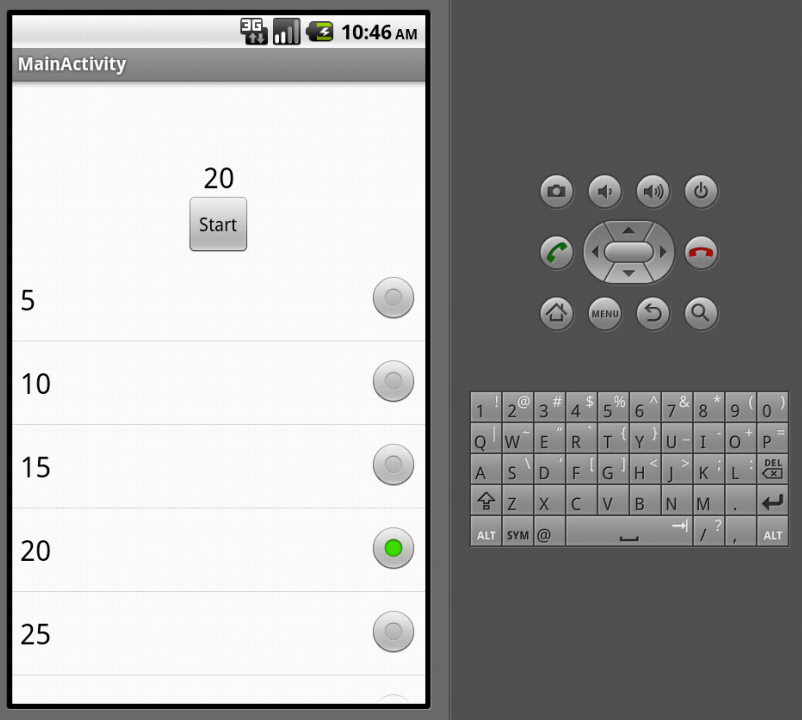
5. Lack of screenshots

describe the imageThere's no better way to grab the potential user's attention, or to illustrate proper usage, than with judicious screenshots. A picture is worth a thousand words. That’s even more important on the Internet because you may not get the reader to read more than a few hundred of your words at all.
Screenshots are also invaluable for the user following along with the prose, trying to make something work right. A screenshot lets him visually compare his results to those in the docs to reassure himself that he's done a task correctly or to easily find what's not right.
It's becoming more common to have videos on the website giving an overview of the project, and those are great. So are in-depth videos that show the steps of a complex process. The Plone project, for example, has an entire site dedicated to video tutorials. However, videos can’t take the place of screenshots. A user wants to see quickly what the screens look like without sitting through a video. Videos also don’t show up in a Google image search, as screenshots do.

6. Lack of realistic examples

For code-based projects, the analog of screenshots are good, solid examples of the code in use. These examples should not be abstract, but direct from the real world. Don’t create throwaway examples full of “demo name here” and lorum ipsum. Take the time to create a relevant example with a user story that represents how the software solves a problem.
There's a reason we have story problems in math class: They help us apply what was taught.
Say I've written a web robot module, and I'm explaining the follow_link method. I might show the method definition like this:
   $mech->follow_link( text_regex => $regex_object, n => $link_index );
But look how obvious it becomes when adding some reality in an example.
   # Follow the 2nd link matching the string "download"
   $mech->follow_link( text_regex => qr/download/, n => 2 );
The abstract placeholder variable names $regex_object and $link_index now have some grounding in the mind of the reader.
Of course, your examples shouldn't just be brief two-line snippets. As Rich Bowen of the Apache project puts it, "One correct, functional, tested, commented example trumps a page of prose, every time."
Show as much as you can. Space is cheap. Make a dedicated section of documentation for examples, or even a cookbook. Ask users to send in working code, and publish their best examples.

7. Inadequate links and references

You have hyperlinks. Use them.
Don't assume that because something is explained in one part of the docs that the reader has already read that part, or even knows where it is. Don't just mention that this part of the code manipulates frobbitz objects. Explain briefly on the first use of the term what a frobbitz object is, or link to the section of the manual that explains what a frobbitz is. Best of all, do both!

8. Forgetting the new user

It's sometimes easy when writing the docs to write them from the perspective of you, the author of the software. New users need introductory documentation to ease them in.
The introduction should be a separate page of documentation, ideally with examples that let the new user get some success with the software. Think about the excitement you feel when you start playing with a new piece of software and you get it to do something cool. Make that happen for your new users, too.
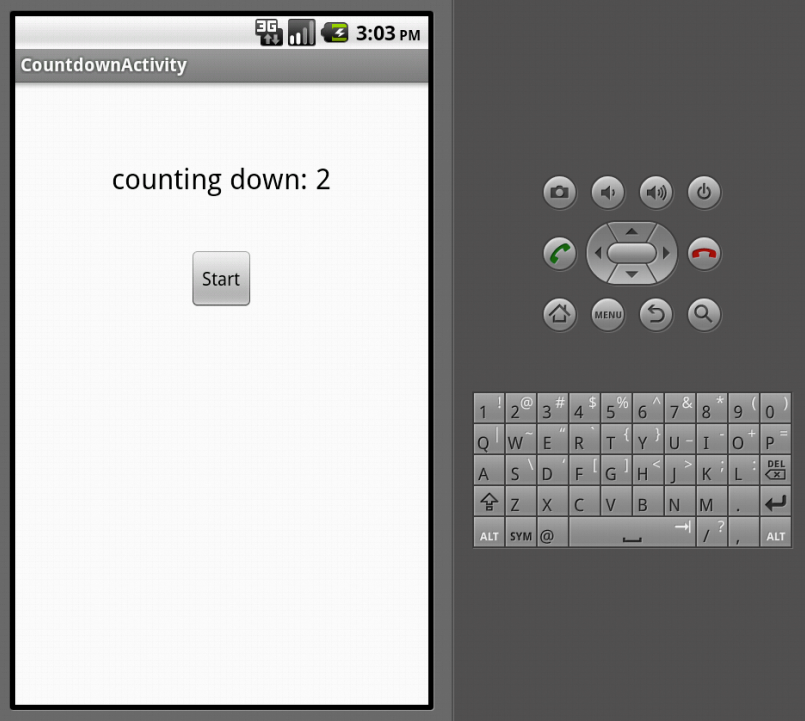
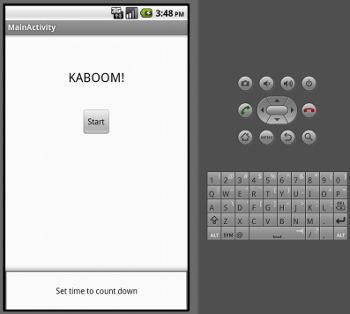
For example, a graphing package might present a series of screenshots that show how to add data to a file, invoke the grapher, and then show the resulting graphs. A code library might show some examples of calling the library, and then show the resulting output. Keep it simple. Give an easy win. The text should introduce terms at the appropriate places, with links to more detailed documentation about the term.
A separate document for these sorts of introductory ideas gives the user a quick understanding of the software. It also keeps the introductory explanations out of the main part of your docs.Not listening to users

9. Not listening to the users

Project owners must listen to the users of the documentation. The obvious element is listening to suggestions and requests from people who are actively using your software. When a user takes the time to mail or post something like, "It would have helped me install the program if there had been an explanation or links to how to install database drivers," take that message seriously. For every one user who emails you about a problem, you can expect that ten others don't say anything but still have the same problem.
Just as important, however, is listening to user problems, and considering the reasons behind them. If people frequently have trouble figuring out how to perform bulk database updates, the first course of action is to add a question to the FAQ (you do have an FAQ, right?) that addresses bulk database updates. However, the question may also be an indication that the section on database updates isn't written clearly enough. Or perhaps there isn't a pointer to that section from the introductory overview document, so your users never know to read the rest of the manual.
Besides helping more people discover how useful your project is, this also eases frustration on the part of the project’s existing community. If your mailing list, forum or IRC channel is filled with people who ask the same “dumb” (or not-so-dumb) questions all the time that everyone gets tired of responding to, recognize that these are the Frequently Asked Questions, and putting the answers in a single find-able spot helps everyone focus on the fun stuff.
Keep an eye on user questions in outside forums, too.  Search sites like StackOverflow regularly, and set up a Google Alert for your project name to be kept aware of how your project is being discussed on the Internet.

10. Not accepting user input

If your project has a large enough user base, it may make sense to incorporate user comments directly into the documentation. The best example I've seen of this is for the PHP language. Each page of the documentation allows authenticated users to add comments to the page, to help clarify points, or to add examples that aren't in the core docs. The PHP team also gives the reader the choice of displaying documentation with or without user comments.
As useful as this is, it requires maintenance. Comments should be weeded over time to prevent overgrowth. For example, the PHP documentation page for how to invoke PHP from the command line includes 43 comments from users dating back to 2001. The comments dwarf the core documentation. The comments should be archived or eliminated, with the most important points incorporated into the core documentation.
A wiki is also a good approach. However, if your wiki doesn't allow the user to download all the pages in one big batch (see item #3 above), then your users are at the mercy of your Internet connection and the web server that hosts the project.

11. No way to see what the software does without installing it

At the minimum, every software project needs a list of features and a page of screenshots to let the curious potential user why she should try it out. For the user shopping around for software packages to use, make it easy for him to see why it's worth the time to download and install it.
Pictures are a great way to do this. Your project should have a "Screenshots" page that shows real examples of the tool in use (see item #5 above). If the project is purely code, like a library, then there should be an example page that shows code using the project.

12. Relying on technology to do your writing

Too often, software authors use automated documentation systems to do their work. They forget about the part where they have to write prose. The automated system can make things easier to maintain, but it doesn't obviate the need for human writing.
The worst case of this is changelogs that are nothing but a dump of commit messages from the version control system, but with no top-level summary that explains it. A changelog should list new features, bugs fixed, and potential incompatibilities, and its target audience is the end user. A commit log is for people working on the project itself; it's easy to generate, but it's not what users need.
Take a look at this page from the docs for Solarium, a PHP interface to the Solr search engine. First, the disclaimer takes up the top half of the screen, giving no information to the reader at all. Second, literally nothing on the page is any more descriptive than a list of the function names. The "METHOD_FC" enum means "Facet method fc". But what is FC? There is no explanation of the different facet methods, nor links to how one would find out. The automatically generated pages look nice, and they may feel like documentation, but they're really not.

13. Arrogance and hostility toward the user

The attitude of RTFM (Read the Freaking Manual) is toxic to your project and to your documentation.
It is the height of arrogance to assume that all problems that relate to someone not knowing how to use your project are the fault of the user. It is even worse to assign a moral failing of "They're just too lazy to read," which you can't possibly know. Most of us have encountered these attitudes as users. Why would you inflict them upon the people who want to use the software you create?
Even if it's provably true that users could find their answers in your documentation but they aren't doing so, it's foolish to assume that it's because the user has failed in some way. Maybe your documentation is poorly written, or hard to read, or presented poorly on the screen. Perhaps you need to improve the Getting Started section (item #8 above) that explains what the software aims to do Maybe some bits of information need to be repeated in multiple parts of the docs. Maybe it's not made clear to the reader where to find certain knowledge tidbits.
You know that new users of your software come to your project knowing nothing. Your project documentation team can do its best to ensure that ignorance is easily curable.

Wrap-up

I'm sure you have come across many of these problems with docs, and I hope there are some you haven't thought of. Let us know about the problems that bother you in the comments below. I don't mean to point fingers at any given project’s examples, since every open source project has some problems or another.
Most of all, I hope that if you recognize a problem in your documentation on projects you're involved with, that you consider this a nudge to take action to improve the situation. Fortunately, improving documentation is an ideal way to get newcomers involved with your project. I’m often asked “How can I get started in open source”, and I recommend documentation improvements as a good way to start.
Make it as simple as possible for contributors, whether novice or veteran, to know where your docs need help. Create a list of tasks, possibly in your bug tracking system, that explain what needs help. Be specific in what your needs are. Don’t just say, “We need more examples.” Create specific tasks, like “Add example code of how to do Task X,”  “Add screen shots of the report generator screens,” or “Add dependency information to the README.” Contributors want to help, but are often stymied by not knowing where to begin.
Docs aren't the most glamorous part of any open source project, and for most of us they're not fun, but without good documentation, users aren't served as well as they could be, and your project will suffer in the long run.

The Importance of Securing a Linux Web Server

$
0
0
http://linuxaria.com/article/the-importance-of-securing-a-linux-web-server?lang=en


Today I present a really interesting article by   first published on Infosecinstitute.com.
With the significant prevalence of Linux web servers globally, security is often touted as a strength of the platform for such a purpose. However, a Linux based web server is only as secure as its configuration and very often many are quite vulnerable to compromise. While specific configurations vary wildly due to environments or specific use, there are various general steps that can be taken to insure basic security considerations are in place.
Many risks are possible from a compromise including using the web server into a source of malware, creating a spam-sending relay, a web or TCP proxy, or other malicious activity. The operating system and packages can be fully patched with security updates and the server can still be compromised based purely on a poor security configuration. Security of web applications first begins with configuring the server itself with strict security in mind.


Many will often deploy various layers such as a WAF, IDS, or Mod Security to react in real time to various hacking and threats for HTTP requests. However, securing the entire server and any running services with a high level of security in mind is the first fundamental step to avoid the risk of being hacked or compromised. With the abundance of malware being installed into web applications hosted on Linux based servers (such as the many recent timthumb.php WordPress plugin vulnerabilities), it is clear many servers are configured with little or no security in mind.
For users of personal blogs, a compromise is often an embarrassment and inconvenience. However for small and large businesses, having a site or blog of your company serving up malware from a compromise is a loss of business and creates a very poor reflection of your company’s IT services on the public as well as potential clients.
Web servers that are compromised and serving malware often are then very quickly flagged in Google’s Safe Browsing listing which most all major browsers subscribe. When flagged, often 24 hours or more are needed to clear the listing as the Safe Browsing check only scans sites once a day for changes.
040512_1427_TheImportan1

Information Leakage

The first and relatively trivial configuration changes that should be made are to disable any information leakage from your server. All Linux distributions have poor default configurations in regards to information leakage for Apache and other services. While most dismiss this as not a concern, the less information you broadcast to a hacker, the better. Every request to your Apache web server can reply back with information such as the exact OpenSSL version, PHP version, and many other items. While some applications like OpenSSH require the broadcasting of their version in the banner for operation, there is no functional reason for Apache to broadcast its version number to the world, and likewise nor any other related Apache modules. Fetching the HTTP headers with curl from as an example can provide the following information publicly:
$ curl -I example.com
HTTP/1.1 200 OK
Date: Sun, 25 Mar 2012 02:11:54 GMT
Server: Apache/2.2.9 (Debian) DAV/2 SVN/1.5.1 Phusion_Passenger/2.2.11 PHP/5.2.6-1+lenny16 with Suhosin-Patch mod_ssl/2.2.9 OpenSSL/0.9.8g mod_wsgi/2.5 Python/2.5.2
Last-Modified: Mon, 15 Dec 2008 03:07:18 GMT
ETag: "c622-f16-45e0d23f9c580"
Accept-Ranges: bytes
Content-Length: 3862
Content-Type: text/html
The server signature is also displayed on any 404 pages: TheImportan2  The following changes can be made to eliminate both Apache and PHP from disclosing their version information.
Apache configurations:
ServerTokens Prod
ServerSignature Off
TraceEnable Off
Header unset ETag
FileETag None
PHP configurations to be made in php.ini:
expose_php = Off
display_errors = Off
track_errors = Off
html_errors = Off
After making those changes and restarting Apache, the same curl command to fetch HTTP headers now provides minimal information:
$ curl -I example.com
HTTP/1.1 200 OK
Date: Sun, 25 Mar 2012 02:13:01 GMT
Server: Apache
Last-Modified: Sat, 24 Jul 2010 18:21:28 GMT
Accept-Ranges: bytes
Content-Length: 15
Vary: Accept-Encoding
Content-Type: text/html
Review Additional Running Services It is critical to review and disable any services running on the host that are not required. Many often run a ‘web server’ and unknowingly are running many other various services which all need to be reviewed and secured. If other services are running on the same web server, the banner for those services should be edited to remove any broadcast of the version number or other non-required information that is leak. Other services one might run might include SMTP (Postfix banner, or Sendmail banner), SSH (ssh suffix banner), or even DNS (BIND also has a banner!). While these services may be completely separate from any web application or web server, be aware that they too broadcast version information and can often provide additional information to a potential hacker. Nmap can be used to quickly scan open services running on the host and also report back the banner being advertised by each service. The nmap command to use is:
$ sudonmap-sV[target]
Below is a particularly exposing Linux server with many services open to the internet, all broadcasting version information in the banners:
$ sudo nmap -sV example.com
Password:

Starting Nmap 5.51 ( http://nmap.org ) at 2012-03-24 21:46 EDT
Nmap scan report for example.com (192.168.1.120)
Host is up (0.051s latency).
rDNS record for 192.168.1.120: test.example.com
Not shown: 986 closed ports
PORT STATE SERVICE VERSION
22/tcp open ssh OpenSSH 5.1p1 Debian 5 (protocol 2.0)
25/tcp open smtp Postfix smtpd
53/tcp open domain ISC BIND 9.6-ESV-R4
80/tcp open http Apache httpd 2.2.9 ((Debian) DAV/2 SVN/1.5.1 Phusion_Passenger/2.2.11 PHP/5.2.6-1+lenny16 with Suhosin-Patch mod_ssl/2.2.9 OpenSSL/0.9.8g mod_wsgi/2.5 Pyth...)
110/tcp open ssh OpenSSH 5.1p1 Debian 5 (protocol 2.0)
111/tcp open rpcbind
135/tcp filtered msrpc
139/tcp filtered netbios-ssn
443/tcp open ssl/http Apache httpd 2.2.9 ((Debian) DAV/2 SVN/1.5.1 Phusion_Passenger/2.2.11 PHP/5.2.6-1+lenny16 with Suhosin-Patch mod_ssl/2.2.9 OpenSSL/0.9.8g mod_wsgi/2.5 Pyth...)
445/tcp open netbios-ssn Samba smbd 3.X (workgroup: HOME)
465/tcp open ssl/smtp Postfix smtpd
587/tcp open smtp Postfix smtpd
1720/tcp filtered H.323/Q.931
4444/tcp filtered krb524
Service Info: Host: example.com; OS: Linux
Below are a few common services that could also be running on your web host which can have the banner configured to reveal a minimal amount of information: Disable SSH banner suffix Debian and Ubuntu allow users to disable the Debian version suffix of the SSH banner by setting the following in /etc/ssh/sshd_config:
DebianBanner no
Disable Postfix banner The banner for Postfix is easily configurable in /etc/postfix/main.cf by editing the following line as desired:
smtpd_banner = Hello!
Hopefully samba is not open to the internet, but the samba server banner is configurable in /etc/samba/smb.conf
server string = Samba Server Version %v
Remove Version from BIND banner Use this configuration in your named.conf to disable the broadcast of the version:
options
{
version "Not disclosed";
}

Firewall Considerations

All Linux servers should make use of the built-in software firewall which in most cases is iptables. Red Hat makes a very easy command line interface for managing the firewall. There is no longer a need to write intricate iptables scripts unless there is a particular need or desire to do so. Debian and Ubuntu incorporate an application called ufw which is a command line interface for iptables. Using ufw, simple commands can open or close ports again without the need of being an iptables wizard.
Red Hat’s firewall management tool:
# system-config-firewall-tui
theImportan3 
Regardless if additional firewalls are in place, the host internal software firewall should always be enabled. Only allowed services should be able to communicate in and out of specified ports and network interfaces. Consider if a company’s perimeter firewall is compromised. Then the only layer of defense would be that of the software firewall on the host. And similarly, if the host is compromised through a web application, restricting access of network traffic of that host will provide some protection against island hopping or other intrusions.
Disabling ICMP – Not Required Many administrators will often disable or filter ICMP requests, though this has no security benefits. In the case of something like DNS, ICMP requests are actually used in the DNS spec to query if a server is available before sending the DNS request. ICMP replies are extremely beneficial to web servers as well and can serve in troubleshooting a web server that appears to not be responding to HTTP requests. The threat of a ping flood is minimal today. Unless the attacker has considerably larger network bandwidth than the target, the flood attempt is going to cause little effect. Ping echo replies take very little CPU from the target to reply so it is perhaps a bit like throwing many small pebbles in attempt to take down a brick wall. This is why most DoS attacks today focus on HTTP requests instead of ICMP so to drive up CPU and memory usage from the web server which is far more effective to execute. In short, there is no reason to disable ICMP.


Permissions

File and directory permissions in Linux is often a confusing topic which leads to differing views, especially in the case of web directories and files. The worst advice, which should never be followed, is to change files or folders to 777. This allows anyone in the world to execute or write to your server. The best example of this is rogue WordPress plugins that malicious hackers push to servers via a simple HTTP POST command. If directory permissions are 777, this allows anyone to then read, write, or execute anything in that directory including posting malicious code.
Many WordPress users in particular have been recently compromised by a malicious plugin which was installed because users incorporated 777 permissions on the WordPress installation.
Below is an example log of an attacker remotely installing a remote exploit plugin directly to the WordPress plugin directory with a single HTTP POST request: xx.xx.xxx.xxx - - [06/Mar/2012:03:17:41 -0500] "POST /wp-content/plugins/ToolsPack/ToolsPack.php HTTP/1.0" 200 1 "-" "Mozilla/4.76 [en] (Win98; U)"
In general, directories should be 750 or 755. Files should be 644 or 640. The following commands can be used to locate problematic directories and files on your web server which are 777.
Locate directories that are 777 on your server:
$ sudofind/var/www/-type d -perm-002
Locate files that are 777 on your server:
$ sudofind/var/www/-type f -perm-002
Apart from the read/write/execute permissions, ownership permission also needs attention. The web directory on your server should not be owned by the apache user. A regular user should be the owner of the web directory, and the group should be the apache user. Even if the read/write/execute permissions are accurate, a rogue or runaway process or php application can then have full access to make changes to your entire web directory.
This ownership change can make the push button upgrades for Drupal and WordPress problematic unfortunately. In being security mindful, it is best to temporarily change ownership to the apache user for the purposes of applying upgrades through a web interface, and then change the ownership back to a regular user after push button upgrades are complete.
Below is an example hacker administration page for a server that was compromised from poor permissions where the apache user was the owner and group:
TheImportan4

PHP Applications

Running PHP on a Linux server is required for many popular applications such as Drupal, WordPress, and others. New vulnerabilities are found in not only poorly written PHP code but in the language itself at an alarming rate. Since PHP if often paired along with MySQL a PHP compromise can mean a compromise of the accompanying MySQL database for the web server. For these purposes, it is critical to be on top of any PHP software or plugin updates. Do not install or use PHP code from unknown sources. For blogging software, minimize the number of plugins or extensions in use. If a plugin or add-on is not activated or in use for the blog or website, remove the unused files from the server. Insure that 404 pages for the server do not provide any extraneous information and do not interpret what was put in the URL bar. Visit a random 404 page on the web server as a test such as http://example.com/asdf. The results of the 404 page should only provide a generic ‘Sorry, that page was not found’ and not try to interpret or relay results that the user placed in the URL bar. 404 pages that allow user input manipulation are an entry point for attackers to craft XSS and other malicious attempts.

Monitoring Logs

Logs are a critical part for monitoring the security of a web server. Many tools exist in Linux distributions to automate log monitoring. The application logwatch sends a daily email report of all of the logs on the server to inform on varying log entries such as the number of emails sent, potential web attackers and IPs causing errors in Apache logs, to ssh attempts and other aspects. In a large corporate environment it is common to send logwatch emails along with other mail directed to the root user (cron errors, and other system messages) to a single company email list. Administrators in the company then subscribe to that single email list to stay informed of any alarming notifications in various servers’ logs for the company.

Additional Resources

The NSA has in the past published many documents on hardening and securing Red Hat Linux servers which can also apply to other distributions. At time of this blog post, the NSA has taken down links to these guides. However the document is still available at this location:
http://www.nsa.gov/ia/_files/os/redhat/rhel5-guide-i731.pdf

Conclusions

Linux is a popular operating system for web servers and web hosting and is unfortunately likewise a popular target for compromise. Consideration for strict security is needed to ensure attacks and attempts for inserting malicious code are to be avoided. Taking care to reduce information leakage, restrict permissions, keep PHP and other applications updated, and monitor all server logs will help keep the administrator on top of any attack vectors to avoid compromise.

Multiserver administration with Puppet

$
0
0
http://www.openlogic.com/wazi/bid/254233/Multiserver-administration-with-Puppet


Puppet software lets you manage the software configuration on all the hosts on your network. It simplifies repetitive operations and ensures state and configuration integrity among large number of machines. A centralized, single master server pushes configuration changes and commands to slaves nodes, with both sides relying on SSL certificates for security.
Puppet comes in both Enterprise and Apache-licensed open source versions; we worked with the latter. Its powerful object-oriented configuration language supports inheritance and code reuse. Puppet can run on and manage a wide range of operating systems – Linux, FreeBSD, Solaris, and even Windows (partially) – so it's suitable for heterogeneous server environments running different distributions of Linux or even different operating systems.
With Puppet, you specify a manifest that states the configuration you want on your systems, and Puppet finds the best way to reach this state. For instance, if you want to install the httpd package on a particular server, you don't tell Puppet to run the yum command; instead, you specify in a Puppet configuration file that the httpd package is required and let Puppet figure out the best way to install it.

How to install Puppet

If you want to try Puppet, the best way to install it is through its official repositories. Many Linux distributions are supported; for CentOS you can use the repository for Red Hat Linux and its derivatives.
To install the current version of Puppet repository on CentOS 6, run rpm -ivh http://yum.puppetlabs.com/el/6/products/i386/puppetlabs-release-6-6.noarch.rpm. Once you have the Puppet repo, run the command yum -y install puppet on the Puppet slave nodes and yum -y install puppet puppet-server on the Puppet master server. Those commands install not only Puppet but all its dependencies as well, including the Ruby programming language, on which Puppet is based. Understanding Ruby may help you design advanced configurations with ERB templates, but Ruby is just the underlying basis and you don't need to know it in order to work with Puppet.
One noteworthy dependency package is Facter, a standalone cross-platform tool that gathers information such as host operating system, distribution, architecture, and network interfaces. The information from Facter is available both to the local node and to the master. Based on this information Puppet decides how to apply your specified state to each local machine.
To make sure puppet starts and stops automatically with your CentOS system, run the commands chkconfig puppet on on the slave nodes, and on the master server run chkconfig puppet on && checkconfig puppetmaster on.
If you use iptables for your firewall, make sure to allow the slave nodes to connect to the master. The master Puppet service listens by default on TCP port 8140. To allow it in iptables on CentOS, run these commands:
iptables -I INPUT -p TCP --dport 8140 -j ACCEPT
service iptables save

Initial Puppet setup

Puppet requires a few minor configuration adjustments before you can start using it. First, ensure that the slave nodes can connect to the master. By default, the slaves look for the master host at the fully qualified domain name "puppet." You can specify a different FQDN for the master by placing the directive server=somehost.example.org inside the [main] configuration block in the file /etc/puppet/puppet.conf on each node. Alternatively, you can simply hardcode the default 'puppet' address in the /etc/hosts file on each node by adding a line such as 192.168.1.200 puppet to each instance of that file.
The SSL certificate on the master must correspond to the FQDN to which the nodes connect. If you leave the default "puppet" FQDN for the master, add two lines to the file /etc/puppet/puppet.conf. The section heading [master] indicates that a directive for the master follows. The directive itself is certname=puppet.
Now the nodes should know where to find the master and be able to establish a valid secure connection, so you can manually start the Puppet services for the first time. On the master run service puppetmaster start && service puppet start. On the nodes run service puppet start.
When the Puppet services start on the nodes they try to connect to the master, but the master does not allow them to connect automatically. You have to authorize the connections and establish a trust relationship by signing the nodes' certificates.
To see the current signing requests on the master, run the command puppet cert --list. This should produce output similar to:
  "server2" (SHA256) 82:A8:FA:BB:CE:0D:D5:0A:DB:7A:3E:8D:A5:62:5B:AC:91:7D:9C:65:51:5F:80:50:F7:DB:ED:36:87:EC:B4:C0
"server3" (SHA256) 7C:5C:05:58:CC:5A:1C:D7:7C:98:CC:C4:34:17:D5:35:1C:11:E8:DC:04:92:42:1C:8E:58:36:EA:5C:11:03:9B
To sign a node's certificate, run the command puppet cert --sign followed by the node's name: puppet cert --sign server2, for instance. Make sure that the hosts' names can be resolved from the master to avoid problems. The easiest way to do that is to add static records in the hosts file.
On the master, to verify certificates have been signed, use the command puppet cert --list --all. In the output, a plus sign in front of a certificate name shows that it has been signed: + "server1" (SHA256), for instance.
On the nodes, to verify they are able to connect to the master, check the file /var/log/messages, to which Puppet sends its logs by default. When you've created a successful relationship with the master, you should see an entry like:
Dec 11 12:03:20 server2 puppet-agent[2429]: Finished catalog run in 0.14 seconds
This means that the node can connect to the master and download and run the catalog. What's a catalog? Glad you asked!

Puppet manifests and catalogs

Puppet's configuration files are called manifests. They contain the instructions Puppet uses to bring nodes to a desired state. Manifests are compiled into a catalog. The compiling process resolves dependencies and correctly reorders the instructions. For example, suppose you want to install the httpd package and put a requirement that PHP package be present. In this case Puppet checks and installs PHP first if necessary, then proceeds with the httpd package installation.
When a node connects to the master it downloads the catalog and runs it locally. Running the catalog means checking to ensure the current node state corresponds to the state configured on the master. By default, Puppet slaves connect each 30 minutes to the master to synchronize. You can follow Puppet's activity in the /var/log/messages file.
Manifests are stored on the master in the directory /etc/puppet/manifests/ with, by default, an extension of .pp. When you want to include a file called something.pp you can drop the extension; Puppet automatically appends .pp when looking for a file to import.
The file site.pp is the main manifest that Puppet loads by default. To get started with a simple example, create it with the following contents:
node 'server2' {
}
node 'server3' {
include postfix
}
import "postfix"
The node directive takes a node's FQDN and specifies the configuration for each node. And the import directive? Just as in a programming language, to make the configuration more readable and reusable you should separate atomic pieces of configuration (called Puppet classes) in separate files, and import them using the import directive. Here we import the contents of the file postfix.pp, which is located in /etc/puppet/manifests/, the same directory as site.pp. The postfix class might look like this:
class postfix {
package { "postfix":
ensure => installed,
}
service { "postfix":
ensure => running,
enable => true,
}
}
First, the postfix package should be installed (ensure => installed). You don't have to tell Puppet what command to run; it automatically finds and uses the correct package manager based on the details provided by Facter.
The above manifest also shows that the postfix service should be started (ensure => running) and added to the default runlevels (enable => true), which means it is to be started and stopped with the system.

Once you have the above class you can include it in the definition for a node, as we've done with node server3, to ensure that the node complies with the manifest for postfix.
One last note on manifests: When you make changes in the file site.pp, Puppet automatically detects and enforces them by reloading its configuration. If you make changes to files imported into site.pp, you have to update the timestamp of site.pp with the command touch site.pp to make Puppet recognize the changes.
Through its manifests Puppet can edit text files, serve static files, perform installations, and adapt configurations on heterogeneous systems. You can learn more about manifests from the official documentation.

Reporting

Puppet supports reporting for its catalog runs. When configured, the nodes can send reports to the master about changes and operations that have been executed successfully, and those that have not. To enable reporting you have to configure the nodes to send reports and the master to accept them. On the nodes, edit the file /etc/puppet/puppet.conf and add in the [agent] section a new row containing report = true. On the server, edit /etc/puppet/puppet.conf, but this time go to the [master] section and add two rows. The first, reportdir = /etc/puppet/reports, specifies the directory in which the reports will be stored. The second, reports = store, defines the default action for the received logs.
After restarting Puppet both on the nodes and the master you should begin seeing reports in the directory /etc/puppet/reports. Each node creates its own directory there named after its hostname.
Puppet reports, which come in yaml format, are detailed and verbose. Each report starts with the file name of the applied manifest; for example, file: /etc/puppet/manifests/postfix.pp. A line with a message tag describes what has happened: message: "ensure changed 'stopped' to 'running'". This message means that Puppet has started the service in accordance to the instructions from the manifest. The last line specifies the time of the event, such as time: 2012-12-16 07:00:57.326020 +02:00.
Puppet reports provide much more information than in the simple example above. You won't want to analyze them manually; tools such as Puppet's dashboard can help you visualize the reports.
This article provides just a bare introduction to Puppet's many features. Puppet is very powerful but requires some knowledge to operate it well. Luckily, plenty of educational resources can help teach you Puppet; start by exploring the official Puppet documentation.

Source Sans Pro: Adobe’s first open source type family

$
0
0
https://blogs.adobe.com/typblography/2012/08/source-sans-pro.html


Source Sans Pro title image

Adobe’s legacy in type technology

Adobe has come a long way since its early days in which the specification for the PostScript Type 1 font format was a closely-guarded trade secret leading up to the “font wars.” Since this specification was begrudgingly published in 1990, Adobe has been more proactive in publicly releasing tools for developing and producing high-quality type. Subsequently, Adobe collaborated with Microsoft on the OpenType standard, which was later made an open standard for type technology as the Open Font Format: a free, publicly available standard (ISO/IEC 14496-22:2009). In connection with this, Adobe has shared its tool set for building OpenType fonts as the Adobe Font Development Kit for OpenType (AFDKO). Although these tools are not open source, they can be used freely and have been downloaded by thousands of users. Additionally, tools such as FontLab Studio and FontMaster make use of AFDKO code for building fonts. I believe that the world of type design and typography has benefited greatly from Adobe’s contributions in the arena of type technology. In adding to this legacy, I am proud to announce that today marks another milestone as Adobe makes yet another type resource freely available by releasing the Source Sans Pro family as our first-ever open source type family.

Adobe’s open source contributions have not only been limited to the realm of type. In recent years, Adobe has been publishing more specifications and creating more open source tools. In fact, Adobe has partnered with SourceForge to maintain many of our projects on the Open@Adobe portion of that site. In addition, there is an increasing number of Adobe-initiated projects hosted on GitHub as well. As more platforms and applications are being developed at Adobe as open source software, our type team has been fielding more frequent requests for type for these environments. Although there are many open source type families currently available, we felt that our applications would benefit from a typeface tailored to their specific needs and that this would be an opportunity for us to make a useful contribution that would benefit Adobe, the open source community, type developers, as well as anyone who uses type.

The brief & development

The primary need for type in Adobe’s open source applications has thus far been for usage within user interfaces. A second environment of perennial interest to Adobe is the realm of text typography. Thus the immediate constraints on the design were to create a set of fonts that would be both legible in short UI labels, as well as being comfortable to read in longer passages of text on screen and in print. In thinking of typeface models that accomplish these tasks well, I was drawn to the forms of the American Type Founders’ gothics designed by Morris Fuller Benton. In particular, I have always been impressed by the forms of his News Gothic and Franklin Gothic, which have been staples for typographers since their introduction in the early twentieth century. While keeping these models in mind, I never sought to copy specific features from these types. Instead, I sought to achieve a similar visual simplicity by paring each glyph to its most essential form.

News Gothic type specimen from the American Type Founders’ Specimen Book and Catalogue, 1923.
News Gothic type specimen from the American Type Founders’ Specimen Book and Catalogue, 1923. Actual Size.

During the development process, I was fortunate to be able to work with application developers who deployed beta versions of what would become Source Sans in the environments for which they were intended. In fact, preliminary versions of the design have already shipped with a couple of Adobe open source projects. A very early version of the type family has been included in the Strobe Media Playback platform, using the name Playback Sans. More recently, the WebKit-based code editor, Brackets, has featured updated versions of the Source Sans fonts in its user interface, as well as on its home page. Having real world testers, I was able to receive recommendations on ways I could improve the design. One particular feature that came about due to user feedback is the treatment of the lowercase l. To fully differentiate it from the uppercase I, I gave the default glyph for this letter a tail, even though it is uncharacteristic for this particular type style. For usages where this level of distinction is not required, there is an alternate, simple lowercase l (without the tail) accessible via stylistic alternates or by applying a stylistic set.

Differences between commonly confusable characters: 1, I, and l.

About the fonts

We realize that the majority of users interested in this project will likely only want the fonts. For this purpose, there is a Source Sans font package on SourceForge that includes just these resources, as well as a package of binary files on GitHub. The family currently includes six weights, from ExtraLight to Black, in upright and italic styles. The fonts offer wide language support for Latin script, including Western and Eastern European languages, Vietnamese, pinyin Romanization of Chinese, and Navajo (an often overlooked orthography that holds some personal significance for me). These fonts are the first available from Adobe to support both the Indian rupee and Turkish lira currency symbols. Besides being ready for download to install on personal computers, the Source Sans fonts are also available for use on the web via font hosting services including Typekit, WebInk, and Google Web Fonts. Finally, the Source Sans family will shortly be available for use directly in Google documents and Google presentations. Full glyph complement specimens (793K) are available in the Adobe type store along with informational pages for each style.
In making these fonts open source, it is important to us to make all the source files we used in their production available so that they can be referenced by others as a resource on how to build OpenType fonts with an AFDKO workflow. The full package of source files can be obtained from the Source Sans download page on SourceForge. And in response to comments to the initial posting of this article, the project is now hosted on GitHub as well. As part of this ongoing project, we are publishing a roadmap of features that we plan to implement in the near future. At present, this includes items such as expanding the fonts to provide Cyrillic and Greek support, as well as producing a monowidth version of the Source Sans design.

Monowidth variant of Source Sans (work in progress)

In addition to making these files available as a learning resource, we are eager that this project will become an undertaking in which we can collaborate with others in the design community. We hope that if any of you want to build upon these assets that you will consider coordinating with us to help add features and increase language support for this family. In fact, this project has already been a concerted effort (as is so much of type design). I am grateful to Robert Slimbach for his guidance throughout this project — the design would not have been anywhere near as good without his input. I am indebted to Miguel Sousa who ensured that all of my files were fit for publication. I would also like to thank Ernie March for his work in testing and vetting the font files. We hope that you find these fonts useful in your work and we look forward to seeing the interesting ways in which you employ them in your designs.
Updated 2 August 2012, 5:35 PM to add information regarding PDF specimens.
Updated 22 October 1012, 2:30 PM to add information regarding GitHub.

How To Download Windows Updates For Offline Windows Update

$
0
0
http://www.intowindows.com/how-to-download-windows-updates-for-offline-windows-update


Many users don’t have an internet connected Windows system to update online itself. Updating a Windows system offline is pretty tedious unless you download all the updates with the help of a net connected system & third-party software.
Windows Updates
Offline Update is a free too for Windows that downloads all the available Windows and Office updates for you. Downloading updates with Offline Update is very easy as it comes with several options to tweak the download process Windows updates.

Offline Update
Options are available to choose the language and the version of Windows. There are also options to exclude service packs, include .Net Framework, verify downloaded updates, create ISO images, and more.

Additionally one can also download the Microsoft Office updates with a single-click. The current version supports Microsoft Office 2000, Office XP, Office 2003, & Office 2007.

Offline Update office
Quick features:
# Download Windows 2000, Windows XP, Windows Server 2003, XP/Server 2003 x64, and Vista/ Server 2008 updates
# Download Office 2000, Office XP, Office 2003, & Office 2007
# Options to create ISO images
# Option to exclude service packs
# Option to verify downloaded updates

With all these features, Offline Update is a perfect utility to update your Windows and Office offline.
  Tags:
Advertisements

Related Posts

Windows 8 Features For Windows 7
Useful Guides For Windows 7

3 alternative ways to get Windows updates

$
0
0
http://downloadsquad.switched.com/2008/11/25/3-alternative-ways-to-get-windows-updates


Not everyone wants to let Windows handle downloading and installing updates. If you prefer the DIY approach, here are three ways to keep your system up to date without Windows helping out.

1. Windiz Updates provides an experience that's as similar to the original as its name. The twist is that this service won't work in Internet Explorer - you'll need Firefox and the Windiz addon. It doesn't collect any personal information, and IE doesn't even need to be installed on your system to use it.

It's an intelligent system and won't download old updates that have been superceded by newer ones. Windiz also won't install updates that have potential security issues. New updates with It can even provide updates for Microsoft's golden oldies like 95 and NT.


2. Windows Updates Downloader is a bit more cumbersome, but it does the job. After installing the app, you'll need to download the appropriate .ulz files from this page to access the updates. The updater can handle Windows 2000 Pro, Server 2003, XP, Vista (both 32 and 64 bit), and even Office 2003 and Exchange Server.

Select the updates you want and the downloader goes to work, dropping the individual KB files into your specified folder - the path and automatic naming options can be customized. Once they're downloaded, double click each update you want to install.

One important note: although the items are marked with checkboxes, you have to double-click them to check and uncheck an update. Don't click once and mutter "WTF" like I did at first.

3. CT Update uses WGET to handle everything from 2000 to server 2008 - regardless of the language of your Windows install - and then creates a CD or DVD images of your updates. Pop the disc in your target machine (or mount the iso) and run updateinstaller.exe and let it run. It creates a temporary account with the necessary rights to install the updates and reboot without user interaction, then removes the account when it's finished.

Have another method I've missed? Share it with your fellow readers in the comments!      

Linux System Hogs and Child Processes

$
0
0
http://www.linux.com/learn/docs/691117-linux-system-hogs-and-child-processes


There are a lot of good old Linux commands to see what's happening inside your system, with all the power and flexibility you need to zero in on just the information you want. Want to see who is sucking up the most resources on your computer? You can use the good old ps command. This example lists the top 7 hogs, excluding your own processes:
$ ps aux  --sort=-%cpu | grep -m 8 -v `whoami`
USER PID %CPU %MEM VSZ RSS TTY STAT START TIME COMMAND
root 1558 4.1 1.6 193620 68532 tty8 Rs+ 07:05 16:10 /usr/bin/X
root 55 0.0 0.0 0 0 ? S 07:05 0:21 [kswapd0]
root 7615 0.0 0.0 0 0 ? S 12:06 0:02 [kworker/2:0]
root 1772 0.0 0.0 0 0 ? S 07:05 0:10 [flush-8:16]
mysql 1262 0.0 4.5 549912 185232 ? Ssl 07:05 0:10 /usr/sbin/mysqld
root 9478 0.0 0.0 0 0 ? S 12:54 0:00 [kworker/1:1]
root 9832 0.0 0.0 0 0 ? S 13:25 0:00 [kworker/0:1]
hog
You can modify this particular incantation to sort by any ps category, like this example that displays the seven biggest memory users (that are not you):
$ ps aux  --sort=-%mem | grep -m 8 -v `whoami`
USER PID %CPU %MEM VSZ RSS TTY STAT START TIME COMMAND
mysql 1262 0.0 4.5 549912 185232 ? Ssl 07:05 0:12 /usr/sbin/mysqld
root 1558 4.0 1.7 197268 72352 tty8 Ss+ 07:05 18:10 /usr/bin/X
root 1310 0.0 1.3 122728 53032 ? Ss 07:05 0:05 /usr/sbin/spamd
root 1329 0.0 1.2 122728 52164 ? S 07:05 0:00 spamd child
root 1328 0.0 1.2 122728 52140 ? S 07:05 0:00 spamd child
root 3156 0.0 0.2 95320 10204 ? S 08:53 0:00 /usr/bin/python
root 1559 0.0 0.2 311480 8156 ? Ss 07:05 0:00 /usr/sbin/apache2 -k start
Or who has been running the longest:
$ ps aux  --sort=-time | grep -m 8 -v `whoami`
USER PID %CPU %MEM VSZ RSS TTY STAT START TIME COMMAND
root 1558 4.0 1.7 197268 72352 tty8 Ss+ 07:05 18:12 /usr/bin/X
root 55 0.0 0.0 0 0 ? S 07:05 0:21 [kswapd0]
mysql 1262 0.0 4.5 549912 185232 ? Ssl 07:05 0:12 /usr/sbin/mysqld
root 1772 0.0 0.0 0 0 ? S 07:05 0:11 [flush-8:16]
root 3 0.0 0.0 0 0 ? S 07:05 0:05 [ksoftirqd/0]
root 1310 0.0 1.3 122728 53032 ? Ss 07:05 0:05 /usr/sbin/spamd
root 845 0.0 0.0 0 0 ? S 07:05 0:03 [jbd2/sdb3-8]
You might have noticed that to get 7 results, you need to use grep -m 8. I shall leave it as your homework to read man grep to learn why.
The ps command has some built-in sorting options. ps aux displays all running processes, and the users they belong to. You can view processes per user with the -U option:
$ ps -U carla
Or multiple users:
$ ps  -U postfix -U mysql
pigChild processes? Piglet processes!
You can see all child processes:
$ ps -eo pid,args --forest
[...]
397 /sbin/udevd --daemon
9900 \_ /sbin/udevd --daemon
9901 \_ /sbin/udevd --daemon
815 upstart-socket-bridge --daemon
881 smbd -F
896 \_ smbd -F
884 /usr/sbin/sshd -D
[...]
Or all child processes of a particular process:
$ ps -f --ppid 1559
UID PID PPID C STIME TTY TIME CMD
www-data 1576 1559 0 07:05 ? 00:00:00 /usr/sbin/apache2 -k start
www-data 1577 1559 0 07:05 ? 00:00:00 /usr/sbin/apache2 -k start
www-data 1578 1559 0 07:05 ? 00:00:00 /usr/sbin/apache2 -k start
www-data 1579 1559 0 07:05 ? 00:00:00 /usr/sbin/apache2 -k start
www-data 1580 1559 0 07:05 ? 00:00:00 /usr/sbin/apache2 -k start
www-data 9526 1559 0 13:00 ? 00:00:00 /usr/sbin/apache2 -k start
Please read man ps, man sort, and man grep to learn more.

Simple database load balancing with MySQL Proxy

$
0
0
http://www.openlogic.com/wazi/bid/259864/Simple-database-load-balancing-with-MySQL-Proxy


MySQL Proxy transparently passes information between a client and a MySQL server. The proxy can audit the information flow in both directions and change it if necessary, which could be useful for protecting the MySQL server from malicious queries or for altering the information clients receive without actually making changes to the database. The proxy can also do load balancing between MySQL servers, and perform flow optimization by directing SELECT statements to read-only slave servers, which enhances MySQL scalability by allowing you to add more servers for read operations.
In many Linux package managers the MySQL Proxy package can be found under the name mysql-proxy. In CentOS the package is available from the EPEL repository. EPEL provides many additional packages that are not available from the main CentOS repository. If you don't have the EPEL repository installed, in CentOS 6 you can install it with the command rpm -ivh http://ftp-stud.hs-esslingen.de/pub/epel/6/i386/epel-release-6-8.noarch.rpm. Once you've added the EPEL repository, you can install MySQL Proxy with the command yum install mysql-proxy, then make sure it starts and stops automatically along with the system by running the command chkconfig mysql-proxy on.

Configuration

Unfortunately, MySQL Proxy and its CentOS package are not well documented. It requires some ingenuity to configure it and get started. Here are some tips to aid you.
The configuration file for MySQL Proxy is /etc/sysconfig/mysql-proxy, as you can confirm with the command rpm -qc mysql-proxy, where the argument q stands for query and c for configuration files. You can always use this command on CentOS when you are not sure about the configuration files of a package.
Inside the /etc/sysconfig/mysql-proxy file you can set the following options:
  • ADMIN_USER – the user for the proxy's admin interface. You can leave the default admin user.
  • ADMIN_PASSWORD – the password for the admin user in clear text. Change the default password for better security.
  • ADMIN_LUA_SCRIPT – the admin script in the Lua programming language. Without this script the admin interface cannot work. You can leave the default value.
  • PROXY_USER – the system user under which the proxy will work. By default it is mysql-proxy, and it's safe to leave it as is.
  • PROXY_OPTIONS – proxy options such as logging level, plugins, and Lua scripts to be loaded.
The most important configuration directive is the PROXY_OPTIONS. A good example for it looks like:
PROXY_OPTIONS="--daemon --log-level=info --log-use-syslog --plugins=proxy --plugins=admin --proxy-backend-addresses=192.168.1.102:3306 --proxy-read-only-backend-addresses=192.168.1.105:3306 --proxy-lua-script=/usr/lib/mysql-proxy/lua/proxy/rw-splitting.lua"
With these settings, logging is set to the info level (--log-level=info) through the system's syslog (--log-use-syslog), which means all system messages from the proxy go to the file /var/log/messages.
Two plugins are to be used – proxy (--plugins=proxy), which provides the core proxy functionality, and admin (--plugins=admin), which gives users an admin interface with useful information about the back-end servers, as we will see later.
The backend servers are specified – one read/write (--proxy-backend-addresses=192.168.1.102:3306) and one only for reading, meaning only SELECT statements (--proxy-read-only-backend-addresses=192.168.1.105:3306). The read-only servers should be replicated from the master read/write server. You can specify more read and write servers according to your MySQL replication design, and all queries will be evenly distributed using a round-robin algorithm. This is useful for load balancing and failover because the proxy will not forward queries to a failed server.
The last setting is a Lua script for splitting queries into reads and writes (--proxy-lua-script=/usr/lib/mysql-proxy/lua/proxy/rw-splitting.lua). This is one of the most useful features of the MySQL Proxy. It allows offloading the master MySQL servers and forwarding SELECT statements to optimized-for-reads slave servers.
This Lua script by default is not included in the EPEL package. To acquire it, you have to download the official MySQL Proxy package. From the download options choose the generic Linux archive, which is currently called mysql-proxy-0.8.3-linux-glibc2.3-x86-64bit.tar.gz. Once you extract this package you can find the rw-splitting.lua script in the newly extracted directory mysql-proxy-0.8.3-linux-glibc2.3-x86-64bit/share/doc/mysql-proxy/. (Say that three times fast.) Copy the script from there to /usr/lib/mysql-proxy/lua/proxy/ on the proxy server.
That newly created directory contains many other example Lua scripts that you can play with and use even without fully understanding the Lua language. In the case of most scripts, their names suggest their purpose. For example, the auditing.lua script is used for auditing, and tutorial-query-time.lua gives you the time of queries.

Monitoring

Once you complete the setup you can start MySQL Proxy with the command mysql proxy start on CentOS. In the /var/log/messages file you should see output indicating a successful start, such as:
Jan 14 21:54:08 server2 mysql-proxy: 2013-01-14 21:54:08: (message) mysql-proxy 0.8.2 started
Jan 14 21:54:08 server2 mysql-proxy: 2013-01-14 21:54:08: (message) proxy listening on port :4040
Jan 14 21:54:08 server2 mysql-proxy: 2013-01-14 21:54:08: (message) added read/write backend: 192.168.1.102:3306
Jan 14 21:54:08 server2 mysql-proxy: 2013-01-14 21:54:08: (message) added read-only backend: 192.168.1.105:3306
To test the proxy you need to set up MySQL replication first. Once you have replication working you can import a sample database, such as the
After you've had some activity through the proxy you can check its status and begin monitoring. To do this, use the admin interface, which is accessible by a MySQL client on the server's port 4041. If your MySQL Proxy has an IP address of 192.168.1.201, for example, you can connect to its admin interface with the command mysql --host=192.168.1.201 --port=4041 -u admin -psecr3t_pass. The admin login ID and password are the ones specified in /etc/sysconfig/mysql-proxy.
The admin interface is simple and usually (depending on the Lua admin script) allows only the command SELECT * FROM backends;. On a properly working MySQL Proxy this command should give output such as:
+-------------+--------------------+-------+------+------+-------------------+
| backend_ndx | address | state | type | uuid | connected_clients |
+-------------+--------------------+-------+------+------+-------------------+
| 1 | 192.168.1.102:3306 | up | rw | NULL | 0 |
| 2 | 192.168.1.105:3306 | up | ro | NULL | 0 |
+-------------+--------------------+-------+------+------+-------------------+
The above table shows the addresses of the servers, their state, type – read/write (rw) or read-only (ro) – uuid, and number of connected clients.
You can also play with the rest of the Lua scripts included in the official archive. To test a new script, just copy it to the /usr/lib/mysql-proxy/lua/proxy/ directory on the MySQL Proxy server and include it in the PROXY_OPTIONS directive.
MySQL Proxy is a simple yet powerful utility. Even though it provides some challenges today in terms of scanty documentation and sketchy ease of use, it is under continuous development and shows constant improvement.

Using OpenSSL to encrypt messages and files on Linux

$
0
0
http://how-to.linuxcareer.com/using-openssl-to-encrypt-messages-and-files


1. Introduction

OpenSSL is a powerful cryptography toolkit. Many of us have already used OpenSSL for creating RSA Private Keys or CSR (Certificate Signing Request). However, did you know that you can use OpenSSL to benchmark your computer speed or that you can also encrypt files or messages? This article will provide you with some simple to follow tips on how to encrypt messages and files using OpenSSL.

2. Encrypt and Decrypt Messages

First we can start by encrypting simple messages. The following command will encrypt a message "Welcome to LinuxCareer.com" using Base64 Encoding:
$ echo "Welcome to LinuxCareer.com" | openssl enc -base64
V2VsY29tZSB0byBMaW51eENhcmVlci5jb20K
The output of the above command is an encrypted string containing encoded message "Welcome to LinuxCareer.com". To decrypt encoded string back to its original message we need to reverse the order and attach -d option for decryption:
$ echo "V2VsY29tZSB0byBMaW51eENhcmVlci5jb20K" | openssl enc -base64 -d
Welcome to LinuxCareer.com
The above encryption is simple to use, however, it lacks an important feature of a password, which should be used for encryption. For example, try to decrypt the following string with a password "pass":
U2FsdGVkX181xscMhkpIA6J0qd76N/nSjjTc9NrDUC0CBSLpZQxQ2Db7ipd7kexj
To do that use OpenSSL again with -d option and encoding method aes-256-cbc:
echo "U2FsdGVkX181xscMhkpIA6J0qd76N/nSjjTc9NrDUC0CBSLpZQxQ2Db7ipd7kexj" | openssl 
enc -aes-256-cbc -d -a
 As you have probably already guessed, to create an encrypted message with a password as the one above you can use the following command:
 $ echo "OpenSSL" | openssl enc -aes-256-cbc -a enter aes-256-cbc encryption password:
Verifying - enter aes-256-cbc encryption password:
U2FsdGVkX185E3H2me2D+qmCfkEsXDTn8nCn/4sblr8=
If you wish to store OpenSSL's output to a file instead of STDOUT simply use STDOUT redirection ">". When storing encrypted output to a file you can also omit -a option as you no longer need the output to be ASCII text based:
$ echo "OpenSSL" | openssl enc -aes-256-cbc > openssl.dat
enter aes-256-cbc encryption password:
Verifying - enter aes-256-cbc encryption password:
$ file openssl.dat
openssl.dat: data
To decrypt the openssl.dat file back to its original message use:
$ openssl enc -aes-256-cbc -d -in openssl.dat 
enter aes-256-cbc decryption password:
OpenSSL

3. Encrypt and Decrypt File

 To encrypt files with OpenSSL is as simple as encrypting messages. The only difference is that instead of the echo command we use the -in option with the actual file we would like to encrypt and -out option, which will instruct OpenSSL to store the encrypted file under a given name:
$ openssl enc -aes-256-cbc -in /etc/services -out services.dat
To decrypt back our services file use:
$ openssl enc -aes-256-cbc -d -in services.dat > services.txt
enter aes-256-cbc decryption password:

4. Encrypt and Decrypt Directory

In case that you needed to use OpenSSL to encrypt an entire directory you would, firs,t need to create gzip tarball and then encrypt the tarball with the above method or you can do both at the same time by using pipe:
# tar cz /etc | openssl enc -aes-256-cbc -out etc.tar.gz.dat
tar: Removing leading `/' from member names
enter aes-256-cbc encryption password:
Verifying - enter aes-256-cbc encryption password:
To decrypt and extract the entire etc/ directory to you current working directory use:
# openssl enc -aes-256-cbc -d -in etc.tar.gz.dat | tar xz
enter aes-256-cbc decryption password:
The above method can be quite useful for automated encrypted backups.

5. Conclusion

What you have just read was a basic introduction to OpenSSL encryption. When it comes to OpenSSL as an encryption toolkit it literally has no limit on what you can do. To see how to use different encoding methods see OpenSSL manual page:
$ man openssl
Make sure you tune in to our Linux jobs portal to stay informed about the latest opportunities in the field. Also, if you want to share your experiences with us or require additional help, please visit our Linux Forum.

Learning Linux Commands: export

$
0
0
http://how-to.linuxcareer.com/learning-linux-commands-export

1. Introduction

The export command is one of the bash shell BUILTINS commands, which means it is part of your shell. The export command is fairly simple to use as it has straightforward syntax with only three available command options. In general, the export command marks an environment variable to be exported with any newly forked child processes and thus it allows a child process to inherit all marked variables. If you are unsure what this means read on, as this article will explain this process in more detail.

2. Frequently Used Options

  • -p
    List of all names that are exported in the current shell
  • -n
    Remove names from export list
  • -f
    Names are exported as functions

3. Export basics

Think over the following example:
$ a=linuxcareer.com
$ echo $a
linuxcareer.com
$ bash
$ echo $a

$
  • Line 1: new variable called "a" is created to contain string "linuxcareer.com"
  • Line 2: we use echo command to print out a content of the variable "a"
  • Line 3: we have created a new child bash shell
  • Line 4: variable "a" no longer have any values defined
From the above we can see that any new child process forked from a parent process by default does not inherit parent's variables. This is where the export command comes handy. What follows is a new version of the above example using the export command:
$ a=linuxcareer.com
$ echo $a
linuxcareer.com
$ export a
$ bash
$ echo $a
linuxcareer.com
$
Linux Career Internal  advertisementOn the line 3 we have now used the export command to make the variable "a" to be exported when a new child process is created. As a result the variable "a" still contains the string "linuxcareer.com" even after a new bash shell was created. It is important to note that, in order to export the variable "a"  to be available in the new process, the process must be forked from the parent process where the actual variable was exported. The relationship between the child and parent process is explained below.

4. Child vs Parent process

In this section we briefly explain the relationship between the child and parent process. Any process can be a parent and child process at the same time. The only exception is the init process, which is always marked with PID ( process ID ) 1. Therefore, init is a parent of all processes running on your Linux system.
$ ps -p 1
  PID TTY          TIME CMD
    1 ?        00:00:02 init
Any process created will normally have a parent process from which it was created and will be considered as a child of this parent process. For example:
$ echo $$
27861
$ bash
$ echo $$
28034
$ ps --ppid 27861
  PID TTY          TIME CMD
28034 pts/3    00:00:00 bash
  • Line 1: print a PID for a current shell - 27861
  • Line 2: create a new child process from the process ID 27861
  • Line 3: print a PID for a current shell - 28034
  • Line 4: with use of the ps command print the child process of PID 27861
When creating a new child process an export command simply ensures that any exported variables in the parent process are available in the child process.

5. Using export command

Now that we have learned some basics we can continue to explore the export command in more detail. When using the export command without any option and arguments it will simply print all names marked for an export to a child process. This is the same when using the -p option:
$ export
declare -x COLORFGBG="15;0"
declare -x DEFAULTS_PATH="/usr/share/gconf/cinnamon.default.path"
declare -x DESKTOP_SESSION="cinnamon"
declare -x DISPLAY=":0".....
As shown previously, to export a variable we simply use the  variable's name as an argument to an export command.
$ MYVAR=10
$ export | grep MYVAR
$ export MYVAR
$ export | grep MYVAR
declare -x MYVAR="10"
As you can see, once the MYVAR variable is exported it will show up in the list of exported variables ( line 4 ). The above example can be shortened by using the export command directly with variable assessment.
$ export MYVAR=10
$ export | grep MYVAR
declare -x MYVAR="10"
The most common use of the export command is when defining the PATH shell variable:
export PATH=$PATH:/usr/local/bin
In the example above, we have included additional path /usr/local/bin to the existing PATH definition.

6. Exporting a shell function

With the option -f the export command can also be used to export functions. In the example below, we will create a new bash function called printname, which will simply use the echo command to print the string "Linuxcareer.com".
$ printname () { echo "Linuxcareer.com"; }
$ printname
Linuxcareer.com
$ export -f printname
$ bash
$ printname
Linuxcareer.com

7. Removing names from export list

 Following the example above we now have the MYVAR variable defined in our export list.
$ export | grep MYVAR
declare -x MYVAR="10"
To remove this variable from the export list we need to use the -n export option.
$ export | grep MYVAR
declare -x MYVAR="10"
$ export -n MYVAR
$ export | grep MYVAR
$

8. Conclusion

This article covered basic use of the export command. For more information execute command:
$ man export
Make sure you tune in to our Linux jobs portal to stay informed about the latest opportunities in the field. Also, if you want to share your experiences with us or require additional help, please visit our Linux Forum.

Provision a New Linux Dev Environment in Nothing Flat with Puppet

$
0
0
http://www.linux.com/news/software/applications/694157-setup-your-dev-environment-in-nothing-flat-with-puppet


Setting up a development environment for a web application can seem simple—just use SQLite and WEBrick or a similar development server—but taking shortcuts can quickly lead to problems. What happens when you need to onboard new team members? What if your team members are geographically distributed? How do you prevent bugs from creeping in when the production environment's configuration drifts away from the development environment? Even if you've managed to set up a picture-perfect development environment, what happens when a developer inevitably breaks its configuration?
In the last few years a huge number of DevOps tools have sprung up to help teams automate the provisioning and configuration of their infrastructure. These include Puppet, a configuration management tool, and Vagrant, a tool to automate the management and provisioning of development environments. While these tools are often thought of as being most useful for Ops staff, this tutorial will show how they can be used to manage a development environment for a team working on a web application.
By taking advantage of the infrastructure-as-code approach of these tools, the configuration of environments can be version controlled along with the source code for the application itself. This allows developers to work in extremely realistic environments, often identical to those managing a production application, while reducing the overhead involved in managing the environment. It also significantly decreases the onboarding cost for a new developer: all they have to do is clone a repository, run a few simple commands, and they have their own copy of the environment up and running. Most importantly, it means that any changes to the setup to the environment can be immediately reflected across all copies of the environment through the use of version control systems.
In the first part of this tutorial, we'll be examining how to use Vagrant to automate away the pain of managing VMs on your local system. The next part of the tutorial will show how to use Puppet's powerful declarative language to simply describe the elements of your environment and their relations to each other. By the end of the series, you'll be able to define a powerful, reusable development environment with just a few simple configuration files. This tutorial is oriented towards web application development, and will show how to configure a VM to run apache on code shared from your local machine.

Using Vagrant to Manage VMs

Vagrant is a configuration-centric tool for managing VMs on your local machine. Using Vagrant, you only need to write a simple file specifying certain attributes you want your system to have, and Vagrant takes care of provisioning and managing the VM for you. It also provides an elegant command line interface for interacting with the VMs.
In order to get started with Vagrant, you'll need to download the appropriate version of VirtualBox for your system, since that's what Vagrant uses on the backend. You'll also need to grab the Vagrant package for your distro and add /opt/vagrant/bin to your PATH. In the examples we'll be using Debian 6.0, but all you should need to change is which packages you grab and install.
$ wget http://download.virtualbox.org/virtualbox/4.2.6/virtualbox-4.2_4.2.6-82870\~Debian\~squeeze_i386.deb
$ sudo dpkg -i virtualbox-4.2_4.2.6-82870\~Debian\~squeeze_i386.deb
$ wget http://files.vagrantup.com/packages/476b19a9e5f499b5d0b9d4aba5c0b16ebe434311/vagrant_i686.deb
$ sudo dpkg -i vagrant_i686.deb
We'll also need to grab a boxfile. Boxfiles are the base images Vagrant builds its VMs on, specifying things like disk capacity and the installed operating system. For our environment we'll grab a simple boxfile for a Lucid 32-bit system:
$ vagrant box add lucid32 http://files.vagrantup.com/lucid32.box

Creating our source controlled development environment

Now we can create a directory for our dev environment. We'll also go ahead and initialize it as a git repository.
$ mkdir sample-dev-env
$ cd sample-dev-env
$ touch Vagrantfile
$ git init
$ git add Vagrantfile
$ git commit -m "Starting our new dev environment"
The Vagrantfile we've just created is the central configuration file that Vagrant uses to determine the configuration of the VMs it manages. You can automatically generate a sample Vagrantfile with lots of documentation in it by running vagrant init, but for now we'll just set up our own Vagrantfile to configure one VM with the boxfile we've added, and set it up to forward port 80 on the VM to port 3000 on our local machine so we can access the webapp being run on the VM on our local machine:
Vagrant::Config.run do |config|
config.vm.box = "lucid32"
config.vm.forward_port 80, 3000
end
That's it! Vagrant automatically shares any files in the project directory to a shared folder located at /vagrant on the VM, so if we just put our web app folder into the dev env directory and execute vagrant up, vagrant will bring up a virtual machine with our code on it. Accessing that virtual machine is simplified by the use of vagrant ssh, the ssh wrapper Vagrant provides for accessing your VMs.
$ vagrant up
$ vagrant ssh
$ ls /vagrant
Vagrantfile your_webapp_here
Now that we have a Vagrantfile that defines our basic configuration, we can commit our changes to our dev env git repo:
$ git add Vagrantfile
$ git commit -m "Basic Vagrantfile"
Of course, that still leaves us with a lot of work to do: how do we make sure the necessary libraries and packages are installed? How do we ensure the webapp is running? How do we configure the system so that Apache can find our web application? In the next part of this tutorial, we'll learn how to use Puppet to provision our Vagrant-managed virtual machines, so that developers can go from scratch to having a working VM serving your app just by cloning your repository and running vagrant up.

AMD Roadrunner Platform Opens Server Design

$
0
0
http://www.serverwatch.com/server-news/amd-roadrunner-opens-server-design.html


The promise of the Open Compute Project is to provide new standards that promote server and data center flexibility. It's a promise that AMD wants to deliver on with its new Open 3.0 platform.
Open 3.0 was originally codenamed "Roadrunner" and is a new server motherboard approach that conforms to standards being developed by the Open Compute Project.
Suresh Gopalakrishnan explained during a keynote session at the Open Compute Summit this week that Open 3.0 is a single modular platform that can be tuned for multiple-use cases, whether its cloud, storage or high-performance computing. Gopalakrishnan defined Open 3.0 as the physical implementation of Open Compute.
According to Gopalakrishnan, the platform provides open management and no vendor lock-in.
The initial Open 3.0 motherboard is powered by a pair of AMD Opteron 6300 Series processors. The board supports up to 24 DIMM memory slots and 6 SATA connections. In terms of dimensions, the Open 3.0 motherboard measures 16" x 16.7" and will fit into 1U, 1.5U, 2U or 3U server chassis. AMD 3.0
"What's really exciting for me here is the way the Open Compute Project inspired AMD and specific consumers to collaboratively bring our 'vanity-free' design philosophy to a motherboard that suited their exact needs," Frank Frankovsky, chairman of the Open Compute Foundation and VP of Hardware Design and Supply Chain at Facebook, said in a statement.
AMD is working with a number of partners, including Quanta Computer, Tyan and Penguin Computing, and expects availability of Open 3.0 servers by the end of the first quarter of 2013.
AMD's Open 3.0 news followed some other big news from the Open Compute Summit, namely the new Common Slot specification. With the common slot architecture, the idea is to enable multiple types of CPUs to co-exist within a server.
"We are an active participant in that (Common Slot) and you will see different types of open hardware that we will help to drive to the market," Gopalakrishnan said. "We're very interested in how dense computing is coming together, and common slot is one approach to do that."

RHEV upgrade saga: RHEL KVM and the Open vSwitch

$
0
0
http://www.itworld.com/virtualization/335244/rhev-upgrade-saga-rhel-kvm-and-open-vswitch


A customer of mine recently switched from VMware Server to KVM, but they wanted better networking, which required installing and operating the Open vSwitch. Since they are using RHEL 5 (and I am using RHEL 6) we had to do some magic to install open vswitch. For RHEL 6 it is pretty simple. So here are the steps I took. All these were accomplished with a reference from Scott Lowe's posts (and with Scott's help via Twitter).
[Red Hat to acquire ManageIQ cloud software provider and Red Hat RHEV gets storage savvy]
The key requirement of this customer was that the KVM node and VMs had to share the same networking, which bridge routing would not do without some major configuration changes. They have a management network that is shared by all hosts whether virtual or physical to help in managing all aspects of their environment.

RHEL5 (installation)


# wget http://openvswitch.org/releases/openvswitch-1.7.1.tar.gz
# tar –xzf openvswitch-1.7.1.tar.gz

follow the instructions in INSTALL.RHEL to build your openvswitch RPMs such as:

# rpmbuild –bb rhel/openvswitch.spec
# cp rhel/kmodtool-openvswitch-el5.sh /usr/src/redhat/SOURCES
# rpmbuild –bb rhel/openvswitch-kmod-rhel5.spec

If there is a problem refer to the INSTALL.RHEL for using the –D option to rebuild the module with the kernel version. In my install I did NOT include –target= options as I was building for the host I was upon.

# rpm –ivh /usr/src/redhat/RPMS/x86_64/{kmod-openvswitch,openvswitch}-1.7.1*rpm

RHEL6 (installation)


# yum install kmod-openvswitch openvswitch

Now that we have installed openvswitch we should make sure that libvirtd is running first. If it is not then we cannot use KVM and therefore not OVS.

# service libvirtd status


If libvirtd is not running use the following to start immediately and to ensure it starts at boot.

# service libvirtd start
# chkconfig libvirtd on

Under normal circumstances, KVM starts with its own bridge named default, which is actually virbr0, if we are going to use the openvswitch, it is best to remove that bridge. First we need to see what bridges/networks exist. By default, it is fine to have this bridge also available as it becomes an internal only network using non-openvswitch constructs.


 # virsh –c qemu:///system net-list –all
Name State Autostart Persistent
--------------------------------------------------
default active yes yes
# ifconfig –a |grep br0
virbr0 Link encap:Ethernet HWaddr XX:XX:XX:XX:XX:XX
virbr0-nic Link encap:Ethernet HWaddr YY:YY:YY:YY:YY:YY


Now let's talk configuration, since this is the main reason for using openvswitch. We want the configuration to include an uplink from the physical devices to the openvswitch, then a link from the openvswitch to the Dom0 OS, and finally a link to each VM hosted. To complicate matters we need to have this done on two distinctly different networks. So how did we proceed?
First we need to configure Openvswitch, which goes along with Scott's article. First we configure the BRCOMPAT setting, which is commented out by default:/p>

# echo “BRCOMPAT=yes” >> /etc/sysconfig/openvswitch

Then start the openvswitch service(s) and configure them to start on reboot as well:

# /sbin/service openvswitch start
# /sbin/chkconfig openvswitch on

Check to see if KVM is running and openvswitch is installed properly, first by ensuring libvirtd is running properly and if the openvswitch components are loaded as modules and that the servers are running properly.

# virsh –c qemu:///system version
Compiled against library: libvirt 1.0.1
Using library: libvirt 1.0.1
Using API: QEMU 1.0.1
Running hypervisor: QEMU 0.12.1
# lsmod |grep brcom
brcompat 5905 0
openvswitch 92800 1 brcompat
# service openvswitch status
ovsdb-server is running with pid 2271
ovs-vswitchd is running with pid 2280

Now we need to create some openvswitches with some bonding thrown in for redundancy and bandwidth requirements. We also create a ‘named’ port on the openvswitch for our internal network.


# ovs-vsctl add-br ovsbr0
# ovs-vsctl add-bond ovsbr0 bond0 eth0 eth2 lacp=active # only needed for bonding
# ovs-vsctl add-port ovsbr0 mgmt0
# set interface mgmt0 type=internal

Before we go any further, we need to bring down the old interfaces, otherwise our changes to the configuration files will force a reboot. Since we are working with the existing Linux bond0 device and mapping that into the openvswitch, we should disable that bond0 device as follows.


Bonded:
# ifdown bond0

Unbonded:
# ifdown eth0


However, this is far from complete, we need to modify the ifcfg configurations within /etc/sysconfig/network-scripts to make all the networks come back on reboot. So the config scripts look like the following depending if we are using bonding or not:

Then we have to specify the bridge itself as a OVSBridge type.


ifcfg-ovsbr0
DEVICE=ovsbr0
ONBOOT=yes
DEVICETYPE=ovs
TYPE=OVSBridge
HOTPLUG=no
USERCTL=no


Finally we have to specify a new device to bring up to put the KVM node itself onto the openvswitch. In this case, we define it as type OVSPort and specify that it is part of the OVS_BRIDGE named ovsbr0. We give it the ip address assigned to the machine and the proper netmask.


ifcfg-mgmt0
DEVICE=mgmt0
ONBOOT=yes
DEVICETYPE=ovs
TYPE=OVSIntPort
OVS_BRIDGE=ovsbr0
USERCTL=no
BOOTPROTO=none
HOTPLUG=no

IPADDR=A.B.C.D
NETMASK=255.255.255.192


Finally, we set a default route for A.0.0.0/8 traffic that may be different than traffic going to the outside world.


route-mgmt0
route add A.0.0.0/8 via W.X.Y.Z


Now the process is repeated for the next bonded network, which means we created two openvswitches. You can either reboot the server to make sure everything comes up properly and you have an alternative way into the machine (perhaps an ILO, DRAC, or IPMI mechanism) or you can shutdown the network and restart the network and the openvswitch constructs. I tested this by restarting the openvswitch and bringing up the mgmt0 network using normal means. I ran the following command with the following output and my openvswitches were created and all was working as expected.


# ovs-vsctl show
Bridge "ovsbr0"
Port "ovsbr0"
Interface "ovsbr0"
type: internal
Port "mgmt0"
Interface "mgmt0"
type: internal
Port "bond0"
Interface "eth2"
Interface "eth0"
Port "vnet7"
Interface "vnet7"
Bridge "ovsbr1"
Port "bond1"
Interface "eth3"
Interface "eth1"
Port "mgmt1"
Interface "mgmt1"
type: internal
Port "ovsbr1"
Interface "ovsbr1"
type: internal
ovs_version: "1.7.1"


Now enable the bridges and run some pings. If you are at a console you can run the following command:


# service network restart


Otherwise perhaps you want to test one interface at a time. In this case we did:


# ifup bond0 
or use # ifup eth0
# ifup ovsbr0
# ifup mgmt0


The ultimate test however is pinging the outside world and that worked flawlessly.
I would like to thank Scott Lowe for all his help from his blog post (originally for Ubuntu) and for his help on Twitter and Skype to solve the problem of getting not only openvswitch running but bonding my Dom0 to the vSwitch as well as all the DomU’s in use.
Next it is time to create some virtual machines and find a graphical management system that works for RHEV with the Open vSwitch.


RHEV upgrade saga: Creating VMs on Open vSwitch

$
0
0
http://www.itworld.com/virtualization/336623/rhev-upgrade-saga-rhel-kvm-creating-vms-open-vswitch


In last week's post, we discussed how we created our network by integrating Open vSwitch into RHEL KVM. Now we need to create some virtual machines to run the workloads. (VMs are required to run within a virtual environment, so we need an easy way to create them.) Once more we will approach this from running on a RHEL 6 and RHEL 5 box, as the steps are somewhat different.
The libvirt that comes with stock RHEL 6 (and RHEV actually) is version 0.90.10-21, which, lucky for us, contains support for Open vSwitch, however the libvirt for RHEL 5 is version 0.8.2, which does not contain support for Open vSwitch. This means that for RHEL 5 we have to take some extra steps to manage our networks and implies that we can't use virt-manager to create our VMs. It also means on RHEL 5 that we can't import our Open vSwitch networks into virsh to make using virt-manager and other tools easier.
Even so, I feel that libvirt v1.0.1 is a better way to go, so I downloaded the source RPM from libvirt.org and rebuilt it on my RHEL 6 machine. This did require me to rebuild libssh2 (needed >= v1.4) and sanlock (needed >= v2.4) to get the proper versions of those tools to support libvirt 1.0.1.

# Get libssh2 >= v1.4 which is available from the Fedora Core 18 repository
# rpmbuild –rebuild libssh2-1.4.3-1.fc18.src.rpm
# rpm –Uvh /root/rpmbuild/RPMS/x86_64/{libssh2,libssh2-devel}-1.4.3-1.el6.x86_64.rpm
# Get sanlock >= 2.4 which is available from the Fedora Core 18 repository as well
# rpmbuild –rebuild sanlock-2.6.4.fc18.src.rpm
# rpm –Uvh /root/rpmbuild/RPMS/x86_64/{sanlock,sanlock-devel,sanlock-lib,sanlock-python,fence-sanlock}-2.6-4.el6.x86_64.rpm
# wget http://libvirt.org/sources/libvirt-1.0.1-1.fc17.src.rpm
# rpmbuild –rebuild libvirt-1.0.1-1.fc17.src.rpm
# rm /root/rpmbuild/RPMS/x86_64/libvirt*debuginfo*rpm
# rpm –Uvh /root/rpmbuild/RPMS/x86_64/libvirt*rpm
# service libvirtd restart

While this upgrade works for RHEL 6, it will NOT work on RHEL 5 as it would require installing so many new packages that it is far easier to just upgrade to RHEL 6. So if you are using RHEL 5, you should continue down the path to use libvirt 0.8.2.
Without a tool to manage multiple KVM nodes, it is very hard to do a rolling upgrade of libvirt. I am still looking for a good tool for this. RHEV may be the only usable interface, but I could also use OpenStack -- a discussion for another time.

For RHEL 6

Once libvirtd has been restarted, we can import our networks into libvirt for use, to do that we need to write a proper libvirt network XML file. Here is the one I used named ovsbr1.xml


ovsbr1


The key lines are the name of the bridge, the virtualport type, and portgroup. While I do not use VLANs, we want to make a default portgroup that includes all VMs, etc. This has no VLANs defined. So we need to define it in libvirt, verify it is defined, start it, and then verify it is active.


# virsh net-define ovsbr1.xml
# virsh net-list –all
Name State Autostart Persistent
--------------------------------------------------
default active yes yes
ovsbr1 inactive no no
# virsh net-start ovsbr1
# virsh net-info ovsbr1
Name ovsbr1
UUID ffffff-ffffffff-ffffffffff-ffffffffff….
Active: yes
Persistent: no
Autostart: no
Bridge: ovsbr1


Building VMs

Before we make some VMs we need to place the VMs on our storage. There are multiple types of storage pools we can use: physical disk device (disk), pre-formatted block device (fs), logical volume manager volume group (logical), iscsi target (iscsi), multipath device (mpath), network directory (netfs), SCSI host adapater (scsi), or directories (dir). For our example we will be using a directory. However, for best performance a logical storage pool is recommended.


 # virsh pool-create-as VMs dir - - - - “/mnt/KVM”
#pool-list
Name State Autostart
-----------------------------------------
default active yes
VMs active yes


For a LVM based pool where the Volume Group already exists


# virsh pool-define-as vg_kvm logical --target /dev/vg_kvm 
# virsh pool-start vg_kvm
Pool vg_kvm started
# virsh pool-autostart vg_kvm
Pool vg_kvm marked as autostarted
# virsh pool-list
Name State Autostart
-----------------------------------------
default active yes
vg_kvm active yes


In general, we do not want to use the default location because it ends up being in an inconvenient location within the root filesystem. You may wish to delete it, so that VMs don't accidentally end up there. Use of a block storage device as a disk type such as iSCSI would be a better performer than a file system approach if the iSCSI server is running over a high speed network such as 10G. If all you have is 1G your mileage may vary.
I did this using a simple script that will assign the proper values for my VMs. Specifically the base memory, number of vCPUs, disk to a pool, the networks to use (in this case two Open vSwitch bridges), where to find the installation media, and finally the use of VNC to do the install.

# cat mkvm
set -x
virt-install --name $1 --ram 2048 --vcpus=2 --disk pool=VMs,size=$2 --network bridge=ovsbr0 --network bridge=ovsbr1 --cdrom /home/kvm/CentOS-5.8-x86_64-bin-DVD-1of2.iso --noautoconsole --vnc --hvm --os-variant rhel5

This makes it an easily repeatable process and the script takes two arguments, the vmname and the size in Gigabytes of the disk. Once I have a VM installed, I could then clone it as necessary. Run as such for a 12G VM named vmname.

# ./mkvm vmname 12

During the install you will have to configure your networks, to determine which Mac Addresses go with which you should use the following command:


# virsh dumpxml vmname


What you are looking for is which interface goes with which bridge via its Mac address as the Linux installer lists network adapters via Mac addresses not bridges. It does not even know there is a bridge there. Using the above script works on RHEL 6 and RHEL 5 and does not require you to go into and edit any XML files.
If you do have to edit the XML file containing the VM definition you can do so using:

# vi /etc/libvirt/qemu/vmname.xml
And once you finish editing
# virsh define vmname.xml

If you do not do the define command mentioned above, the changes may not be picked up.
Next we will clone some VMs from a gold master.

Android Programming for Beginners: Part 1

$
0
0
http://www.linux.com/learn/docs/683628-android-programming-for-beginners-part-1


With Android phones and tablets making their way into more and more pockets and bags, dipping a toe into Android coding is becoming more popular too. And it's a great platform to code for -- the API is largely well-documented and easy to use, and it's just fun to write something that you can run on your own phone. You don't even need a phone at first, because you can write and test code in an emulator on your Linux PC.  In the first of this two-part intro to Android coding, get a basic timer app up and running and start learning about the Android API. This tutorial assumes some basic familiarity with Java, XML, and programming concepts, but even if you're shaky on those, feel free to follow along!

Dev environment and getting started

A note on versions: the most recent version of Android is 4.2 (Jelly Bean), but as you can see from this Wikipedia chart, there aren't many people using it yet. You're better off coding for one or both of 4.0 (Ice Cream Sandwich) or 2.3 (Gingerbread), especially as Android is entirely forwards-compatible (so your 2.3 code will run on 4.2) but not always backwards-compatible. The code here should work on either 4.0 or 2.3.
android countdown timer
The quickest way to get your dev environment set up is to download the Android Bundle. You'll also need JDK 6 (not just JRE); note that Android is not compatible with gcj. If you already have Eclipse, or wish to use another IDE, you can set it up for Android as described here.
Now, create a project called Countdown either using Eclipse, or from the command line. I set the BuildSDK to 4.0.3, and minimum SDK to 2.2, and (in Eclipse) used the BlankActivity template.


My First Android Project: Layout

For our very first program, we're going to do is to show a timer that counts down from 10 seconds when you click a button. Before writing the code, let's create the interface -- what the user will see when they start the app. Open up res/layout/activity_countdown.xmlto create an XML layout, using either the Eclipse graphical editor, or a text/XML editor, to enter this:


Note the references to @string/start and @string/__00_30. These values are stored in res/values/strings.xml:
Start
00:30
This illustrates the standard way of referring to Android resources. It's best practice to use string references rather than hard-coding strings.

My First Android Project: Code

Next, open up the CountdownActivity.java file in your editor, ready to write some code. You should already have an onCreate() method stub generated. onCreate() is always called when the Activity is first created, so you'll often do setup and app logic startup here. (Eclipse may also have created an onCreateOptionsMenu()method stub, which we'll ignore for now.) Enter this code:
public class CountdownActivity extends Activity {

private static final int MILLIS_PER_SECOND = 1000;
private static final int SECONDS_TO_COUNTDOWN = 30;
private TextView countdownDisplay;
private CountDownTimer timer;
@Override
public void onCreate(Bundle savedInstanceState) {
super.onCreate(savedInstanceState);
setContentView(R.layout.activity_countdown);

countdownDisplay = (TextView) findViewById(R.id.time_display_box);
Button startButton = (Button) findViewById(R.id.startbutton);
startButton.setOnClickListener(new View.OnClickListener() {
public void onClick(View view) {
try {
showTimer(SECONDS_TO_COUNTDOWN * MILLIS_PER_SECOND);
} catch (NumberFormatException e) {
// method ignores invalid (non-integer) input and waits
// for something it can use
}
}
});
}
}
You'll notice the thing that makes this a surprisingly easy first project: the Android API includes a CountDownTimer that you can use. We set up this, and the countdown display, as private member variables. In onCreate() we use the built-in setContentView method to grab our XML layout The R.foo.barsyntax is a standard way to refer to Android XML resources in your code, so you'll see it a lot.
findViewById is another method you'll use a lot; here, it grabs the display and the Start button from the XML layout. For the Button to work when clicked, it needs an OnClickListener. This is an interface, so must be subclassed. We could create a whole new MyButton class to do this, but this is overkill for a single button. Instead, we do it inline, creating a new OnClickListener and its onClick() method. Ours simply calls showTimer() on the number of milliseconds we want to use (currently hard-coded).
So what does showTimer()do?
private void showTimer(int countdownMillis) {
if(timer != null) { timer.cancel(); }
timer = new CountDownTimer(countdownMillis, MILLIS_PER_SECOND) {
@Override
public void onTick(long millisUntilFinished) {
countdownDisplay.setText("counting down: " +
millisUntilFinished / MILLIS_PER_SECOND);
}
@Override
public void onFinish() {
countdownDisplay.setText("KABOOM!");
}
}.start();
}
The CountDownTimer class does most of the work for us, which is nice. Just in case there's already a running timer, we start off by cancelling it if it exists. Then we create a new timer, setting the number of milliseconds to count down (from the showTimer() parameter) and the milliseconds per count interval. This interval is how often the onTick()callback is fired.
CountDownTimer is another abstract class, and the __onTick()__ and __onFinish()__ methods must be implemented when it is subclassed. We override onTick() to decrease the countdown display by a second on every tick; and override onFinish() to set a display message once the countdown finishes. Finally, start() sets the timer going.
If you select 'Run' in Eclipse, you can choose to run this as an Android app, and an emulator will automatically be generated and run for you. Check out the Android docs if you need more information on setting up an emulator, or on running an app from the command line.
Congratulations, you've written your first Android app! In the second part of this series, we'll have a closer look at the structure of an Android app, and make some improvements to the timer to input a countdown time, a Stop button, and menu options. We'll also look at running it on a physical phone rather than the software emulator.
For more information in the mean time, you can check out the Android Development Training section of The Linux Foundation's Linux training website.

Android Programming for Beginners: Part 2

$
0
0
http://www.linux.com/learn/docs/686857--android-programming-for-beginners-part-2


In the first part of this two-part series on getting started with Android coding, you set up your development environment, built a basic countdown app, and got acquainted with the Android API. In this second article we'll have a closer look at the structure of an Android app, create a menu, and write a second activity to input a countdown time. We'll also look at running your app on a physical phone.

Menu options

There are three Android menu types. The Options Menu is the menu that appears when you hit the menu button (on older Android) or is shown in the Action bar (newer Android), and you can also access contextual menus and popup menus. We're going to use the Options Menu to allow you to set the count down time.
Eclipse creates an stub Options Menu method with a new main Activity:
public boolean onCreateOptionsMenu(Menu menu) {
getMenuInflater().inflate(R.menu.activity_main, menu);
return true;
}
getMenuInflater() allows you to follow best practice and create your menu in XML rather than in code. Edit res/menu/activity_main.xml:


and add the @string reference to res/values/strings.xml. You can fiddle around more with menu ordering and other options in the Layout tab, if you want.
onMenuItemSelected()is fired when the user chooses a menu item:
public boolean onMenuItemSelected(int id, MenuItem item) {
switch(item.getItemId()) {
case R.id.set_time:
setTime();
return true;
default:
// we don't have any other menu items
}
return super.onMenuItemSelected(id, item);
}
All we do is get the menu item ID (set in the XML above) and act accordingly. We're now ready to write the setTime()method, which will call another Activity.
 android 2 menuMenu item is showing at the bottom of the screen.

Activities

First, a little bit of background. Android is structured as a whole bunch of modules, the idea being that parts of one app can easily hook into parts of other apps, maximising code reuse. There are four main application components:
  1. Activites: provide a screen and UI for a particular action. An app has at least one main Activity, and may have lots of other associated Activities.
  2. Services: run in the background doing something (checking email, playing music, etc), without a UI.
  3. Broadcast Receiver: receive announcements broadcast by the system and do something accordingly.
  4. Content Provider: makes data available to other apps.
Intents are messages which are used to jump into a module, or to pass information between modules. We're going to set up a second Activity to enter the time to count down for, using a scroller widget, called using the menu and setTime():
private void setTime() {
Intent i = new Intent(getBaseContext(), CountdownSetTime.class);
startActivityForResult(i, SET_TIME_REQUEST_ID);
}
This Intent simply starts the new CountdownSetTime Activity, and tells the current Activity to expect a result. In CountdownSetTime.java, the work is done in the onCreate()method:
public void onCreate(Bundle savedInstanceState) {
super.onCreate(savedInstanceState);
setContentView(R.layout.set_time);
context = this.getApplicationContext();
Spinner spinner = (Spinner) findViewById(R.id.spinner);
ArrayList spinnerList = new ArrayList();
for (int i = MIN; i <= MAX; i++) {
spinnerList.add(i);
}
ArrayAdapter adapter = new ArrayAdapter(context,
android.R.layout.simple_spinner_item, spinnerList);
adapter.setDropDownViewResource(
android.R.layout.simple_spinner_dropdown_item);
spinner.setAdapter(adapter);
spinner.setOnItemSelectedListener(new OnItemSelectedListener() {
public void onItemSelected(AdapterView parent,
View view, int pos, long id) {
secondsSet = (Integer)parent.getItemAtPosition(pos);
}
public void onNothingSelected(AdapterView parent) {
// Do nothing.
}
};
The XML layout in res/layout/set_time.xmllooks like this:


It defines a Spinner and two buttons, within a RelativeLayout. A Spinner displays data; an array holds the data; and an ArrayAdapter translates between the two. Our Spinner just displays numbers (seconds to count down), so the data is held by an Integer ArrayList, holding the integers between our MIN and MAX values. android.R.layout.simple_spinner_item and android.R.layout.simple_spinner_dropdown_itemare stock Android layout resources that set up the look of the spinner item and the dropdown. You could also choose to create your own resources.
onItemSelectedListener() sets up a Listener to act when an item is picked, setting the secondsSet class variable. To pass this value back to the original Activity, we set up OK and Cancel buttons. You've already seen the code for a button and its OnClickListener in the previous article, so here I'll just show the onClick()method for the OK button:
public void onClick(View view) {
Intent i = new Intent();
Bundle bundle = new Bundle();
bundle.putInt(CountdownActivity.SET_TIME_KEY, secondsSet);
i.putExtras(bundle);
setResult(RESULT_OK, i);
finish();
}
A Bundle is used to store information in an Intent, so it can be passed between Activities. Each value (here we just have a single Integer) is stored with a String key. For the cancel button, no Bundle is needed. Just create an Intent, set the result as RESULT_CANCELLED, and call finish().
android 2 spinnerChoosing the number of seconds on a hardware phone.
You'll also need to register the new Activity by adding this line to AndroidManifest.xml:
Finally, then, we need something to handle the Intent back in CountdownActivity; this is what the onActivityResult()method is for:
private int countdownSeconds = 10;  // default value of 10 secs
[ .... ]
protected void onActivityResult(int requestCode, int resultCode, Intent i) {
super.onActivityResult(requestCode, resultCode, i);
if (resultCode == RESULT_CANCELED) {
return;
}
assert resultCode == RESULT_OK;
switch(requestCode) {
case SET_TIME_REQUEST_ID:
Bundle extras = i.getExtras();
countdownSeconds = extras.getInt(SET_TIME_KEY);
countdownDisplay.setText(Long.toString(countdownSeconds));
break;
default:
// do nothing; we don't expect any other results
}
}
}
Check for RESULT_CANCELLED first, as this will be the same for any returning Activity, and you will always ignore it and return. The assertstatement makes it clear that beyond this point, the result is assumed to be OK. If any other value is returned, the method will throw an error. The number of seconds is stored in a class variable, and displayed to the user.
Finally, to make the timer do the right thing, we need to change one line in the start button's onClick()method:
showTimer(countdownSeconds * MILLIS_PER_SECOND)
If you run the app on an emulator now, you should be able to pick a time and watch it count down.

Installing on a phone

You can hook your phone up via USB and run on that rather than on the software emulator. For some uses (e.g. the accelerometer and the GPS) it is better to test it on a phone, rather than in the emulator. Just plug in the USB cable, and turn on USB Debugging in Settings / Developer Options. When you hit Run in Eclipse, you'll get the option to run it on your phone. If you want to be able to run your app in non-debugging mode, check out the Android info on publishing.
This app could obviously still use some improvement. Perhaps a start/stop button (check out the CountDownTimer API); a button rather than a menu item to set the time; a ringtone to go off when the alarm finishes; a different form of spinner; some graphical design improvements... Play around and see where you can take the code from here!

Android Programming for Beginners: User Menus

$
0
0
http://www.linux.com/learn/docs/690708-android-programming-multiple-choice-lists


In our previous Android coding tutorials (part 1, part 2), you set up your dev environment, built a basic app, and then improved it by adding a menu and a second Activity. In this tutorial we're going to look at a very handy part of the Android API: ListView, ListActivity, and the associated methods which give you an easy way to show the user a list and then act when they click a list item.

Creating a ListView

A very common pattern in an Android activity is showing a list of items for the user to select from. The Android API provides the ListView and ListActivity classes to help out with this. Carrying on with the Countdown app from previous tutorials, we'll list a few sample countdown times for the user to select from to set the timer.
If all you want is a List, ListActivity will set your View up for you automatically; no need to write any XML at all. So onCreate()can be very simple:
public class CountdownActivity extends ListActivity {
public void onCreate(Bundle savedInstanceState) {
super.onCreate(savedInstanceState);

Integer[] values = new Integer[] { 5, 10, 15, 20, 25, 30, 45, 60 };
ArrayAdapter adapter =
new ArrayAdapter(this, android.R.layout.simple_list_item_1,
values);
setListAdapter(adapter);
}
}
CountdownActivity now extends ListActivity. ListActivity does a lot of the preparation work for you, so to show a list, you just need to create an array of values to show, hook it up to an ArrayAdapter, and set the ArrayAdapter as the ListActivity's ListAdapter. The ArrayAdapter has three parameters:
  1. The current context (this);
  2. The layout resource defining how each array element should be displayed;
  3. The array itself (values).
For the layout resource, we're use a standard Android resource, android.R.layout.simple_list_item_1. But you could create your own, or use another of the standard layout items (of which more later). You can also take a look at the XML of the standard resources.
The problem with this layout is that it only shows a list. We want to be able to see the countdown and the start button as well. This means setting up our own XML layout, rather than relying on ListActivity to generate its own layout. Add this to your XML, below the TextView and the Button:

It's important that the ListView should have the ID @android:id/list. This is what enables the ListActivity to do its magic without you explicitly setting up the List.
android 3 listchoice
Now go back to CountdownActivity.onCreate(), and put your previous display and button setup code back in, after the ListView setup:
public void onCreate(Bundle savedInstanceState) {
super.onCreate(savedInstanceState);

Integer[] values .... etc ...
[ ... ]
setListAdapter(adapter);
setContentView(R.layout.activity_main);
countdownDisplay = (TextView) findViewById(R.id.time_display_box);
Button startButton = (Button) findViewById(R.id.startbutton);
[ .... etc .... ]
}
Again, it's important that you set up the ListView first, before setContentView(), or it won't work properly. Recompile and run, and you'll see the list appear below the text and button. What you won't see, though, is anything happening when you click the list elements. The next section will tackle that problem.
One final note: you can also set up an empty element in the layout, which will display if and only if the ListView is empty. Add this to your XML:

(You'll need to set up the string value in res/values/strings.xml, too). Now replace the array declaration line in CountdownActivity.onCreate()with this one:
Integer[] values = new Integer[] { };
Compile and run, and you'll see the empty text displayed, and no list. Put the array declaration back how it was, compile and run again, and the list shows, but no text. In our app this isn't particularly useful, but if you were populating the array from elsewhere in your code, it's a neat trick to have available.

Clicking on List elements

Now we have the List set up, we need to make it do something when you click on a list element. Specifically, it should set the countdown seconds to the new value, and change the display. Happily, Android has a straightforward API for this, too:
ListView list = getListView();
list.setOnItemClickListener(new OnItemClickListener() {
public void onItemClick(AdapterView parent, View view, int position,
long id ) {
countdownSeconds = (Integer) getListAdapter().getItem(position);
countdownDisplay.setText(Long.toString(countdownSeconds));
}
});
This is all pretty self-explanatory! We grab the ListView, set its OnItemClickListener, and create an onItemClick() method for the Listener. As you can see here, onItemClick()has access to the position in the List of the item you clicked on. So we can grab the ListAdapter, get the item from that position, and then cast the value to an Integer. Save and run, and you have a list of values to set your timer.

Changing the List's appearance

Earlier, we mentioned the other standard layouts available. If you switch simple_list_item_1 to simple_list_item_single_choice, and rerun your code, you'll see that you get a selection indicator next to your list items. However, when you click it, the countdown value changes, but the selection indicator doesn't do anything. To make this work, you need to change your ListView, too. Add this attribute in your XML:

Run it again, and the selection indicator does its job. If you were using a ListActivity without an XML file, you could do this with a line of code in your app:
getListView().setChoiceMode(ListView.CHOICE_MODE_SINGLE); 

Conclusion

There are lots of situations in apps where you might want to show the user a list. ListView and ListActivity make that very easy, and as shown just above, there are plenty of ways to improve the UI experience. You could also look at providing a context menu (in these tutorials we've only used the options menu so far) when the user long-clicks on a list item. Or you could look at some form of back-end data storage, and allow the user to add and edit their own list items, so they have a list of countdown times that they regularly use. As ever, keep playing with the code and see where it takes you!
For more Android programming training resources, please visit the Linux training website.

9 of the Best Free PHP Books

$
0
0
http://www.linuxlinks.com/article/20130119004851789/9oftheBestFreePHPBooks-Part1.html


Learning the PHP: Hypertext Preprocessor (PHP) programming language from scratch can be an arduous affair. Fortunately, budding developers that want to code in this language have a good range of introductory texts available to read, both in-print and to download. There are also many quality books that help programmers that have reached an intermediate level deepen their understanding of the language.
PHP has been at the helm of the web for many years. It is an extremely popular, interpreted scripting language that is ideally suited for web development. This language powers millions of web sites on the net and is extremely well supported by its user community. It is released under a non-copyleft free software license / open source license. PHP can be deployed on most Web servers and also as a standalone shell on almost all operating systems and platforms.
The word "Preprocessor" means that PHP makes changes before the HTML page is created. The code is executed on the server, generating HTML which is then sent to the client. PHP therefore enables a static webpage to become dynamic. The language is dynamically typed and easy to use. PHP comes with many extensions offering all kinds of functionality from system operations to numerical processing. One of the reasons why PHP is so popular is that it is simple to learn for a newcomer to the language, but provides advanced features for professional developers. Other reasons for its popularity include its embedded relationship with HTML, it provides a good mix of performance and flexibility to developers, has a relatively shallow learning curve, easy to debug and good performance.
The focus of this article is to select some of the finest PHP books which are available to download for free. Many of the books featured here can also be freely distributed to others.
To cater for all tastes, we have chosen a good range of books, encompassing general introductions to PHP, as well as books that will help you to effectively use the many advanced features of PHP. All of the texts here come with our strongest recommendation. So get reading (and downloading).
1. PHP Cookbook
PHP Cookbook
Websitecommons.oreilly.com/wiki/index.php/PHP_Cookbook
AuthorDavid Sklar, Adam Trachtenberg
FormatHTML
Pages632
The PHP Cookbook is a collection of problems, solutions, and practical examples for PHP programmers. The book contains a unique and extensive collection of best practices for everyday PHP programming dilemmas. It contains over 250 recipes, ranging from simple tasks to entire programs that demonstrate complex tasks, such as printing HTML tables and generating bar charts -- a treasure trove of useful code for PHP programmers, from novices to advanced practitioners.
Chapters cover:
  • Strings - PHP strings differ from C strings in that they are binary-safe (i.e., they can contain null bytes) and can grow and shrink on demand
  • Numbers - integers and floating-point numbers
  • Dates and Times - looks at the mktime, date functions
  • Arrays - lists: lists of people, lists of sizes, lists of books. To store a group of related items in a variable, use an array
  • Variables - they are the core of what makes computer programs powerful and flexible
  • Functions - help you create organized and reusable code
  • Classes and Objects - a class is a package containing two things: data and methods to access and modify that data; Objects play another role in PHP outside their traditional OO position
  • Web Basics - focuses on some web-specific concepts and organizational topics that will make your web programming stronger
  • Forms - seamless integration of form variables into your programs. It makes web programming smooth and simple, from web form to PHP code to HTML output
  • Database Access - PHP can interact with 17 different databases, some relational and some not. The relational databases it can talk to are DB++, FrontBase, Informix, Interbase, Ingres II, Microsoft SQL Server, mSQL, MySQL, Oracle, Ovrimos SQL Server, PostgreSQL, SESAM, and Sybase. The nonrelational databases it can talk to are dBase, filePro, HyperWave, and the DBM family of flat-file databases. It also has ODBC support
  • Web Automation - there are four ways to retrieve a remote URL in PHP
  • XML - with the help of a few extensions, PHP lets you read and write XML for every occasion
  • Regular Expressions - a powerful tool for matching and manipulating text
  • Encryption and Security - including obscuring data with encoding, verifying data with hashes, encrypting and decrypting data, and more
  • Graphics - with the assistance of the GD library, you can use PHP to create applications that use dynamic images to display stock quotes, reveal poll results, monitor system performance, and even create games
  • Internationalization and Localization - PHP can create applications that speak just about any language
  • Internet Services - covers sending mail including MIME mail, reading mail with IMAP or POP3, posting and reading messages to Usenet newsgroups, getting and putting files with FTP, looking up addresses with LDAP, using LDAP for user authentication, performing DNS lookups, checking if a host is alive, and getting information about a domain name
  • Files - PHP's interface for file I/O is similar to C's, although less complicated
  • Directories - PHP provides two ways to look in a directory to see what files it holds. The first way is to use opendir( ) to get a directory handle, readdir( ) to iterate through the files, and closedir( ) to close the directory handle. The second method is to use the directory class. Instantiate the class with dir( ), read each filename with the read( ) method, and close the directory with close( )
  • Client-Side PHP
  • PEAR - the PHP Extension and Application Repository, a collection of open source classes that work together. Developers can use PEAR classes to generate HTML, make SOAP requests, send MIME mail, and a variety of other common tasks
2. PHP 5 Power Programming
PHP 5 Power Programming
Websiteptgmedia.peasoncmg.com
AuthorAndi Gutmans, Stig Saether Bakken and Derick Rethans
FormatPDF
Pages720
In PHP 5 Power Programming, PHP 5's co-creator and two leading PHP developers show you how to make the most of PHP 5's industrial-strength enhancements in any project, no matter how large or complex.
Their unique insights and realistic examples illuminate PHP 5's new object model, powerful design patterns, improved XML Web services support, and much more. Whether you are creating web applications, extensions, packages, or shell scripts, or migrating PHP 4 code, here are high-powered solutions you will not find anywhere else.
Review PHP's syntax and master its object-oriented capabilities, from properties and methods to polymorphism, interfaces, and reflection.
The book enables users to:
  • Master the four most important design patterns for PHP development
  • Write powerful web applications: handle input, cookies, session extension, and more
  • Integrate with MySQL, SQLite, and other database engines
  • Provide efficient error handling that is transparent to your users
  • Leverage PHP 5's improved XML support including parsing, XSLT conversions, and more
  • Build XML-based web services with XML-RPC and SOAP
  • Make the most of PEAR: work with the repository, use key packages, and create your own
  • Upgrade PHP 4 code to PHP 5, compatibility issues, techniques, and practical workarounds
  • Improve script performance: tips and tools for PHP optimization
  • Use PHP extensions to handle files/streams, regular expressions, dates/times, and graphics
  • Create original extensions and shell scripts
3. PHP Reference: Beginner to Intermediate PHP5
PHP Reference Book
Websitewww.phpreferencebook.com
AuthorMario Lurig
FormatPDF, ePub, HTML
Pages163
PHP Reference Book: Beginner to Intermediate PHP5 is a collection of over 250 PHP functions with clear explanations in language anyone can understand, followed with as many examples as it takes to understand what the function does and how it works. One of the best PHP books to keep around as a PHP reference.
This PHP reference includes numerous additional tips, the basics of PHP, MySQL query examples, regular expressions syntax, and two indexes to help you find information faster: a common language index and a function index.
Topics include:
  • Operators
  • Control Structures
  • Global Variables
  • Variable Functions
  • String Functions
  • Array Functions
  • Date/Time Functions
  • Mathematical Functions
  • MySQL Functions
  • Directory & File System Functions
  • Output Control (Output Buffer)
  • Sessions
  • Regular Expressions
This book is licensed under the Creative Commons Attribution-NonCommercial-ShareAlike 2.0 License.

4. The Underground PHP and Oracle Manual
The Underground PHP and Oracle Manual
Websitewww.oracle.com
AuthorChristopher Jones, Alison Holloway, and many contributors
FormatPDF
Pages362
The Underground PHP and Oracle Manual is written for PHP programmers developing applications for the Oracle Database. It shows programmers how to use PHP with Oracle, and provides the fundamental building blocks needed to create high-performance PHP Oracle Web applications.
Topics covered:
  • Getting Started With PHP - provides a very brief overview of the PHP language
  • PHP Oracle Extensions - covers OCI8 (PHP's main Oracle extension) and PDO_OCI driver for the PHP Data Object extension
  • Installing Oracle Database 11g Express Edition - contains an overview of, and installation instructions for, Oracle Database 11g Express Edition for Linux and Windows
  • SQL with Oracle Database - contains an overview of some SQL*Plus, Oracle Application Express and Oracle SQL Developer features you can use to perform database development
  • Netbeans IDE for PHP - gives a high level overview of the NetBeans IDE - this provides tools to make PHP development productive and effective
  • Installing Apache HTTP Server - gives you the steps needed to install and configure the Apache HTTP Server for use with PHP
  • Installing and Configuring PHP - discusses the main ways of installing PHP on Linux and Windows
  • Installing PHP and Apache on Oracle Solaris 11.1
  • Connecting to Oracle Using OCI8 - covers connecting to an Oracle database from your PHP application, showing the forms of Oracle connection and how to tune them
  • Executing SQL Statements With OCI8 - discusses using SQL statements with the PHP OCI8 extension. It covers statement execution, the OCI8 functions available, handling transactions, tuning queries, and some useful tips and tricks
  • Using PL/SQL with OCI8 - PL/SQL is Oracle’s procedural language extension to SQL
  • Using Large Objects in OCI8 - Oracle Character Large Object (CLOB) and Binary Large Object (BLOB) types can be used for very large amounts of data. They can be used for table columns and as PL/SQL variables
  • Using XML with Oracle and PHP - covers the basics of using XML data with Oracle and PHP. It also shows how to access data over HTTP directly from the database
  • PHP Connection Pooling and High Availability - discusses connection pooling and how it applies to connection management
  • PHP and TimesTen In-Memory Database - TimesTen is an in-memory database that can be used standalone or as a cache to Oracle database
  • PHP and Oracle Tuxedo - shows using Oracle Tuxedo 11.1 with PHP applications running under Apache. HTTP requests are forwarded from Apache to mod_tuxedo which then invokes the PHP script engine. Oracle Tuxedo is a transaction oriented application server which can be used for developing and deploying applications written in PHP, Python and Ruby, as well as in the traditional languages C, C++, and COBOL
  • Globalization - discusses global application development in a PHP and Oracle Database environment. It addresses the basic tasks associated with developing and deploying global Internet applications, including developing locale awareness, constructing HTML content in the user-preferred language, and presenting data following the cultural conventions of the locale of the user
  • Testing PHP and the OCI8 Extension - discusses running the PHP test suite on Linux. The PHP source code includes command-line tests for all the core functionality and extensions
The book has been updated for Oracle Database Express Edition 11g Release 2. It is not a complete PHP syntax or Oracle SQL guide.
5. Symfony - The Book
Symfony - The Book
Websitesymfony.com/doc/current/book/index.html
AuthorSensioLabs
FormatPDF
Pages242
Symfony is a web application framework written in PHP that follows the model–view–controller (MVC) paradigm.
Topics covered include:
  • Symfony2 and HTTP Fundamentals
  • Symfony2 versus Flat PHP
  • Installing and Configuring Symfony
  • Creating Pages in Symfony2 - create a route, create a controller
  • Controller - a PHP function you create that takes information from the HTTP request and constructs and returns an HTTP response
  • Routing - the Symfony2 router lets you define creative URLs that you map to different areas of your application
  • Creating and using Templates - learn how to write powerful templates that can be used to return content to the user, populate email bodies, and more
  • Databases and Doctrine - learn the basic philosophy behind Doctrine and see how easy working with a database can be. Doctrine is a library whose sole goal is to give you powerful tools to make this easy
  • Databases and Propel - Propel is a free, open-source (MIT) object-relational mapping toolkit written in PHP
  • Testing - integrates with an independent library - called PHPUnit - to give a rich testing framework
  • Validation - Symfony2 ships with a Validator component that makes this task easy and transparent. This component is based on the JSR303 Bean Validation specification
  • Forms - build a complex form from the ground-up, learning the most important features of the form library along the way
  • Security - Symfony's security component is available as a standalone PHP library for use inside any PHP project
  • HTTP Cache - The Symfony2 cache system relies on the simplicity and power of the HTTP cache as defined in the HTTP specification
  • Translations - learn how to prepare an application to support multiple locales and then how to create translations for multiple locales
  • Service Container - this chapter is about a special PHP object in Symfony2 that helps you instantiate, organize and retrieve the many objects of your application
  • Performance - explore many of the most common and powerful ways to make your Symfony application even faster
  • Internals - an in-depth explanation of the Symfony2 internals
  • The Symfony2 Stable API - a subset of all Symfony2 published public methods (components and core bundles)
This book is licensed under the Attribution-Share Alike 3.0 Unported license.
6. PHP Essentials
PHP Essentials
Websitewww.techotopia.com/index.pho/PHP_Essentials
AuthorNeil Smyth
FormatHTML
Pages-
This online e-book covers all aspects of PHP programming. It begins with a brief history of PHP, then gives an overview of PHP, and why it is so useful to web programmers. Subsequent chapters cover all areas of PHP in detail: the basics of the language, file and filesystem handling, object oriented programming, MySQL and SQLite database access, handling of HTML forms, using cookies and PHP sessions. All chapters are accompanied by real world examples.
Topics include:
  • The History of PHP
  • An Overview of PHP - a high level look at PHP and provide a basic understanding of what it is, what is does and how it does it
  • Creating a Simple PHP Script - construct the most basic of PHP examples, and in so doing the author takes two approaches to creating PHP powered web content: embedding PHP into an HTML page, and embed the HTML into the PHP
  • Commenting PHP Code - involves writing notes alongside the code to describe what the code does and how it works
  • An Introduction to PHP Variables - covers naming and creating a variable in PHP, assigning a value to a PHP variable, accessing PHP variable values, changing the type of a PHP variable, and checking whether a variable is set
  • Understanding PHP Variable Types - looks at the PHP integer, string, float and boolean variable types
  • PHP Constants - the opposite of a variable in that once it has been defined it cannot be changed
  • PHP Operators - enable us to perform tasks on variables and values such as assign, multiply, add, subtract and concatenate them
  • PHP Flow Control and Looping - explores conditional statements, looping statements, and switch statements and creates some examples that show how to implement these mechanisms
  • PHP Functions
  • PHP Arrays - provides a way to group together many variables such that they can be referenced and manipulated using a single variable
  • Working with Strings and Text in PHP - explores a number of the functions and techniques provided by PHP to enable you, as a web developer, to perform tasks such as changing the case of a string, replacing one part of a piece of text with another piece of text, searching text and much more
  • PHP, Filesystems and File I/O - covers all aspects of interacting with files and the filesystem
  • Working with Directories in PHP - work with file system directories
  • An Overview of HTML Forms - provides a basic grounding of HTML forms before moving on to the more PHP specific areas of building a form
  • PHP and HTML Forms - create a simple HTML form to gather information from the user and then create a PHP script to process that data once it has been submitted to the server
  • PHP and Cookies - Creating, Reading and Writing - looks at the use of cookies to maintain state, and the use of PHP sessions as an alternative to the use of cookies. It also provides an overview of the difference between cookies and PHP sessions
  • Understanding PHP Sessions - explores the concept of PHP sessions in more detail and provide some examples of how to create and use sessions
  • PHP Object Oriented Programming - introduces the basic concepts involved in object oriented programming and explains the concept as it relates to PHP development
  • Using PHP with MySQL - how to access information stored in a MySQL database from a PHP script and present that data to a user's web browser
  • PHP and SQLite - SQLite is an embedded database that is bundled with PHP starting with PHP 5 and implements a large subset of the SQL 92 standard
7. Practical PHP Programming
PracticalPHPProgramming
Websitewww.tuxradar.com/practicalphp
AuthorPaul Hudson
FormatHTML
Pages-
Practical PHP Programming is a concise, starting resource for individuals that want to learn PHP programming. It assumes no PHP programming at all.
The book contains lots of information for newcomers as well as information on advanced functionality in PHP for veterans. It includes information on advanced features such as IMAP, XML and Sockets, as well as tips and tricks on how to program effectively in PHP.
Topics covered include:
  • Simple variables and operators
    • Types of data that is availabe
    • References, typecasting, and variable variables
    • Script variables, pre-set-variables, script contstants, and pre-set constants
    • Operators such as plus, minus, multiply, and divide
  • Functions:
    • Working with date and time
    • Mathematical functions
    • String manipulation
    • Creating data hashes
    • Regular expressions
    • Extension handling
    • Writing your own functions
    • Recursive, variable, and callback functions
  • Arrays:
    • Reading arrays
    • Manipulating arrays
    • Multidimensional arrays (arrays of arrays)
    • Saving arrays
  • Objects:
    • Objects and classes defined
    • Class inheritance
    • Access control
    • Runtime type information
    • Abstract and final properties and functions
    • Constructors and destructors
    • Magic functions
  • HTML Forms
    • Form design using HTML
    • Sending and receiving form data with PHP
    • Splitting forms across pages
    • Validating input
  • Files:
    • Reading and writing files
    • Temporary files
    • How to make a counter
    • Handling file uploads
    • File permissions
  • Databases:
    • What makes a database
    • What databases are available
    • SQL commands using MySQL
    • Connecting to MySQL through PHP
    • Using PEAR::DB for database abstraction
    • SQLite for systems without a database system
    • Normalisation and table joins
    • Table design considerations
    • Persistent connections and transactions
  • Cookies and Sessions:
    • How cookies and sessions compare
    • Which to use and when
    • How to use sessions
    • Using a database to store your sessions
    • Storing complex objects
  • Multimedia:
    • The multimedia formats that are available and their advantages
    • Creating basic image formats
    • Working with the rich-text format (RTF)
    • Creating portable document format (PDF) files
    • Working with the Shockwave Flash (SWF) format
  • XML & XSLT:
    • Standard XML manipulation
    • "SimpleXML" - the fast and easy way to use XML
    • XSL and transforming XML
  • Output Buffering:
    • When to use output buffering
    • Manipulating multiple buffers
    • Incremental data flushing
    • Output compression
  • Java and COM:
    • How to use COM
    • Finding out what components you have installed
    • Advanced COM - controlling Internet Explorer, and even writing VBScript
    • Distributed COM: COM over a network
    • Running Java in your scripts
    • Creating interfaces with Swing
  • Networks:
    • What sockets are, and basic socket use
    • How to use sockets outside of HTTP
    • How to create a basic server using PHP
    • Creating a web server
    • Helpful network-related functions
    • HTTP-specific and FTP-specific functions
    • The Curl library
  • Miscellaneous topics
  • Security concerns: 
    • Why register_globals matters
    • How to program secure PHP
    • Considerations for people who host others' web sites
    • Safe mode PHP
    • Encryption, simple and advanced
  • Performance:
    • Increasing performance by optimising your scripts
    • Increasing performance by optimising your SQL
    • Increasing performance by optimising your server
    • Caching PHP scripts
    • PHP the CGI vs. PHP the Apache module
  • Writing PHP:
    • How to analyse your system requirements
    • Using a development tool to help you code
    • File layout schemes and group development
    • Documentation and testing
    • Distribution your code and licensing your work
    • How to debug your scripts
    • Troubleshooting hints and tips
    • Where to get help if you still have a problem
  • Writing extensions: 
    • When to write a custom extension
    • How to design, create, and test your extension
  • Alternative PHP uses: 
    • How to use PHP to write shell scripts
    • How the CLI SAPI differs from "normal" PHP
    • Interacting with the dialog program to create command-line user interfaces
    • Using GTK+ to create graphical user interfaces
    • Using Glade to automatically generate GTK+ GUIs
    • Making text-based games with PHP
    • Making graphical games with PHP and SDL
    • Creating your own miniature language with PHP
  • Practical PHP
  • Bringing it to a close
  • Answers to Exercises
  • The future of PHP
8. Zend Framework: Surviving the Deep End
Zend Framework: Surviving the Deep End
Websitesurvivethedeepend.com
AuthorPádraic Brady
FormatHTML
Pages-
Zend Framework: Surviving The Deep End is written in the form of a detailed tutorial following a step by step approach to building a real life application.
The book walks you through the process of building a complete Web application with the Zend Framework, starting with the basics and then adding in more complex elements, such as data pagination and sorting, user authentication, exception handling, localization, and Web services. Debugging and performance optimization are also covered in this fast-paced tutorial.
The book was written to guide readers through the metaphorical "Deep End". It is the place you find yourself in when you complete a few tutorials and scan through the Reference Guide, where you are buried in knowledge up to your neck but without a clue about how to bind it all together effectively into an application. This take on the Zend Framework offers a survival guide, boosting your understanding of the framework and how it all fits together by following the development of a single application from start to finish.
Topics include:
  • The Architecture of Zend Framework Applications
  • The Model
  • Installing the Zend Framework
  • A Not So Simple Hello World Tutorial
  • Standardise the Bootstrap Class with Zend_Application
  • Handling Application Errors
  • Developing a Blogging Application
  • Inplementing the Domain Model: Entries and Authors
  • Setting the Design with Zend_View, Zend_Layout, HTML 5 and Yahoo! User Interface Library
The text of this book is licensed under a Creative Commons Attribution-Non-Commercial-No Derivative Works 3.0.
9. Practical PHP Testing
Practical PHP Testing
Websitewww.giorgiosironi.com
AuthorGiorgio Sironi
FormatPDF
Pages61
Practical PHP Testing is targeted at PHP developers. It features articles published on the author's blog site, together with new content. The book includes code samples and TDD exercises.
Topics covered include:
  • PHPUnit usage - a unit testing software framework for the programming language PHP
  • Write clever tests
  • Assertions - declarations that must hold true for a test to be declared successful
  • Fixtures - write the code to set the world up in a known state and then return it to its original state when the test is complete
  • Annotations - a standard way to add metadata to code entities, such as classes or methods
  • Refactoring and Patterns - changing of complex and complicated programming codes into simple and confusion-less ones
  • Stubs - a piece of code used to stand in for some other programming functionality
  • Mocks -used in behavior verification
  • Command line options
  • The TDD theory - describes the fundamentals of Test-Driven Development and its benefits
  • Testing sqrt() - the PHP sqrt() function calculates the square root mathematical function on its argument
The ebook is licensed under a Creative Commons Attribution Noncommercial-Share Alike 3.0 License.       


Vert.x's journey teaches invaluable governance lessons

$
0
0
http://www.infoworld.com/d/open-source-software/fork-vmware-open-source-triumphs-again-211029


As the Vert.x community selects its future home, it offers a fascinating illustration of the role of governance


The community discussion of the Vert.x open source project was just starting when I wrote about it last week. Conducted entirely on the mailing list as a result of all the press the Vert.x dustup received, this group conversation has launched an educational parade of governance solutions.
I've had a deep interest in open source community governance for years; indeed, several years ago I sketched out a benchmark for comparing governance approaches. Community governance matters because when disputes arise it's important that every good-faith community participant has a right to join in the resolution. Many developers feel licensing and governance are a bureaucratic make-work nuisance imposed by an aging generation trying to retain control over software. But projects that neglect or ignore licensing and governance can discover too late how important it is.
[ Also on InfoWorld: Who controls Vert.x: Red Hat, VMware, or neither?. | Track the latest trends in open source with InfoWorld's Technology: Open Source newsletter. ]
Without shared ownership of concrete assets like copyrights and trademarks, as well as social assets (access right approvals, feature selection, and release management), times of crisis become opportunities for overprivileged community members to make self-serving fiat decisions at the expense of community members. The results can be forks or the departure of community members, and ironically those with control frequently find they lose more than they gain as the community evaporates.
The time to pick licenses and governance styles is early, before the arrival of existential crises, so the actions of Vert.x project leader Tim Fox in calling out the risk of covert corporate carve-ups are paying off. While some researchers are experimenting with automatic analysis of governance, the best way to compare and contrast today is to ask community members about their communities. It's worth tracing the path Vert.x has taken. Reading the thread will introduce you to the three main ideas the Vert.x community considered and illustrate some of the many governance choices available.
A community journey
Faced with the perception that VMware wanted to retain control at all costs, the first option the community considered was to create a fork and continue the existing approach independently. But it quickly became obvious that a fork was neither necessary nor helpful because VMware did not want to retain control of the project at all costs.
The next option considered was to run the project as it is now -- using GitHub as the host -- but trust concrete assets to a nonprofit foundation. Possible hosts for those assets included Software in the Public Interest (SPI), one of the oldest open source nonprofits, formed to host assets for the Debian project.
It gradually became apparent, however, that Vert.x needed a steward for more than just the concrete assets of the community. With two strong companies already involved -- Red Hat and VMware -- and the evident interest of more, the need for a guarantor of social assets became clear. Indeed, it was concern over who would have ultimate control over participation and contribution that lay behind Tim Fox's original posting. The conversation turned to understanding "full service" foundations, involving a governance methodology, a community philosophy, and concrete asset stewardship.


Both the Apache Software Foundation and the Eclipse Foundation were proposed early in the discussion, and much of the later discussion involved understanding the nature of these two foundations. Both are large communities with proven approaches, and they have much in common. Both have strong policies on ensuring cleanliness of the copyright provenance on all contributions, for example.
They differ in important ways, though. The deepest difference is their nonprofit type. Apache is a public-benefit nonprofit, registered with the IRS as such and able to accept tax-deductible donations. Eclipse is a member-benefit nonprofit; as such, its IRS registration does not allow tax deduction by donors.
Decision time
This difference goes beyond taxes to community ethos. Eclipse formally includes businesses in its governance and recognizes the affiliations of contributors, while Apache allows only contributors to engage in its governance and encourages hiding of affiliation.
In the end, it was probably this difference that settled the decision, and on Wednesday Tim Fox recommended that the community move to the Eclipse Foundation, saying, "I am not a huge fan of the ASF voting process, especially the veto, and the weaker notion of project leadership. I also think Eclipse is perhaps a little more 'business friendly' and that's going to be an important thing for Vert.x as we progress if we want to get a foothold in large enterprises."
Issues remain. Vert.x uses the permissive Apache License, and the Eclipse community will need to agree to an exception to its normal policy of using the copyleft Eclipse Public License. VMware will need to follow through on its commitment to donate the trademarks to Eclipse and satisfy its copyright provenance rules. Various members are concerned by the need to move the Git repository from GitHub to Eclipse, so contribution ownership tracking can be maintained. (GitHub does not offer this, although there's now a third-party solution.)
Hopefully these details will be sorted out. The whole experience has been educational, and I know many participants and readers have gleaned useful insights into the governance needs of a new open source community.
Viewing all 1409 articles
Browse latest View live