Quantcast
Channel: Sameh Attia
Viewing all 1407 articles
Browse latest View live

Evil Kali Access Point Red A Kali Linux Evil Wireless Access Point

$
0
0
http://www.offensive-security.com/kali-linux/kali-linux-evil-wireless-access-point

A few days ago, we had the opportunity to deploy a rogue access point that would steal user credentials using a fake, captive web portal, and provide MITM’d Internet services via 3G. We needed reliability and scalability in our environment as there would potentially be a large amount of, erm….”participants” in this wireless network. We were pretty happy with the result and quickly realized that we had created a new “Kali Linux recipe”. Or in other words, we could create a custom, bootable wireless evil access point image, which could do all sorts of wondrous things.

Required Hardware

  • We used a battery-powered Raspberry Pi for this project, however the instructions below will work on pretty much anything that can run Kali Linux and has 2 free USB ports – ARM and virtual environments included.
  • A supported USB wireless adapter; we used an old Netgear WNA1000 we had lying around.
  • A supported 3G modem; we found a TP-Link MA180 3.75G HSUPA USB Adapter in a local shop.

Simple Setup of DNS and DHCP

We ended up building our wireless access point using hostapd and dnsmasq using a relatively simple setup. We found that this gave the most reliable performance and was the easiest to configure. In addition, using dnsmasq allowed us to easily control spoofed DNS queries. We start by installing all our prerequisites:
apt-get install-y hostapd dnsmasq wireless-tools iw wvdial
Once everything is installed, we configure dnsmasq to serve DHCP and DNS on the wireless interface and then start the dnsmasq service.
sed-i's#^DAEMON_CONF=.*#DAEMON_CONF=/etc/hostapd/hostapd.conf#'/etc/init.d/hostapd

cat<<EOF >/etc/dnsmasq.conf
log-facility=/var/log/dnsmasq.log
#address=/#/10.0.0.1
#address=/google.com/10.0.0.1
interface=wlan0
dhcp-range=10.0.0.10,10.0.0.250,12h
dhcp-option=3,10.0.0.1
dhcp-option=6,10.0.0.1
#no-resolv
log-queries
EOF

service start dnsmasq

Setting up the 3G Connection

updated-new-mobile-3g
This part was surprisingly simple using the Gnome NetworkManager GUI interface. Adding a new 3G connection and going through the automated wizard got us online in a couple of minutes. Once connected, we saw our new ppp0 WAN interface, now providing us with Internet access. Alternatively, this setup can be performed at the command line using wvdial. Now that we have our WAN connection setup, let’s move on to setting up the wireless access point.
ppp-established

Setting up the Wireless Access Point

connect-to-me
Setting up the access point is a breeze using hostapd. We configure an IP for the wireless interface, and configure iptables rules for NAT. Then we quickly configure the hostapd service to use our wireless interface to run an access point with the SSID “FreeWifi”. Once the service is started a wireless network called “FeeWifi” should show up. Anyone connecting to this network would be routed thorough our Kali box, out to the internet over 3g.
ifconfig wlan0 up
ifconfig wlan0 10.0.0.1/24

iptables -t nat -F
iptables -F
iptables -t nat -A POSTROUTING -o ppp0 -j MASQUERADE
iptables -A FORWARD -i wlan0 -o ppp0 -j ACCEPT
echo'1'>/proc/sys/net/ipv4/ip_forward

cat<<EOF >/etc/hostapd/hostapd.conf
interface=wlan0
driver=nl80211
ssid=FreeWifi
channel=1
# Yes, we support the Karma attack.
#enable_karma=1
EOF

service start hostapd

Bootable Kali Access Point ISO Recipe

Using live-build, we can create a custom Kali Linux ISO image that will boot up into a “rogue AP”. Certain elements such as the wireless and 3G interface names (wlan0, ppp0, etc) would be pre-configured during the live-build process. We’ve gone ahead and set up a Kali Recipe which worked perfectly in our VMware environment, with both the wireless card and 3G modem connected to the VM at boot time.

Doing the Evil Stuff

There’s a whole bunch of evil stuff to be done once we’re in the middle of communications. MITM tools like responder, evilgrade and sslsplit come to mind. In our case, selectively spoofing DNS queries and redirecting users to our own phishing site was sufficient for our task. Lastly, we’ve added the Karma patch to our hostapd package, which causes the AP to probe requests not just for itself but for any ESSID requested. This allows the AP to act as a lure to draw in any clients probing for known networks. Let the games begin!

Looking for more cool stuff? Kali linux Dojo

Looking for more cool stuff to do with Kali Linux? Want to get some mind bending hands-on experience with the distribution? You should check out our Kali Linux Dojo!

How to speed read on Linux

$
0
0
http://xmodulo.com/2014/04/speed-read-linux.html

Have you heard of speed reading? Me neither. At least not before a startup called Spritz raised 3.5 Millions in seed money to develop an API that supposedly allows a user to read 1,000 words per minute.
The concept of speed reading is simple: slice a text into individual short segments, like a word or two, and flash these segments very quickly. The reader's eyes do not have to move at all during the process, sparing the time we normally need to skim a page. As this technology is brand new, there is no way to tell if your brain will explode or implode above that speed. No, apparently it is safe to use as your brain is fast enough to process the information. The API should become very handy once people get accustomed to it. Now if you are as excited as I am for this, but don't want to wait or prefer to get used to it now, good news: you can already try speed reading on your favorite OS today.
The following are three tools that allow you to speed read on Linux.

1. Spread0r


Based on Perl and Gtk2, spread0r (previously called Gritz) is a GPL software that takes a text file as an input, and then flashes you the content at a speed up to 1,000 words per minute. You should however try something slower at first, just to get the hang of it. The interface is simple, nearly minimalist: launching the lecture, choosing the speed, quitting, etc. The software could use a bit of improvement. I would suggest starting by taking something else than just a text file as input (you can convert yourself though), and maybe also a “no-distract” mode? Anyway, it is still very cool.
You can try spread0r by downloading the sources from github and simply launching the "spread0r.pl" file. Note that you will need Gtk2 and Perl installed on your system first.
$ sudo apt-get install libgtk2-perl (for Debian/Ubuntu)
$ sudo pacman -S gtk2-perl (for Archlinux)
$ sudo yum install perl-gtk2 (for Fedora)

2. Spreed


Aside from ebooks and word documents, the stuff I read the most on my computer are Internet articles (yes this is meta). However, it would really be a chore if I had to copy and paste what I want to read into a text editor, save it as a txt file, and then launch it in Spread0r. Hopefully, the Chrome extension Spreed is here to cope with that. After installing and enabling Spreed on your Chrome browser, you can just select the text you want to speed read, right-click on it, and choose "Spreed selected text." It will open a new window in which the words will be flashed to you. I like the integration with Chrome, and the level of thought which was put into the extension. You can, for example, select the color set of the windows, the number of words at a time, the font size, launch the lecture and pause it via the space bar, and even go above 4,000 words per minute (that's not speed reading anymore though, it's just staring).

3. Squirt


If you liked the idea of speed reading from within your browser, but do not have Chrome, or do not like the idea of an extension, the solution is the bookmarklet Squirt. Despite the name which seems to come out of nowhere, Squirt is currently my favorite speed reading utility. It is efficient and easy to use. Add it from here by "drag'n'dropping" the big blue button into your favorite bar. You can then call it from any web page, after selecting some text or not, and a fancy white panel will overlay the page. You can control the lecture with intuitive shortcuts. The interface is beautiful, and it can also go above 4,000 words per minute.

Bonus: Zethos

If none of the options mentioned so far pleases you, and you are a coder, then you will be happy to know that there exist a free and open source JS code called Zethos that you will be able to use in your own speed reading apps. You can check it out on github, and bravo to its creator.
In conclusion, you have now no excuse to ignore speed reading on your favorite OS. Just try not to get your brain fried. Which one of these solutions do you prefer? Or do you have another one not mentioned here? Also do you really think that speed reading can develop in the future? Let us know in the comment.

How to Rescue a Non-booting GRUB 2 on Linux

$
0
0
http://www.linux.com/learn/tutorials/776643-how-to-rescue-a-non-booting-grub-2-on-linux

grub command shell
Figure 1: GRUB 2 menu with cool Apollo 17 background.
Once upon a time we had legacy GRUB, the Grand Unified Linux Bootloader version 0.97. Legacy GRUB had many virtues, but it became old and its developers did yearn for more functionality, and thus did GRUB 2 come into the world. GRUB 2 is a major rewrite with several significant differences. It boots removable media, and can be configured with an option to enter your system BIOS. It's more complicated to configure with all kinds of scripts to wade through, and instead of having a nice fairly simple /boot/grub/menu.lst file with all configurations in one place, the default is /boot/grub/grub.cfg. Which you don't edit directly, oh no, for this is not for mere humans to touch, but only other scripts. We lowly humans may edit /etc/default/grub, which controls mainly the appearance of the GRUB menu. We may also edit the scripts in /etc/grub.d/. These are the scripts that boot your operating systems, control external applications such as memtest and os_prober, and theming./boot/grub/grub.cfg is built from /etc/default/grub and /etc/grub.d/* when you run the update-grub command, which you must run every time you make changes.
The good news is that the update-grub script is reliable for finding kernels, boot files, and adding all operating systems to your GRUB boot menu, so you don't have to do it manually.
We're going to learn how to fix two of the more common failures. When you boot up your system and it stops at the grub> prompt, that is the full GRUB 2 command shell. That means GRUB 2 started normally and loaded the normal.mod module (and other modules which are located in /boot/grub/[arch]/), but it didn't find your grub.cfg file. If you see grub rescue> that means it couldn't find normal.mod, so it probably couldn't find any of your boot files.
How does this happen? The kernel might have changed drive assignments or you moved your hard drives, you changed some partitions, or installed a new operating system and moved things around. In these scenarios your boot files are still there, but GRUB can't find them. So you can look for your boot files at the GRUB prompt, set their locations, and then boot your system and fix your GRUB configuration.

GRUB 2 Command Shell

The GRUB 2 command shell is just as powerful as the shell in legacy GRUB. You can use it to discover boot images, kernels, and root filesystems. In fact, it gives you complete access to all filesystems on the local machine regardless of permissions or other protections. Which some might consider a security hole, but you know the old Unix dictum: whoever has physical access to the machine owns it.
When you're at the grub> prompt, you have a lot of functionality similar to any command shell such as history and tab-completion. The grub rescue> mode is more limited, with no history and no tab-completion.
If you are practicing on a functioning system, press C when your GRUB boot menu appears to open the GRUB command shell. You can stop the bootup countdown by scrolling up and down your menu entries with the arrow keys. It is safe to experiment at the GRUB command line because nothing you do there is permanent. If you are already staring at the grub> or grub rescue>prompt then you're ready to rock.
The next few commands work with both grub> and grub rescue>. The first command you should run invokes the pager, for paging long command outputs:
grub> set pager=1
There must be no spaces on either side of the equals sign. Now let's do a little exploring. Type ls to list all partitions that GRUB sees:
grub> ls
(hd0) (hd0,msdos2) (hd0,msdos1)
What's all this msdos stuff? That means this system has the old-style MS-DOS partition table, rather than the shiny new Globally Unique Identifiers partition table (GPT). (See Using the New GUID Partition Table in Linux (Goodbye Ancient MBR). If you're running GPT it will say (hd0,gpt1). Now let's snoop. Use the ls command to see what files are on your system:
grub> ls (hd0,1)/
lost+found/ bin/ boot/ cdrom/ dev/ etc/ home/ lib/
lib64/ media/ mnt/ opt/ proc/ root/ run/ sbin/
srv/ sys/ tmp/ usr/ var/ vmlinuz vmlinuz.old
initrd.img initrd.img.old
Hurrah, we have found the root filesystem. You can omit the msdos and gpt labels. If you leave off the slash it will print information about the partition. You can read any file on the system with the cat command:
grub> cat (hd0,1)/etc/issue
Ubuntu 14.04 LTS \n \l
Reading /etc/issue could be useful on a multi-boot system for identifying your various Linuxes.

Booting From grub>

This is how to set the boot files and boot the system from the grub> prompt. We know from running the ls command that there is a Linux root filesystem on (hd0,1), and you can keep searching until you verify where /boot/grub is. Then run these commands, using your own root partition, kernel, and initrd image:
grub> set root=(hd0,1)
grub> linux /boot/vmlinuz-3.13.0-29-generic root=/dev/sda1
grub> initrd /boot/initrd.img-3.13.0-29-generic
grub> boot
The first line sets the partition that the root filesystem is on. The second line tells GRUB the location of the kernel you want to use. Start typing /boot/vmli, and then use tab-completion to fill in the rest. Type root=/dev/sdX to set the location of the root filesystem. Yes, this seems redundant, but if you leave this out you'll get a kernel panic. How do you know the correct partition? hd0,1 = /dev/sda1. hd1,1 = /dev/sdb1. hd3,2 = /dev/sdd2. I think you can extrapolate the rest.
The third line sets the initrd file, which must be the same version number as the kernel.
The fourth line boots your system.
On some Linux systems the current kernels and initrds are symlinked into the top level of the root filesystem:
$ ls -l /
vmlinuz -> boot/vmlinuz-3.13.0-29-generic
initrd.img -> boot/initrd.img-3.13.0-29-generic
So you could boot from grub> like this:
grub> set root=(hd0,1)
grub> linux /vmlinuz root=/dev/sda1
grub> initrd /initrd.img
grub> boot

Booting From grub-rescue>

If you're in the GRUB rescue shell the commands are different, and you have to load the normal.mod andlinux.mod modules:
grub rescue> set prefix=(hd0,1)/boot/grub
grub rescue> set root=(hd0,1)
grub rescue> insmod normal
grub rescue> normal
grub rescue> insmod linux
grub rescue> linux /boot/vmlinuz-3.13.0-29-generic root=/dev/sda1
grub rescue> initrd /boot/initrd.img-3.13.0-29-generic
grub rescue> boot
Tab-completion should start working after you load both modules.

Making Permanent Repairs

When you have successfully booted your system, run these commands to fix GRUB permanently:
# update-grub
Generating grub configuration file ...
Found background: /usr/share/images/grub/Apollo_17_The_Last_Moon_Shot_Edit1.tga
Found background image: /usr/share/images/grub/Apollo_17_The_Last_Moon_Shot_Edit1.tga
Found linux image: /boot/vmlinuz-3.13.0-29-generic
Found initrd image: /boot/initrd.img-3.13.0-29-generic
Found linux image: /boot/vmlinuz-3.13.0-27-generic
Found initrd image: /boot/initrd.img-3.13.0-27-generic
Found linux image: /boot/vmlinuz-3.13.0-24-generic
Found initrd image: /boot/initrd.img-3.13.0-24-generic
Found memtest86+ image: /boot/memtest86+.elf
Found memtest86+ image: /boot/memtest86+.bin
done
# grub-install /dev/sda
Installing for i386-pc platform.
Installation finished. No error reported.
When you run grub-install remember you're installing it to the boot sector of your hard drive and not to a partition, so do not use a partition number like /dev/sda1.

But It Still Doesn't Work

If your system is so messed up that none of this works, try the Super GRUB2 live rescue disk. The official GNU GRUB Manual 2.00 should also be helpful.

10 Tips to Push Your Git Skills to the Next Level

$
0
0
http://www.sitepoint.com/10-tips-git-next-level

Recently we published a couple of tutorials to get you familiar with Git basics and using Git in a team environment. The commands that we discussed were about enough to help a developer survive in the Git world. In this post, we will try to explore how to manage your time effectively and make full use of the features that Git provides.
Note: Some commands in this article include part of the command in square brackets (e.g. git add -p [file_name]). In those examples, you would insert the necessary number, identifier, etc. without the square brackets.

1. Git Auto Completion

If you run Git commands through the command line, it’s a tiresome task to type in the commands manually every single time. To help with this, you can enable auto completion of Git commands within a few minutes.
To get the script, run the following in a Unix system:
1
2
cd ~
curl https://raw.github.com/git/git/master/contrib/completion/git-completion.bash -o ~/.git-completion.bash
Next, add the following lines to your ~/.bash_profile file:
1
2
3
if[ -f ~/.git-completion.bash ]; then
    . ~/.git-completion.bash
fi
Although I have mentioned this earlier, I can not stress it enough: If you want to use the features of Git fully, you should definitely shift to the command line interface!

2. Ignoring Files in Git

Are you tired of compiled files (like .pyc) appearing in your Git repository? Or are you so fed up that you have added them to Git? Look no further, there is a way through which you can tell Git to ignore certain files and directories altogether. Simply create a file with the name .gitignore and list the files and directories that you don’t want Git to track. You can make exceptions using the exclamation mark(!).
1
2
3
4
5
*.pyc
*.exe
my_db_config/
 
!main.pyc

3. Who Messed With My Code?

It’s the natural instinct of human beings to blame others when something goes wrong. If your production server is broke, it’s very easy to find out the culprit — just do a git blame. This command shows you the author of every line in a file, the commit that saw the last change in that line, and the timestamp of the commit.
1
git blame [file_name]
git blame demonstration
And in the screenshot below, you can see how this command would look on a bigger repository:
git blame on the ATutor repository

4. Review History of the Repository

We had a look at the use of git log in a previous tutorial, however, there are three options that you should know about.
  • --oneline– Compresses the information shown beside each commit to a reduced commit hash and the commit message, all shown in a single line.
  • --graph– This option draws a text-based graphical representation of the history on the left hand side of the output. It’s of no use if you are viewing the history for a single branch.
  • --all– Shows the history of all branches.
Here’s what a combination of the options looks like:
Use of git log with all, graph and oneline

5. Never Lose Track of a Commit

Let’s say you committed something you didn’t want to and ended up doing a hard reset to come back to your previous state. Later, you realize you lost some other information in the process and want to get it back, or at least view it. This is where git reflog can help.
A simple git log shows you the latest commit, its parent, its parent’s parent, and so on. However, git reflog is a list of commits that the head was pointed to. Remember that it’s local to your system; it’s not a part of your repository and not included in pushes or merges.
If I run git log, I get the commits that are a part of my repository:
Project history
However, a git reflog shows a commit (b1b0ee9HEAD@{4}) that was lost when I did a hard reset:
Git reflog

6. Staging Parts of a Changed File for a Commit

It is generally a good practice to make feature-based commits, that is, each commit must represent a feature or a bug fix. Consider what would happen if you fixed two bugs, or added multiple features without committing the changes. In such a situation situation, you could put the changes in a single commit. But there is a better way: Stage the files individually and commit them separately.
Let’s say you’ve made multiple changes to a single file and want them to appear in separate commits. In that case, we add files by prefixing -p to our add commands.
1
git add -p [file_name]
Let’s try to demonstrate the same. I have added three new lines to file_name and I want only the first and third lines to appear in my commit. Let’s see what a git diff shows us.
Changes in repo
And let’s see what happes when we prefix a -p to our add command.
Running add with -p
It seems that Git assumed that all the changes were a part of the same idea, thereby grouping it into a single hunk. You have the following options:
  • Enter y to stage that hunk
  • Enter n to not stage that hunk
  • Enter e to manually edit the hunk
  • Enter d to exit or go to the next file.
  • Enter s to split the hunk.
In our case, we definitely want to split it into smaller parts to selectively add some and ignore the rest.
Adding all hunks
As you can see, we have added the first and third lines and ignored the second. You can then view the status of the repository and make a commit.
Repository after selectively adding a file

7. Squash Multiple Commits

When you submit your code for review and create a pull request (which happens often in open source projects), you might be asked to make a change to your code before it’s accepted. You make the change, only to be asked to change it yet again in the next review. Before you know it, you have a few extra commits. Ideally, you could squash them into one using the rebase command.
1
git rebase -i HEAD~[number_of_commits]
If you want to squash the last two commits, the command that you run is the following.
1
git rebase -i HEAD~2
On running this command, you are taken to an interactive interface listing the commits and asking you which ones to squash. Ideally, you pick the latest commit and squash the old ones.
Git squash interactive
You are then asked to provide a commit message to the new commit. This process essentially re-writes your commit history.
Adding a commit message

8. Stash Uncommitted Changes

Let’s say you are working on a certain bug or a feature, and you are suddenly asked to demonstrate your work. Your current work is not complete enough to be committed, and you can’t give a demonstration at this stage (without reverting the changes). In such a situation, git stash comes to the rescue. Stash essentially takes all your changes and stores them for further use. To stash your changes, you simply run the following-
1
git stash
To check the list of stashes, you can run the following:
1
git stash list
Stash list
If you want to un-stash and recover the uncommitted changes, you apply the stash:
1
git stash apply
In the last screenshot, you can see that each stash has an indentifier, a unique number (although we have only one stash in this case). In case you want to apply only selective stashes, you add the specific identifier to the apply command:
1
git stash applystash@{2}
After un-stashing changes

9. Check for Lost Commits

Although reflog is one way of checking for lost commits, it’s not feasible in large repositories. That is when the fsck (file system check) command comes into play.
1
git fsck --lost-found
Git fsck results
Here you can see a lost commit. You can check the changes in the commit by running git show [commit_hash] or recover it by running git merge [commit_hash].
git fsck has an advantage over reflog. Let’s say you deleted a remote branch and then cloned the repository. With fsck you can search for and recover the deleted remote branch.

10. Cherry Pick

I have saved the most elegant Git command for the last. The cherry-pick command is by far my favorite Git command, because of its literal meaning as well as its utility!
In the simplest of terms, cherry-pick is picking a single commit from a different branch and merging it with your current one. If you are working in a parallel fashion on two or more branches, you might notice a bug that is present in all branches. If you solve it in one, you can cherry pick the commit into the other branches, without messing with other files or commits.
Let’s consider a scenario where we can apply this. I have two branches and I want to cherry-pick the commit b20fd14: Cleaned junk into another one.
Before cherry pick
I switch to the branch into which I want to cherry-pick the commit, and run the following:
1
git cherry-pick [commit_hash]
After cherry pick
Although we had a clean cherry-pick this time, you should know that this command can often lead to conflicts, so use it with care.

Conclusion

With this, we come to the end of our list of tips that I think can help you take your Git skills to a new level. Git is the best out there and it can accomplish anything you can imagine. Therefore, always try to challenge yourself with Git. Chances are, you will end up learning something new!

9 commands to check hard disk partitions and disk space on Linux

$
0
0
http://www.binarytides.com/linux-command-check-disk-partitions

In this post we are taking a look at some commands that can be used to check up the partitions on your system. The commands would check what partitions there are on each disk and other details like the total size, used up space and file system etc.


Commands like fdisk, sfdisk and cfdisk are general partitioning tools that can not only display the partition information, but also modify them.

1. fdisk

Fdisk is the most commonly used command to check the partitions on a disk. The fdisk command can display the partitions and details like file system type. However it does not report the size of each partitions.
$ sudo fdisk -l

Disk /dev/sda: 500.1 GB, 500107862016 bytes
255 heads, 63 sectors/track, 60801 cylinders, total 976773168 sectors
Units = sectors of 1 * 512 = 512 bytes
Sector size (logical/physical): 512 bytes / 512 bytes
I/O size (minimum/optimal): 512 bytes / 512 bytes
Disk identifier: 0x30093008

Device Boot Start End Blocks Id System
/dev/sda1 * 63 146801969 73400953+ 7 HPFS/NTFS/exFAT
/dev/sda2 146802031 976771071 414984520+ f W95 Ext'd (LBA)
/dev/sda5 146802033 351614654 102406311 7 HPFS/NTFS/exFAT
/dev/sda6 351614718 556427339 102406311 83 Linux
/dev/sda7 556429312 560427007 1998848 82 Linux swap / Solaris
/dev/sda8 560429056 976771071 208171008 83 Linux

Disk /dev/sdb: 4048 MB, 4048551936 bytes
54 heads, 9 sectors/track, 16270 cylinders, total 7907328 sectors
Units = sectors of 1 * 512 = 512 bytes
Sector size (logical/physical): 512 bytes / 512 bytes
I/O size (minimum/optimal): 512 bytes / 512 bytes
Disk identifier: 0x0001135d

Device Boot Start End Blocks Id System
/dev/sdb1 * 2048 7907327 3952640 b W95 FAT32
Each device is reported separately with details about size, seconds, id and individual partitions.

2. sfdisk

Sfdisk is another utility with a purpose similar to fdisk, but with more features. It can display the size of each partition in MB.
$ sudo sfdisk -l -uM

Disk /dev/sda: 60801 cylinders, 255 heads, 63 sectors/track
Warning: extended partition does not start at a cylinder boundary.
DOS and Linux will interpret the contents differently.
Units = mebibytes of 1048576 bytes, blocks of 1024 bytes, counting from 0

Device Boot Start End MiB #blocks Id System
/dev/sda1 * 0+ 71680- 71681- 73400953+ 7 HPFS/NTFS/exFAT
/dev/sda2 71680+ 476938 405259- 414984520+ f W95 Ext'd (LBA)
/dev/sda3 0 - 0 0 0 Empty
/dev/sda4 0 - 0 0 0 Empty
/dev/sda5 71680+ 171686- 100007- 102406311 7 HPFS/NTFS/exFAT
/dev/sda6 171686+ 271693- 100007- 102406311 83 Linux
/dev/sda7 271694 273645 1952 1998848 82 Linux swap / Solaris
/dev/sda8 273647 476938 203292 208171008 83 Linux

Disk /dev/sdb: 1020 cylinders, 125 heads, 62 sectors/track
Warning: The partition table looks like it was made
for C/H/S=*/54/9 (instead of 1020/125/62).
For this listing I'll assume that geometry.
Units = mebibytes of 1048576 bytes, blocks of 1024 bytes, counting from 0

Device Boot Start End MiB #blocks Id System
/dev/sdb1 * 1 3860 3860 3952640 b W95 FAT32
start: (c,h,s) expected (4,11,6) found (0,32,33)
end: (c,h,s) expected (1023,53,9) found (492,53,9)
/dev/sdb2 0 - 0 0 0 Empty
/dev/sdb3 0 - 0 0 0 Empty
/dev/sdb4 0 - 0 0 0 Empty


3. cfdisk

Cfdisk is a linux partition editor with an interactive user interface based on ncurses. It can be used to list out the existing partitions as well as create or modify them.
Here is an example of how to use cfdisk to list the partitions.
linux cfdisk disk partitions
Cfdisk works with one partition at a time. So if you need to see the details of a particular disk, then pass the device name to cfdisk.
$ sudo cfdisk /dev/sdb

4. parted

Parted is yet another command line utility to list out partitions and modify them if needed.
Here is an example that lists out the partition details.
$ sudo parted -l
Model: ATA ST3500418AS (scsi)
Disk /dev/sda: 500GB
Sector size (logical/physical): 512B/512B
Partition Table: msdos

Number Start End Size Type File system Flags
1 32.3kB 75.2GB 75.2GB primary ntfs boot
2 75.2GB 500GB 425GB extended lba
5 75.2GB 180GB 105GB logical ntfs
6 180GB 285GB 105GB logical ext4
7 285GB 287GB 2047MB logical linux-swap(v1)
8 287GB 500GB 213GB logical ext4


Model: Sony Storage Media (scsi)
Disk /dev/sdb: 4049MB
Sector size (logical/physical): 512B/512B
Partition Table: msdos

Number Start End Size Type File system Flags
1 1049kB 4049MB 4048MB primary fat32 boot

5. df

Df is not a partitioning utility, but prints out details about only mounted file systems. The list generated by df even includes file systems that are not real disk partitions.
Here is a simple example
$ df -h
Filesystem Size Used Avail Use% Mounted on
/dev/sda6 97G 43G 49G 48% /
none 4.0K 0 4.0K 0% /sys/fs/cgroup
udev 3.9G 8.0K 3.9G 1% /dev
tmpfs 799M 1.7M 797M 1% /run
none 5.0M 0 5.0M 0% /run/lock
none 3.9G 12M 3.9G 1% /run/shm
none 100M 20K 100M 1% /run/user
/dev/sda8 196G 154G 33G 83% /media/13f35f59-f023-4d98-b06f-9dfaebefd6c1
/dev/sda5 98G 37G 62G 38% /media/4668484A68483B47
Only the file systems that start with a /dev are actual devices or partitions.
Use grep to filter out real hard disk partitions/file systems.
$ df -h | grep ^/dev
/dev/sda6 97G 43G 49G 48% /
/dev/sda8 196G 154G 33G 83% /media/13f35f59-f023-4d98-b06f-9dfaebefd6c1
/dev/sda5 98G 37G 62G 38% /media/4668484A68483B47
To display only real disk partitions along with partition type, use df like this
$ df -h --output=source,fstype,size,used,avail,pcent,target -x tmpfs -x devtmpfs
Filesystem Type Size Used Avail Use% Mounted on
/dev/sda6 ext4 97G 43G 49G 48% /
/dev/sda8 ext4 196G 154G 33G 83% /media/13f35f59-f023-4d98-b06f-9dfaebefd6c1
/dev/sda5 fuseblk 98G 37G 62G 38% /media/4668484A68483B47
Note that df shows only the mounted file systems or partitions and not all.

6. pydf

Improved version of df, written in python. Prints out all the hard disk partitions in a easy to read manner.
$ pydf
Filesystem Size Used Avail Use% Mounted on
/dev/sda6 96G 43G 48G 44.7 [####.....] /
/dev/sda8 195G 153G 32G 78.4 [#######..] /media/13f35f59-f023-4d98-b06f-9dfaebefd6c1
/dev/sda5 98G 36G 61G 37.1 [###......] /media/4668484A68483B47
Again, pydf is limited to showing only the mounted file systems.

7. lsblk

Lists out all the storage blocks, which includes disk partitions and optical drives. Details include the total size of the partition/block and the mount point if any.
Does not report the used/free disk space on the partitions.
$ lsblk
NAME MAJ:MIN RM SIZE RO TYPE MOUNTPOINT
sda 8:0 0 465.8G 0 disk
├─sda1 8:1 0 70G 0 part
├─sda2 8:2 0 1K 0 part
├─sda5 8:5 0 97.7G 0 part /media/4668484A68483B47
├─sda6 8:6 0 97.7G 0 part /
├─sda7 8:7 0 1.9G 0 part [SWAP]
└─sda8 8:8 0 198.5G 0 part /media/13f35f59-f023-4d98-b06f-9dfaebefd6c1
sdb 8:16 1 3.8G 0 disk
└─sdb1 8:17 1 3.8G 0 part
sr0 11:0 1 1024M 0 rom
If there is no MOUNTPOINT, then it means that the file system is not yet mounted. For cd/dvd this means that there is no disk.
Lsblk is capbale of displaying more information about each device like the label and model. Check out the man page for more information

8. blkid

Prints the block device (partitions and storage media) attributes like uuid and file system type. Does not report the space on the partitions.
$ sudo blkid
/dev/sda1: UUID="5E38BE8B38BE6227" TYPE="ntfs"
/dev/sda5: UUID="4668484A68483B47" TYPE="ntfs"
/dev/sda6: UUID="6fa5a72a-ba26-4588-a103-74bb6b33a763" TYPE="ext4"
/dev/sda7: UUID="94443023-34a1-4428-8f65-2fb02e571dae" TYPE="swap"
/dev/sda8: UUID="13f35f59-f023-4d98-b06f-9dfaebefd6c1" TYPE="ext4"
/dev/sdb1: UUID="08D1-8024" TYPE="vfat"

9. hwinfo

The hwinfo is a general purpose hardware information tool and can be used to print out the disk and partition list. The output however does not print details about each partition like the above commands.
$ hwinfo --block --short
disk:
/dev/sda ST3500418AS
/dev/sdb Sony Storage Media
partition:
/dev/sda1 Partition
/dev/sda2 Partition
/dev/sda5 Partition
/dev/sda6 Partition
/dev/sda7 Partition
/dev/sda8 Partition
/dev/sdb1 Partition
cdrom:
/dev/sr0 SONY DVD RW DRU-190A

Summary

The output of parted is concise and complete to get an overview of different partitions, file system on them and the total space. Pydf and df are limited to showing only mounted file systems and the same on them.
Fdisk and Sfdisk show a whole lot of information that can take sometime to interpret whereas, Cfdisk is an interactive partitioning tool that display a single device at a time.
So try them out, and do not forget to comment below.

How to speed up directory navigation in a Linux terminal

$
0
0
http://xmodulo.com/2014/06/speed-up-directory-navigation-linux-terminal.html

As useful as navigating through directories from the command line is, rarely anything has become as frustrating as repeating over and over "cd ls cd ls cd ls ..." If you are not a hundred percent sure of the name of the directory you want to go to next, you have to use ls. Then use cd to go where you want to. Hopefully, a lot of terminals and shell languages now propose a powerful auto-completion feature to cope with that problem. But it remains that you have to hit the tabulation key frenetically all the time. If you are as lazy as I am, you will be very interested in autojump. autojump is a command line utility that allows you to jump straight to your favorite directory, regardless of where you currently are.

Install autojump on Linux

To install autojump on Ubuntu or Debian:
$ sudo apt-get install autojump
To install autojump on CentOS or Fedora, use yum command. On CentOS, you need to enable EPEL repository first.
$ sudo yum install autojump
To install autojump on Archlinux:
$ sudo pacman -S autojump
If you cannot find a package for your distribution, you can always compile from the sources on GitHub.

Basic Usage of autojump

The way autojump works is simple: it records your current location every time you launch a command, and adds it in its database. That way, some directories will be added more than others, typically your most important ones, and their "weight" will then be greater.
From there you can jump straight to them using the syntax:
autojump [name or partial name of the directory]
Notice that you do not need a full name as autojump will go through its database and return its most probable result.
For example, assume that we are working in a directory structure such as the following.

Then the command below will take you straight to /root/home/doc regardless of where you were.
$ autojump do
If you hate typing too, I recommend making an alias for autojump or using the default one.
$ j [name or partial name of the directory]
Another notable feature is that autojump supports both zsh shell and auto-completion. If you are not sure of where you are about to jump, just hit the tabulation key and you will see the full path.
So keeping the same example, typing:
$ autojump d
and then hitting tab will return either /root/home/doc or /root/home/ddl.
Finally for the advanced user, you can access the directory database and modify its content. It then becomes possible to manually add a directory to it via:
$ autojump -a [directory]
If you suddenly want to make it your favorite and most frequently used folder, you can artificially increase its weight by launching from within it the command
$ autojump -i [weight]
This will result in this directory being more likely to be selected to jump to. The opposite would be to decrease its weight with:
$ autojump -d [weight]
To keep track of all these changes, typing:
$ autojump -s
will display the statistics in the database, while:
$ autojump --purge
will remove from the database any directory that does not exist anymore.
To conclude, autojump will be appreciated by all the command line power users. Whether you are ssh-ing into a server, or just like to do things the old fashion way, reducing your navigation time with fewer keystrokes is always a plus. If you are really into that kind of utilities, you should definitely look into Fasd too, which deserves a post in itself.
What do you think of autojump? Do you use it regularly? Let us know in the comments.

LVM Snapshot : Backup & restore LVM Partition in linux

$
0
0
http://www.nextstep4it.com/categories/unix-command/lvm-snapshot

An LVM snapshot is an exact mirror copy of an LVM partition which has all the data from the LVM volume from the time the snapshot was created. The main advantage of LVM snapshots is that they can  reduce the amount of time that your services / application  are down during backups because a snapshot is usually created in fractions of a second. After the snapshot has been created, we can back up the snapshot while our services and applications are in normal operation.

LVM snapshot is the feature provided by LVM(Logical Volume Manager) in linux. While creating lvm snapshot , one of most common question comes to our mind is that what should be the size of snapshot ?

"snapshot size can vary depending on your requirement but a minimum recommended size is 30% of the logical volume for which you are taking the snapshot but if you think that you might end up changing all the data in logical volume then make the snapshot size same as logical volume"

Scenario : We will take snapshot of /home  which  is LVM based parition.

[root@localhost ~]# df -h /home/
Filesystem            Size  Used Avail Use% Mounted on
/dev/mapper/VolGroup-lv_home
                                   5.0G  139M  4.6G   3% /home

Taking Snapshot of   '/dev/mapper/VolGroup-lv_home' partition.

LVM snapshot is created using lvcreate command , one must have enough free space in the volume group otherwise we can't take the snapshot  , Exact syntax is given below :

# lvcreate -s  -n -L

Example :


[root@localhost ~]# lvcreate -s -n home_snap -L1G /dev/mapper/VolGroup-lv_home
Logical volume "home_snap" created

Now verify the newly create LVM 'home_snap' using lvdisplay command


Now Create the mount point(directory ) and mount it
[root@localhost ~]# mkdir /mnt/home-backup
[root@localhost ~]# mount /dev/mapper/VolGroup-home_snap  /mnt/home-backup/
[root@localhost ~]# ls -l /mnt/home-backup/

Above command will  show all directories and files that we know from our /home partition


Now take the backup of snapshot on /opt folder .

[root@localhost ~]# tar zcpvf /opt/home-backup.tgz  /mnt/home-backup/

If you want the bitwise  backup , then use the below command :

[root@localhost ~]# dd if=/dev/mapper/VolGroup-home_snap of=/opt/bitwise-home-backup
10485760+0 records in
10485760+0 records out
5368709120 bytes (5.4 GB) copied, 79.5741 s, 67.5 MB/s

Restoring Snapshot Backup :

If anything goes wrong with your /home file system , then you can restore the backup that we have taken in above steps.  You can also mount the lvm snapshot on /home folder.

Remove LVM snapshot

Once you are done with lvm snapshot backup and restore activity , you should umount and remove lvm snapshot partition using below commands as snapshot is consuming system resources like diskspace of respective voulme group.

[root@localhost ~]# umount /mnt/home-backup/
[root@localhost ~]# lvremove /dev/mapper/VolGroup-home_snap
Do you really want to remove active logical volume home_snap? [y/n]: y
Logical volume "home_snap" successfully removed

How to sync Microsoft OneDrive on Linux

$
0
0
http://xmodulo.com/2014/06/sync-microsoft-onedrive-linux.html

OneDrive (previously known as SkyDrive) is a popular cloud storage offering from Microsoft. Currently OneDrive offers 7GB free storage for every new signup. As you can imagine, OneDrive is well integrated with other Microsoft software products. Microsoft also offers a standalone OneDrive client which automatically backs up pictures and videos taken by a camera to OneDrive storage. But guess what. This client is available for all major PC/mobile platforms except Linux. "OneDrive on any device, any time"? Well, it is not there, yet.
Don't get disappointed. The open-source community already has already come up with a solution for you. onedrive-d written by a Boilermaker in Lafayette can get the job done. Running as a monitoring daemon, onedrive-d can automatic sync a local folder with OneDrive cloud storage.
In this tutorial, I will describe how to sync Microsoft OneDrive on Linux by using onedrive-d.

Install onedrive-d on Linux

While onedrive-d was originally developed for Ubuntu/Debian, it now supports CentOS/Fedora/RHEL as well.
Installation is as easy as typing the following.
$ git clone https://github.com/xybu92/onedrive-d.git
$ cd onedrive-d
$ ./inst install

First-Time Configuration

After installation, you need to go through one-time configuration which involves granting onedrive-d read/write access to your OneDrive account.
First, create a local folder which will be used to sync against a remote OneDrive account.
$ mkdir ~/onedrive
Then run the following command to start the first-time configuration.
$ onedrive-d
It will pop up a onedrive-d's Settings window as shown below. In "Location" option, choose the local folder you created earlier. In "Authentication" option, you will see "You have not authenticated OneDrive-d yet" message. Now click on "Connect to OneDrive.com" box.

It will pop up a new window asking you to sign in to OneDrive.com.

After logging in to OneDrive.com, you will be asked to grant access to onedrive-d. Choose "Yes".

Coming back to the Settings window, you will see that the previous status has changed to "You have connected to OneDrive.com". Click on "OK" to finish.

Sync a Local Folder with OneDrive

There are two ways to sync a local folder with your OneDrive storage by using onedrive-d.
One way is to sync with OneDrive manually from the command line. That is, whenever you want to sync a local folder against your OneDrive account, simply run:
$ onedrive-d
onedrive-d will then scan the content of both a local folder and a OneDrive account, and make the two in sync. This means either uploading newly added files in a local folder, or downloading newly found files from a remote OneDrive account. If you remove any file from a local folder, the corresponding file will automatically be deleted from a OneDrive account after sync. The same thing will happen in the reverse direction as well.
Once sync is completed, you can kill the foreground-running onedrive-d process by pressing Ctrl+C.

Another way is to run onedrive-d as an always-on daemon which launches automatically upon start. In that case, the background daemon will monitor both the local folder and OneDrive account, to keep them in sync. For that, simply add onedrive-d to the auto-start program list of your desktop.
When onedrive-d daemon is running in the background, you will see OneDrive icon in the desktop status bar as shown below. Whenever sync update is triggered, you will see a desktop notification.

A word of caution: According to the author, onedrive-d is still under active development. It is not meant for any kind of production environment. If you encounter any bug, feel free to file a bug report. Your contribution will be appreciated by the author.

Top 3 open source business intelligence and reporting tools

$
0
0
http://opensource.com/business/14/6/three-open-source-business-tools

This article reviews three top open source business intelligence and reporting tools. In economies of big data and open data, who do we turn to in order to have our data analysed and presented in a precise and readable format? This list covers those types of tools. The list is not exhaustive—I have selected tools that are widely used and can also meet enterprise requirements. And, this list is not meant to be a comparison—this is a review of what is available.

BIRT

BIRT is part of the open source Eclipse project and was first released in 2004. BIRT is sponsored by Actuate, and recieves contributions from IBM and Innovent Solutions.
BIRT consists of several components. The main components being the Report Designer and BIRT Runtime. BIRT also provides three extra components: a Chart Engine, Chart Designer, and Viewer. With these components you are able to develop and publish reports as a standalone solution. However, with the use of the Design Engine API, which you can include in any Java/Java EE application, you can add reporting features in your own applications. For a full description and overview of it’s architecture, see this overview.
The BIRT Report Designer has a rich feature set, is robust, and performs well. It scores high in terms of usability with it’s intuitive user interface. An important difference with the other tools is the fact it presents reports primarily to web. It lacks a true Report Server, but by using the Viewer on a Java application server, you can provide end users with a web interface to render and view reports.
If you are looking for support, you can either check out the BIRT community or the Developer Center at Actuate. The project also provides extensive documentation and a Wiki.
BIRT is licensed under the Eclipse Public License. It’s latest release 4.3.2, which runs on Windows, Linux and Mac, can be downloaded here. Current development is shared through it’s most recent project plan.

JasperReport

TIBCO recently acquired JasperSoft, the company formerly behind JasperReport. JasperReport is the most popular and widely used open source reporting tool. It is used in hundreds of thousands production environments. JasperReport is released as Enterprise and Community editions.
Similar to BIRT, JasperReport consists of several components such as the JasperReport Library, iReport Report Designer, JasperReport Studio, and JasperReport Server. The Library is a library of Java classes and APIs and is the core of JasperReport. iReport Designer and Studio as the report designers where iReport is a Netbeans plugin and standalone client, and Studio an Eclipse plugin. Note: iReport will be discontinued in December 2015, with Studio becoming the main designer component. For a full overview and description of the components, visit the homepage of the JasperReport community.
A full feature list of JasperSoft (Studio) can be viewed here. Different from BIRT, JasperReport is using a pixel-perfect approach in viewing and printing it’s reports. The ETL, OLAP, and Server components provide JasperReport with valuable functionality in enterprise environments, making it easier to integrate with the IT-architecture of organisations.
JasperReport is supported by excellent documentation, a Wiki, Q&A forums, and user groups. Based on Java, JasperReport runs on Windows, Linux, and Mac. It’s latest release 5.5 is from October 2013, and is licensed under GPL.

Pentaho

Unlike the previous two tools, Pentaho is a complete business intelligene (BI) Suite, covering the gamut from reporting to data mining. The Pentaho BI Suite encompasses several open source projects, of which Pentaho Reporting is one of them.
Like the other tools, Pentaho Reporting has a rich feature set, ready for use in enterprise organisations. From visual report editor to web platform to render and view reports to end users. And report formats like PDF, HTML and more, security and role management, and the ability to email reports to users.
The Pentaho BI suite also contains the Pentaho BI Server. This is a J2EE application which provides an infrastructure to run and view reports through a web-based user interface. Other components from the suite are out of scope for this article. They can be viewed on the site from Pentaho, under the Projects menu. Pentaho is released as Enterprise and Community editions.
The Pentaho project provides it’s community with a forum, Jira bug tracker, and some other collaboration options. It’s documentation can be found on a Wiki.
Pentaho runs on Java Enterprise Edition and can be used on Windows, Linux, and Mac. It’s latest release is version 5.0.7 from May 2014, and is licensed under GPL.

Summary

All three of these open source business intelligence and reporting tools provide a rich feature set ready for enterprise use. It will be up to the end user to do a thorough comparison and select either of these tools. Major differences can be found in report presentations, with a focus on web or print, or in the availability of a report server. Pentaho distinguishes itself by being more than just a reporting tool, with a full suite of components (data mining and integration).
Have you used any of these tools? What was your experience? Or, have you used similar tool not listed here that you would like to share?

Using pass to Manage Your Passwords on Fedora

$
0
0
http://fedoramagazine.org/using-pass-to-manage-your-passwords-on-fedora

At this point, I have more usernames and passwords to juggle than any person should ever have to deal with. I know I’m not alone, either. We have a surfeit of passwords to manage, and we need a good way to manage them so we have easy access without doing something silly like writing them down where others might find them. Being a fan of simple apps, I prefer using pass, a command line password manager.
It’s never been a good idea to use the same username and password with multiple services, but in today’s world? It’s potentially disasterous. So I don’t. At the moment, I’m juggling something like 90 to 100 passwords for all of the services I use. Multiple Twitter accounts, my server credentials, OpenShift applications, my FAS credentials, sign-in for Rdio, and lots more.
As you might imagine, trying to memorize all of those passwords is an exercise in futility. I remember my system password, and a handful of others. Beyond that? I’d rather save some of my brain’s limited storage for more important things.

What’s pass, and What’s it Require?

So what is pass? It’s basically a simple command-line utility that helps you manage passwords. It uses GnuPG-encrypted files to save and manage user passwords. It will even keep them in a git repository, if you choose to set it up that way. That means you’ll need the pass package installed, along with its dependencies like git, gnupg2, and pwgen (a utility for generating passwords).
Yes, there are other options, but I settled on pass a while back as the best fit for my needs. Here’s how you can give it a shot and see if it works for you!

Installation and Setup

Installing pass is simple, it’s conveniently packaged for Fedora. Just open a terminal and run yum install -y pass and it should grab all the dependencies you need.
The first thing you need to do is create a GPG Key. See the Fedora wiki for detailed instructions, or just use gpg --gen-key and walk through the series of prompts. When in doubt, accept the defaults.
Now, you just need to initialize your password store with pass init GPG-ID. Replace “GPG-ID” with the email address you used for your GPG key.

Using pass: Adding and Creating Passwords

Now that you have a password store set up, it’s time to start creating or inserting passwords. If you already have a password you want to store, use pass edit passwordname. For example, if you were going to store your Fedora Account System (FAS) password, you might use pass edit FAS/user with “user” being your username in FAS.
This will create a directory (FAS) and the file (user) in Git, and encrypt the file so that no one can read it without your GPG passphrase. If you look under ~/.password-store/FAS/ you’ll see a file like user.gpg. The directory part is optional, but I find it useful to help keep track of passwords.
If you want to create a new password, just use pass generate FAS/user 12 where “FAS/user” would be the username, and the password length (generated by pwgen) would be 12 characters. The auto-generated passwords will include upper- and lower-case letters, numbers, and special characters.

Creating a git Repository

One of the biggest selling points to me for pass is its integration with git. But it’s not automatic, you do need to tell it to initialize the git repo and use it. First, make sure you’ve set your git globals:

git config --global user.email "your@email.com"
git config --global user.name "Awesome User"

Then run pass git init and it will intialize a git repository in your password store. From then on, it will automatically add new passwords and such to the git repo. If you want to manage passwords on multiple machines, this makes it dead easy: Just clone the repository elsewhere and keep them in sync as you would a normal git repo.

Using pass: Reading Passwords

To recall a password, all you need to do is run pass user, so pass FAS/user would print out the password to the terminal. But what if you don’t want it to be seen by someone looking over your shoulder?
Here’s a nifty workaround for that, just use pass -c FAS/user and it will simply copy your password to the clipboard for 45 seconds. All you have to do is run the command, move over to the application where you’d like to enter your password, and then hit Enter.
If you’ve forgotten what passwords you have stored with pass, just use pass ls and you’ll get a complete listing.

Deleting Passwords

Sometimes you need to get rid of a password. Just use pass rm user and pass will ask if you’re sure, then delete the password file.
If you delete something by accident, you can simply go back and revert the commit!

Stay Safe!

So that’s the basics of using pass. You can get even more examples by running man pass, and I highly recommend skimming the man page at least once.
I have been using pass for some time now, and it’s been a life-saver. I hope it serves you as well as it has me!

How to configure a Tomcat cluster on Ubuntu

$
0
0
http://xmodulo.com/2014/06/configure-tomcat-cluster-ubuntu.html

Apache Tomcat is the most popular open-source Java web server. If your web site is expecting more traffic as your business grows, a single instance of Tomcat will probably not scale with the growing traffic. In that case, you might be thinking to run Tomcat in a "clustered" environment, where web server workload is distributed to multiple Tomcat instances.
In this article I will show you how to configure a Tomcat cluster with load balancing and session replication. Before we delve into the details about the setup, we want to clarify some of the terms we will be using in this tutorial.

Terminology

Load balancing: When HTTP requests are received by a front-end server (often called "load balancer", "proxy balancer" or "reverse proxy"), the front-end server distributes the requests to more than one "worker" web servers in the backend, which actually handle the requests. Load balancing can get rid of a single point of failure in the backend, and can achieve high availability, scalability and better resource optimization for any web service.
Session replication: Session replication is a mechanism to copy the entire state of a client session verbatim to two or more server instances in a cluster for fault tolerance and failover. Typically, stateful services that are distributed are capable of replicating client session states across different server instances in a cluster.
Cluster: A cluster is made up of two or more web server instances that work in unison to transparently serve client requests. Clients will perceive a group of server instances as a single entity service. The goal of the cluster is to provide a highly available service for clients, while utilizing all available compute resources as efficiently as possible.

Requirements

Here are the requirements for setting up a Tomcat cluster. In this tutorial, I assume there are three Ubuntu servers.
  • Server #1: Apache HTTP web server with mod_jk (for proxy balancer)
  • Server #2 and #3: Java runtime 6.x or higher and Apache Tomcat 7.x (for worker web server)
Apache web server is acting as a proxy balancer. Apache web server is the only server visible to clients, and all Tomcat instances are hidden from clients. With mod_jk extension activated, Apache web server will forward any incoming HTTP request to Tomcat worker instances in the cluster.
In the rest of the tutorial, I will describe step by step procedure for configuring a Tomcat cluster.

Step One: Install Apache Web Server with mod_jk Extension

Tomcat Connectors allows you to connect Tomcat to other open-source web servers. For Apache web server, Tomcat Connectors is available as an Apache module called mod_jk. Apache web server with mod_jk turns a Ubuntu server into a proxy balancer. To install Apache web server and mod_jk module, use the following command.
$ sudo apt-get install apache2 libapache2-mod-jk

Step Two: Install JDK and Apache Tomcat

The next step is to install Apache Tomcat on the other two Ubuntu servers which will actually handle HTTP requests as workers. Since Apache Tomcat requires JDK, you need to install it as well. Follow this guide to install JDK and Apache Tomcat on Ubuntu servers.

Step Three: Configure Apache mod_jk on Proxy Balancer

On Ubuntu, the mod_jk configuration file is located in /etc/apache2/mods-enabled/jk.conf. Update this file with the following content:
1
2
3
4
5
6
7
8
9
10
11
12
13
14
15
16
17
18
19
20
21
22
23
24
25
26
27
28
29
30
31
32
33
34
35
36
37
38
39
40
41
 
    # We need a workers file exactly once
    # and in the global server
    JkWorkersFile /etc/libapache2-mod-jk/workers.properties
 
    # JK error log
    # You can (and should) use rotatelogs here
    JkLogFile /var/log/apache2/mod_jk.log
 
    # JK log level (trace,debug,info,warn,error)
    JkLogLevel info
 
    JkShmFile /var/log/apache2/jk-runtime-status
 
    JkWatchdogInterval 60
 
    JkMount /*  loadbalancer
    JkMount /jk-statusjkstatus
 
    # Configure access to jk-status and jk-manager
    # If you want to make this available in a virtual host,
    # either move this block into the virtual host
    # or copy it logically there by including "JkMountCopy On"
    # in the virtual host.
    # Add an appropriate authentication method here!
    /jk-status>
            # Inside Location we can omit the URL in JkMount
            JkMount jk-status
            Order deny,allow
            Deny from all
            Allow from 127.0.0.1
    </Location>
    /jk-manager>
            # Inside Location we can omit the URL in JkMount
            JkMount jk-manager
            Order deny,allow
            Deny from all
            Allow from 127.0.0.1
    </Location>
</IfModule>
In order to make the above configuration work with multiple Tomcat instances, we have to configure every Tomcat worker instance in /etc/libapache2-mod-jk/workers.properties. We assume that the IP addresses of the two worker Ubuntu machines are 192.168.1.100 and 192.168.1.200.
Create or edit etc/libapache2-mod-jk/workers.properties with the following content:
1
2
3
4
5
6
7
8
9
10
11
12
13
14
15
16
17
18
19
20
21
22
23
24
25
26
27
28
29
30
31
32
worker.list=loadbalancer,jkstatus
 
# Configure Tomcat instance for 192.168.1.100
 
worker.tomcat1.type=ajp13
worker.tomcat1.host=192.168.1.100
worker.tomcat1.port=8081
# worker "tomcat1" uses up to 200 sockets, which will stay no more than
# 10 minutes in the connection pool.
worker.tomcat1.connection_pool_size=200
worker.tomcat1.connection_pool_timeout=600
# worker "tomcat1" will ask the operating system to send a KEEP-ALIVE
# signal on the connection.
worker.tomcat1.socket_keepalive=1
 
# Configure Tomcat instance for 192.168.1.200
 
worker.tomcat2.type=ajp13
worker.tomcat2.host=192.168.1.200
worker.tomcat2.port=8082
# worker "tomcat2" uses up to 200 sockets, which will stay no more than
# 10 minutes in the connection pool.
worker.tomcat2.connection_pool_size=200
worker.tomcat2.connection_pool_timeout=600
# worker "tomcat2" will ask the operating system to send a KEEP-ALIVE
# signal on the connection.
worker.tomcat2.socket_keepalive=1
 
worker.jkstatus.type=status
 
worker.loadbalancer.type=lb
worker.loadbalancer.balance_workers=tomcat1,tomcat2

Step Four: Configure Tomcat Instances

Edit /opt/apache-tomcat-7.0.30/conf/server.xml for Tomcat instance on 192.168.1.100 with the following content:
1
2
3
4
5
6
7
8
9
10
11
12
13
14
15
16
17
18
19
    "Catalina"defaultHost="192.168.1.100” jvmRoute="tomcat1">
    "org.apache.catalina.ha.tcp.SimpleTcpCluster"channelSendOptions="8">
    "org.apache.catalina.ha.session.DeltaManager"
        expireSessionsOnShutdown="false"
        notifyListenersOnReplication="true"/>
    "org.apache.catalina.tribes.group.GroupChannel">
        "org.apache.catalina.tribes.transport.ReplicationTransmitter">
            "org.apache.catalina.tribes.transport.nio.PooledParallelSender"/>
        </Sender>
 
        "org.apache.catalina.tribes.transport.nio.NioReceiver"address="auto"        port="4000"autoBind="100"selectorTimeout="5000"maxThreads="50"/>
    "org.apache.catalina.tribes.group.interceptors.TcpFailureDetector"/>
    "org.apache.catalina.tribes.group.interceptors.MessageDispatch15Interceptor"/>
    </Channel>
    "org.apache.catalina.ha.tcp.ReplicationValve"filter=""/>
    "org.apache.catalina.ha.session.JvmRouteBinderValve"/>
    "org.apache.catalina.ha.session.JvmRouteSessionIDBinderListener"/>
    "org.apache.catalina.ha.session.ClusterSessionListener"/>
</Cluster>
Edit /opt/apache-tomcat-7.0.30/conf/server.xml for Tomcat instance on 192.168.1.200 with the following content:
1
2
3
4
5
6
7
8
9
10
11
12
13
14
15
16
17
18
19
    "Catalina"defaultHost="192.168.1.200” jvmRoute="tomcat2">
    "org.apache.catalina.ha.tcp.SimpleTcpCluster"channelSendOptions="8">
    "org.apache.catalina.ha.session.DeltaManager"
        expireSessionsOnShutdown="false"
        notifyListenersOnReplication="true"/>
    "org.apache.catalina.tribes.group.GroupChannel">
        "org.apache.catalina.tribes.transport.ReplicationTransmitter">
            "org.apache.catalina.tribes.transport.nio.PooledParallelSender"/>
        </Sender>
     
        "org.apache.catalina.tribes.transport.nio.NioReceiver"address="auto"        port="4000"autoBind="100"selectorTimeout="5000"maxThreads="30"/>
    "org.apache.catalina.tribes.group.interceptors.TcpFailureDetector"/>
    "org.apache.catalina.tribes.group.interceptors.MessageDispatch15Interceptor"/>
    </Channel>
    "org.apache.catalina.ha.tcp.ReplicationValve"filter=""/>
    "org.apache.catalina.ha.session.JvmRouteBinderValve"/>
    "org.apache.catalina.ha.session.JvmRouteSessionIDBinderListener"/>
    "org.apache.catalina.ha.session.ClusterSessionListener"/>
</Cluster>

Step Five: Test a Tomcat Cluster

Tomcat Connectors has a special type of worker, the so-called status worker. The status worker does not forward requests to Tomcat instances. Instead, it allows one to retrieve status and configuration information at run-time, and even to change many configuration options dynamically. You can monitor the Tomcat cluster by accessing this status worker, which can be done simply by going to http:///jk-status on a web browser.

Get OpenVPN up and running, enjoy your privacy

$
0
0
http://parabing.com/2014/06/openvpn-on-ubuntu

We are fanatic supporters of privacy. Not so much because we have super secrets to hide, but because we consider privacy as a basic human right. So we believe that anytime anyone chooses to exercise that right on the net, then they should have unencumbered access to all the necessary tools and services. OpenVPN is such a service and there are also many tools (clients) which allow us to utilize and enjoy that service.

article metadata

author's avatar

primary area

main body

By establishing a connection to an 
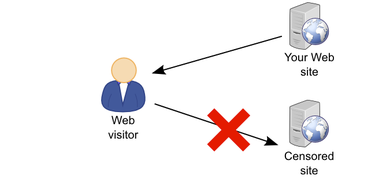
OpenVPN server, we basically create a secure communications channel between our device and the remote host OpenVPN runs on. Although traffic flowing between these two end-points can be intercepted, it is strongly encrypted and thus practically useless to the interceptor. In addition to the OpenVPN acting as the facilitator of this encrypted channel (or tunnel), we may configure the server to also play the role of our Internet gateway. By doing so, we can for example hook up to any open, inherently insecure WiFi network, then immediately connect to the remote OpenVPN server and start using any Internet-enabled application without worrying of prying eyes or bored administrators. (Note though that we still need to trust any administrator in the vicinity of the OpenVPN server. But more on that towards the end of the post.)
This article is a step-by-step guide on how to setup OpenVPN on Ubuntu Server 14.04 LTS. The OpenVPN host computer may be a VPS in the cloud, a virtual machine running on one of our computers at home, or even that somewhat aged box we tend to forget we have.

Step 01 -- System Preparation

We gain access to a command shell in the Ubuntu Server host, for example by remotely connecting to it via SSH, and immediately refresh the local repository database:
sub0@delta:~$ sudoapt-get update
To perform any upgrades for all installed packages and the operating system itself, we type:
sub0@delta:~$ sudoapt-get dist-upgrade
If a new kernel gets pulled in, a system reboot will be required. After refreshing and upgrading, it’s time to install OpenVPN:
sub0@delta:~$ sudoapt-get -y installopenvpn easy-rsa dnsmasq
Notice that we installed three packages with apt-get:
  • openvpn provides the core of OpenVPN
  • easy-rsa contains some handy scripts for key management
  • dnsmasq is the name server we’ll be using later on, when our OpenVPN server box/VM will assume the role of a router for all OpenVPN clients

Step 02 -- Master certificate and private key for the Certificate Authority

advertisment
The most important –and admittedly the most crucial– step during the setup of an OpenVPN server, is the establishment of a corresponding Public Key Infrastructure (PKI). This infrastructure comprises the following:
  • A certificate (public key) and a private key for the OpenVPN server
  • A certificate and a private key for any OpenVPN client
  • A master certificate and a private key for the Certificate Authority (CA). This private key is used for signing the OpenVPN certificate as well as the client certificates.
Beginning with the latter, we create a convenient working directory
sub0@delta:~$ sudomkdir/etc/openvpn/easy-rsa
and then copy easy-rsa’s files to it:
sub0@delta:~$ sudocp-r /usr/share/easy-rsa/* /etc/openvpn/easy-rsa
Before we actually create the keys for the CA, we open /etc/openvpn/easy-rsa/vars for editing (we like the nano text editor but this is just our preference):
sub0@delta:~$ sudonano /etc/openvpn/easy-rsa/vars
Towards the end of the file we assign values to a set of variables which are read during the creation of the master certificate and private key. Take a look at the variables we assigned values to:
export KEY_COUNTRY="GR"
export KEY_PROVINCE="Central Macedonia"
export KEY_CITY="Thessaloniki"
export KEY_ORG="Parabing Creations"
export KEY_EMAIL="nobody@parabing.com"
export KEY_CN="VPNsRUS"
export KEY_NAME="VPNsRUS"
export KEY_OU="Parabing"
export KEY_ALTNAMES="VPNsRUS"
It goes without saying that you may assign different values, more appropriate for your case. Also take particular note of the last line, in which we set a value to the KEY_ALTNAMES variable. This line is not part of the original vars file but we nevertheless append it at the end of said file, or the build-ca script we’re going to run next will fail.
To save the changes in vars we hit [CTRL+O] followed by the [Enter] key. To quit nano we hit [CTRL+X]. Now, we gain access to the root account and move on to building of the master certificate and private key:
sub0@delta:~$ sudosu
root@delta:/home/sub0# cd /etc/openvpn/easy-rsa
root@delta:/etc/openvpn/easy-rsa# source vars
NOTE: If you run ./clean-all, I will be doing a rm-rf on /etc/openvpn/easy-rsa/keys
root@delta:/etc/openvpn/easy-rsa# sh clean-all
root@delta:/etc/openvpn/easy-rsa# sh build-ca
Generating a 1024 bit RSA private key
...++++++
................++++++
writing new private key to 'ca.key'
-----
You are about to be asked to enter information that will be incorporated
into your certificate request.
What you are about to enter is what is called a Distinguished Name or a DN.
There are quite a few fields but you can leave some blank
For some fields there will be a default value,
If you enter '.', the field will be left blank.
-----
Country Name (2 letter code) [GR]:
State or Province Name (full name) [Central Macedonia]:
Locality Name (eg, city) [Thessaloniki]:
Organization Name (eg, company) [Parabing Creations]:
Organizational Unit Name (eg, section) [Parabing]:
Common Name (eg, your name or your server's hostname) [VPNsRUS]:
Name [VPNsRUS]:
Email Address [nobody@parabing.com]:
root@delta:/etc/openvpn/easy-rsa#
In our example the default answers were used for all the questions. After the build-ca script finishes we have the file for the master certificate (keys/ca.crt) and also the file for the private key (keys/ca.key). The latter must be kept secret at all costs.

Step 03 -- Certificate and private key for the OpenVPN server

Before we make a certificate and private key for our OpenVPN server, we need to pick a name for it. We decided to name ours “delta” and then ran the build-key-server script to get the keys:
root@delta:/etc/openvpn/easy-rsa# sh build-key-server delta
Generating a 1024 bit RSA private key
....++++++
...++++++
writing new private key to 'delta.key'
-----
You are about to be asked to enter information that will be incorporated
into your certificate request.
What you are about to enter is what is called a Distinguished Name or a DN.
There are quite a few fields but you can leave some blank
For some fields there will be a default value,
If you enter '.', the field will be left blank.
-----
Country Name (2 letter code) [GR]:
State or Province Name (full name) [Central Macedonia]:
Locality Name (eg, city) [Thessaloniki]:
Organization Name (eg, company) [Parabing Creations]:
Organizational Unit Name (eg, section) [Parabing]:
Common Name (eg, your name or your server's hostname) [delta]:
Name [VPNsRUS]:deltaVPN
Email Address [nobody@parabing.com]:
 
Please enter the following 'extra'attributes
to be sent with your certificate request
A challenge password []:
An optional company name []:
Using configuration from /etc/openvpn/easy-rsa/openssl-1.0.0.cnf
Check that the request matches the signature
Signature ok
The Subject's Distinguished Name is as follows
countryName           :PRINTABLE:'GR'
stateOrProvinceName   :PRINTABLE:'Central Macedonia'
localityName          :PRINTABLE:'Thessaloniki'
organizationName      :PRINTABLE:'Parabing Creations'
organizationalUnitName:PRINTABLE:'Parabing'
commonName            :PRINTABLE:'delta'
name                  :PRINTABLE:'deltaVPN'
emailAddress          :IA5STRING:'nobody@parabing.com'
Certificate is to be certified untilApr  7 08:06:02 2024 GMT (3650 days)
Sign the certificate? [y/n]:y
  
1 out of 1 certificate requests certified, commit? [y/n]y
Write out database with 1 new entries
Data Base Updated
root@delta:/etc/openvpn/easy-rsa#
The script successfully finished and we got a certificate (keys/delta.crt) as well as a private key (keys/delta.key) for our server. Note that the server certificate is signed by the CA’s private key.

Step 04 -- Diffie-Hellman parameters

The secure passing of keys over an insecure communications channel is made possible thanks to a well-known technique involving the so called Diffie-Hellman parameters. To generate those we just type
root@delta:/etc/openvpn/easy-rsa# sh build-dh
Generating DH parameters, 2048 bit long safe prime, generator 2
This is going to take a long time
.......................+.....................................+..
...........................+..+.....................+...........
..............................................+.................
.......................+........................................
................................................+...............
.......................................++*++*++*
root@delta:/etc/openvpn/easy-rsa#
advertisment
The certificates, private keys and the file containing the Diffie-Hellman parameters we just generated, are all stored into the /etc/openvpn/easy-rsa/keys directory. So up until now we have five files in total and in our case they are as follows:
  1. ca.crt– the certificate of the Certificate Authority
  2. ca.key– the private key of the CA
  3. delta.crt– the certificate of the OpenVPN server
  4. delta.key– the private key of the OpenVPN server
  5. dh2048.pem– the Diffie-Hellman parameters file
In all likelihood, the keys for your own OpenVPN server are named differently. We now need to copy all files but the ca.key over to the /etc/openvpn directory:
root@delta:/etc/openvpn/easy-rsa# cd keys
root@delta:/etc/openvpn/easy-rsa/keys# cp ca.crt delta.crt delta.key dh2048.pem /etc/openvpn
root@delta:/etc/openvpn/easy-rsa/keys# cd ..
root@delta:/etc/openvpn/easy-rsa#

Step 05 -- Certificates and private keys for the OpenVPN clients

Let’s assume we’d like to connect to the OpenVPN server from our laptop. That’s actually a very common scenario and in order to be able to do so we first need to generate a certificate as well as a private key for the client, i.e. our laptop. There’s a script for that and it lives in the /etc/openvpn/easy-rsa directory:
root@delta:/etc/openvpn/easy-rsa# source vars
NOTE: If you run ./clean-all, I will be doing a rm-rf on /etc/openvpn/easy-rsa/keys
root@delta:/etc/openvpn/easy-rsa# ./build-key laptop
Generating a 1024 bit RSA private key
.......................................++++++
...................................................................................................++++++
writing new private key to 'laptop.key'
-----
You are about to be asked to enter information that will be incorporated
into your certificate request.
What you are about to enter is what is called a Distinguished Name or a DN.
There are quite a few fields but you can leave some blank
For some fields there will be a default value,
If you enter '.', the field will be left blank.
-----
Country Name (2 letter code) [GR]:
State or Province Name (full name) [Central Macedonia]:
Locality Name (eg, city) [Thessaloniki]:
Organization Name (eg, company) [Parabing Creations]:
Organizational Unit Name (eg, section) [Parabing]:
Common Name (eg, your name or your server's hostname) [laptop]:
Name [VPNsRUS]:
Email Address [nobody@parabing.com]:
  
Please enter the following 'extra'attributes
to be sent with your certificate request
A challenge password []:
An optional company name []:
Using configuration from /etc/openvpn/easy-rsa/openssl-1.0.0.cnf
Check that the request matches the signature
Signature ok
The Subject's Distinguished Name is as follows
countryName           :PRINTABLE:'GR'
stateOrProvinceName   :PRINTABLE:'Central Macedonia'
localityName          :PRINTABLE:'Thessaloniki'
organizationName      :PRINTABLE:'Parabing Creations'
organizationalUnitName:PRINTABLE:'Parabing'
commonName            :PRINTABLE:'laptop'
name                  :PRINTABLE:'VPNsRUS'
emailAddress          :IA5STRING:'nobody@parabing.com'
Certificate is to be certified untilApr  7 18:00:51 2024 GMT (3650 days)
Sign the certificate? [y/n]:y
  
1 out of 1 certificate requests certified, commit? [y/n]y
Write out database with 1 new entries
Data Base Updated
root@delta:/etc/openvpn/easy-rsa#
The base name we chose for the keys was “laptop”, so after the build-key finished we got keys/laptop.crt (certificate) and keys/laptop.key (private key). Those two keys for the particular client along with the CA’s certificate file go together, and it’s a good idea to copy them to a directory where our user (sub0) has full access to. We can, for example, create a new directory in the user’s home directory and copy those three files there:
root@delta:/etc/openvpn/easy-rsa# mkdir /home/sub0/ovpn-client
root@delta:/etc/openvpn/easy-rsa# cd keys
root@delta:/etc/openvpn/easy-rsa/keys# cp ca.crt laptop.crt laptop.key /home/sub0/ovpn-client
root@delta:/etc/openvpn/easy-rsa/keys# chown -R sub0:sub0 /home/sub0/ovpn-client
root@delta:/etc/openvpn/easy-rsa/keys# cd ..
root@delta:/etc/openvpn/easy-rsa#
The directory ovpn-client must be securely copied to our laptop. We are allowed to distribute those three files to more than one clients, as long as they are all ours. Of course, should we need a different certificate-private key couple, we run the build-key script again.

Step 06 -- OpenVPN server configuration

In a little while our OpenVPN server will be up and running. But first, there are some configuration changes that need to be made. There’s a sample configuration file in /usr/share/doc/openvpn/examples/sample-config-files which is excellent for our setup. That file is named server.conf.gz:
root@delta:/etc/openvpn/easy-rsa# cd /etc/openvpn
root@delta:/etc/openvpn# cp /usr/share/doc/openvpn/examples/sample-config-files/server.conf.gz .
root@delta:/etc/openvpn# gunzip -d server.conf.gz
root@delta:/etc/openvpn# mv server.conf delta.conf
root@delta:/etc/openvpn#
As you can see, we copied server.conf.gz into the /etc/openvpn directory, uncompressed it and renamed it to delta.conf. You may choose any name you like for your OpenVPN server’s configuration file, as long as it has the “.conf” extension. Whatever the base name, we now open the configuration file with nano:
root@delta:/etc/openvpn# nano delta.conf
Here are the changes and additions we should make.
  • First, we locate the lines
    cert server.crt
    key server.key
    and make sure they reflect the names of our OpenVPN server’s certificate and private key. In our case, those lines were changed into
    cert delta.crt
    key delta.key
  • We locate the line
    dh dh1024.pem
    and replace “1024″ with “2048″:
    dh dh2048.pem
  • At the end of the configuration file we add the following two lines:
    push "redirect-gateway def1"
    push "dhcp-option DNS 10.8.0.1"
Those last two lines instruct the clients to use OpenVPN as the default gateway to the Internet, and also use 10.8.0.1 as the server to deal with DNS requests. Notice that 10.8.0.1 is the IP address of the tunnel network interface OpenVPN automatically creates upon startup. If the clients were to use any other server for name resolution, then we would have a situation in which all DNS requests were served from a possibly untrustworthy server. To avoid such DNS leaks, we instruct all OpenVPN clients to use 10.8.0.1 as the DNS server.
We start our OpenVPN server like this:
root@delta:/etc/openvpn# service openvpn start
By default, OpenVPN listens for connections on port 1194/UDP. One way to see that is with the netstat tool:
root@delta:/etc/openvpn# netstat -anup
Active Internet connections (servers and established)
Proto Recv-Q Send-Q Local Address           Foreign Address         State       PID/Programname
udp        0      0 0.0.0.0:54149           0.0.0.0:*                           555/dhclient
udp        0      0 0.0.0.0:1194            0.0.0.0:*                           3024/openvpn
udp        0      0 0.0.0.0:53              0.0.0.0:*                           2756/dnsmasq
udp        0      0 0.0.0.0:68              0.0.0.0:*                           555/dhclient
udp6       0      0 :::60622                :::*                                555/dhclient
udp6       0      0 :::53                   :::*                                2756/dnsmasq
All is well, though we have no properly configured DNS server for the clients yet.

Step 07 -- A DNS service for OpenVPN clients

That’s why we’ve installed dnsmasq for. We open up its configuration file
root@delta:/etc/openvpn# nano /etc/dnsmasq.conf
locate this line
#listen-address=
and change it into the following one:
listen-address=127.0.0.1, 10.8.0.1
We also locate this line
#bind-interfaces
and delete the hash character on the left:
bind-interfaces
To make dnsmasq take these changes into account, we just restart the service:
root@delta:/etc/openvpn# service dnsmasq restart
 * Restarting DNS forwarder and DHCP server dnsmasq [ OK ]
root@delta:/etc/openvpn#
As it is now, dnsmasq listens for DNS requests from the loopback (lo) and also from the tunnel (tun0) interface. The output of netstat confirms that:
root@delta:/etc/openvpn# netstat -anup
Active Internet connections (servers and established)
Proto Recv-Q Send-Q Local Address           Foreign Address         State       PID/Programname
udp        0      0 0.0.0.0:57219           0.0.0.0:*                           638/dhclient
udp        0      0 0.0.0.0:1194            0.0.0.0:*                           911/openvpn
udp        0      0 127.0.0.1:53            0.0.0.0:*                           1385/dnsmasq
udp        0      0 10.8.0.1:53             0.0.0.0:*                           1385/dnsmasq
udp        0      0 0.0.0.0:68              0.0.0.0:*                           638/dhclient
udp6       0      0 :::39148                :::*                                638/dhclient

Step 08 -- Router functionality

We want the VM/box our OpenVPN server runs on to behave like a router, and that means that IP forwarding must be enabled. To enable it right now, from the root account we just type
root@delta:/etc/openvpn# echo "1"> /proc/sys/net/ipv4/ip_forward
To make this setting persistent across reboots we open up /etc/sysctl.conf
root@delta:/etc/openvpn# nano /etc/sysctl.conf
locate the line
#net.ipv4.ip_forward=1
and remove the hash character on the left:
net.ipv4.ip_forward=1
There are also some iptables-related rules we should activate:
root@delta:/etc/openvpn# iptables -A FORWARD -m state --state RELATED,ESTABLISHED -j ACCEPT
root@delta:/etc/openvpn# iptables -A FORWARD -s 10.8.0.0/24 -j ACCEPT
root@delta:/etc/openvpn# iptables -A FORWARD -j REJECT
root@delta:/etc/openvpn# iptables -t nat -A POSTROUTING -s 10.8.0.0/24 -o eth0 -j MASQUERADE
root@delta:/etc/openvpn#
And of course we want these rules activated every time Ubuntu boots up, so we add them inside /etc/rc.local:
#!/bin/sh -e
#
# rc.local
#
# This script is executed at the end of each multiuser runlevel.
# Make sure that the script will "exit 0" on success or any other
# value on error.
#
# In order to enable or disable this script just change the execution
# bits.
#
# By default this script does nothing.
  
iptables -A FORWARD -m state --state RELATED,ESTABLISHED -j ACCEPT
iptables -A FORWARD -s 10.8.0.0/24 -j ACCEPT
iptables -A FORWARD -j REJECT
iptables -t nat -A POSTROUTING -s 10.8.0.0/24 -o eth0 -j MASQUERADE
  
service dnsmasq restart
 
exit 0
Please notice the line before the last one:
service dnsmasq restart
This is crucial: During system startup dnsmasq tries to come up before OpenVPN does. But without OpenVPN there is no tunnel interface (tun0) present so naturally dnsmasq fails. A bit later, when /etc/rc.local is read the tun0 interface is present, so at this point we restart dnsmasq and everything is as it's supposed to be.

Step 09 -- Client configuration

In Step 05 we created the directory ovpn-client inside our user’s home directory (/home/sub0, in our example). In there we have the CA certificate plus the client certificate and private key. There’s only one file missing and that’s the configuration file for the client. A sample file we can use is inside /usr/share/doc/openvpn/examples/sample-config-files:
root@delta:/etc/openvpn# exit
exit
sub0@delta:~$ cd~/ovpn-client
sub0@delta:~/ovpn-client$ cp/usr/share/doc/openvpn/examples/sample-config-files/client.conf .
sub0@delta:~/ovpn-client$
We open up client.conf for editing and immediately locate the following line:
remote my-server-1 1194
This “my-server-1″ string is a placeholder and we are now going to replace it for our server’s public domain name or public IP. If we do have a public domain name already assigned to the server, then there’s nothing more to do than put it in place of my-server-1. Things get a tiny bit more involved if there’s no public domain name for our server. What’s the public IP for it? One way to find out is by typing the following:
sub0@delta:~/ovpn-client$ curl ipecho.net/plain; echo
(If instead of a numeric IP address you get an error, just wait a few seconds and try again.) So now we know our server’s public IP, but is it static or dynamic? Well, if we’re dealing with a server at home or even at the office, chances are it has a dynamic IP address. In that case it is advisable to use a free dynamic DNS service, such as the one provided by http://www.noip.com. In the case of NoIP, assuming we have chosen the free domain dnsalias.net then we may end up with a line like this
remote ovpn.dnsalias.net 1194
where “ovpn” is the hostname we’ve given to the server. On the other hand, if our server is hosted in the cloud then it probably has a static public IP address. In that case, the remote directive inside client.conf will look like the following:
remote 1.2.3.4 1194
There are two more lines we need to modify:
cert client.crt
key client.key
In our case, the certificate and private key files for the client are named laptop.crt and laptop.key respectively, so our client.conf contains these two lines:
cert laptop.crt
key laptop.key
After making sure the changes to client.conf are saved, we need to securely transfer the whole ovpn-client directory to the client. One way to do so is by using the scp command (secure copy or copy over SSH). An alternative is provided by the excellent and free FileZilla, which supports FTP over SSH connections (SFTP).

Step 10 -- Connecting and testing

In front of any instance our IaaS provider has a firewall in place, so in order for our OpenVPN server to be reachable from the Internet we explicitly open port 1194/UDP.So how do we actually connect to the remote OpenVPN server? It all depends on the type of the device we have in hand and of course on the operating system is runs. In a bit we are going to examine the cases of four different OS families — or OS categories, if you will: Linux, Windows, OS X and iOS/Android. Note though that no matter the device or the OS, for the connection to be successful we need to be outside of the OpenVPN server’s local network. In addition, if there’s a firewall in front of the server –and it probably is– then we ought to put a new rule in place which essentially states something like this:
Redirect all incoming UDP packets for port 1194 to port 1194/UDP of the server’s public-facing network interface.
That’s some simple firewall rule, don’t you think? And without further ado, let’s establish our first connection to the fabulous OpenVPN server of ours.
Linux. All we need is the openvpn package installed. One way to connect to the remote OpenVPN server is to fire up a terminal, change to the ovpn-client directory and from the root user account –or with the assistance of sudo– type something like this:
/usr/sbin/openvpn--config client.conf
Anytime we want to terminate the connection we just hit [CTRL+C].
Windows. A free OpenVPN client is the so called OpenVPN Desktop Client. The configuration file client.conf must be renamed to client.ovpn and that’s the file we should give to the OpenVPN Desktop Client. The application will read client.ovpn and create a new connection profile for the OpenVPN server.
Is the WiFi hotspot we're connected to secure? Thanks to OpenVPN we can say ‘don't know, don't care’ -- and really mean it. In this example we use our favorite OpenVPN client for our favorite OS to establish a secure, encrypted communications channel with a remote OpenVPN server, in a datacenter somewhere outside the capital of our favorite country in the world :)OS X. A free OpenVPN client for OS X is tunnelblick. There is also Viscosity which is commercial and happens to be our favorite. Viscosity will read client.conf and create a new connection profile for the remote server.
iOS/Android. An excellent choice is OpenVPN connect. It is free of charge and available from the App Store as well as the Google Play store.
Regardless of the computing platform, sometimes we’d like to check if we’re actually using the OpenVPN server we think we’re using. One way to do that is by following this simple 4-step procedure:
Prior to connecting to the OpenVPN server we…
  • visit a site such as whatip.com and take note of our public IP
  • visit dnsleaktest.com, perform the standard test, take note of the name servers we’re using
What's the DNS server we're currently using? Well, its IP address is 10.8.0.1 and in this particular case that means all our DNS requests are routed through a secure, encrypted tunnel. In not-so-many words, there are no DNS leaks to worry about.After connecting to the OpenVPN server we repeat the above two steps. If we get two different public IPs, this means we do go out on the net through the remote OpenVPN server. In addition, if we get two different sets of name servers, then there are no DNS leaks.

Final thoughts

I use three different OpenVPN servers, all custom-made. One of them runs on the pfSense router at my home office in Thessaloniki, Greece. I use this server when I’m out of office and want secure access to the home LAN. The other two OpenVPN servers are hosted on two different VPSes, one in Reykjavik, Iceland, and the other in New Jersey, USA. Whenever I’m out and about and feel like using a random WiFi hotspot, I don’t even have to think of the security implications: I simply connect to the Reykjavik server and start surfing the web normally. There are also some times when I want to casually check out a service which is geographically restricted to the US. In these not-so-common cases the New Jersey server comes in handy, for when I connect to it I get a public IP from the U, S of A and hence access to that otherwise restricted service. It is worth noting that some service providers maintain blacklists with numerous well-known VPN companies. And that’s *exactly* one of the advantages of setting up your own OpenVPN server on a VPS provider of your choosing: It’s unlikely that this provider is blacklisted.
No matter where the physical location of your server is, OpenVPN ensures that the traffic flow between the client and the server is strongly encrypted. What happens to the traffic leaving the OpenVPN server is another story. Depending on the application-layer protocol it may still be encrypted, but it could be unencrypted as well. So unless you have absolute control of the OpenVPN server and of the local network it belongs to, you cannot fully trust the administrator at the other end. The moral of this is apparent: If you really care about your privacy, then you should keep in mind that your own behavior may indeed undermine it.
advertisment
One example will hopefully get the point across. You have a well configured OpenVPN server in the cloud. You use any random WiFi hotspot anytime you feel like it and without the slightest bit of worry, thanks to that heroic OpenVPN server. Then you fire up your favorite mail client to get your email from this good, old mail server which still uses plain SMTP. Guess what? Your username and password leave the OpenVPN server in plain text, i.e. unencrypted. At the same time a bored administrator in the vicinity of the OpenVPN server could be easily sniffing-out your credentials and storing them in their ever-growing list named “random happy people.txt”.
So what do you do? Simple. You continue using your OpenVPN server, but refrain from using applications which talk old and/or insecure protocols.
Enjoy your brand new OpenVPN server!

3 open source content management systems compared

$
0
0
http://opensource.com/business/14/6/open-source-cms-joomla-wordpress-drupal

Whether you need to set up a blog, a portal for some specific usage, or any other website, which content management system is right for you? is a question you are going to ask yourself early on. The most well-known and widely used open source content management system (CMS) platforms are: Joomla, Wordpress, and Drupal. They are all based on PHP and MySQL and offer a wide range of options to users and developers alike.
To help you choose between these three excellent open source CMS platforms, I've written a comparison based on this criteria: installation complexity, available plugin/themes, ease of use, and more.

Installation time and complexity

Installation is the first thing you would need to do before you start using a CMS, so lets have a look at what it takes to install these tools.
Drupal
Drupal is considered by many to be the most complex of them all to install and use, but that's simply not true anymore. Drupal has evolved and the process is fairly simple. Download the files from the website, unzip and place the contents in the root folder of your webserver. Then access the root folder from you browser. From there on, you just let the software do it for you. But remember to create a database for your Drupal site and keep the database user name and password on hand before you start the installation process.
Joomla
Like Drupal, Joomla also needs you to provide the database name during the installation. The installation process in Joomla is similar to Drupal except for a few extra options that Joomla provides during installation. For example, you can choose if your Joomla site should be offline after installation, and you get to see all the configurations before the final installation happens. Also, as a security feature, the installer requires removing the installation code folder after installation.
Wordpress
Most people think that Wordpress is the most easy to use of these three CMS tools. Rightly so. Wordpress requires the same information as the other two, but this is nicely hidden behind two stages of installation. The first part is the creation of config.php file (all of the information about the database, username/password, database host etc. goes in the file). Once this is done, there's just one click for installation of Wordpress. If you have a config.php file ready (from your previous installation or if you manually created it) there is no need to do the first step.  The installer automatically searches for the file and takes you to config.php file creation only if it is not present.
In summary
Installation of all three of these tools is easy and similar with only a few noticeable differences. While Drupal installation looks and feels a bit lengthy, Joomla provides few extra options and a secure feature of installer files deletion. Wordpress has a minimal interface and the quick installation feels nice, but it doesn’t let you configure much during installation. However, all of them need basic information like database name, user ID, and password, among others.

Plugin and theme availability

This is another important aspect of choosing a CMS. You don’t want to get stuck with a CMS that has too few plugins and themes available, because if you don’t find what you want, you may need to get one built as per your requirements and that will directly impact the overall cost of you project! Lets have a look at the total number of plugins and themes available for each of the CMSs in question, though it is possible that you may not find what you want even if the there are more available; but the higher the count the greater the probability that you will find what you are looking for.
Drupal
At the time of writing this article, Drupal’s official website lists 1223 themes and 14369 modules (plugins are called modules) which are available for free download. This is a pretty good number. If you want to find Drupal themes outside of the theme marketplace though, you will be more hard pressed.
Joomla
Joomla's official website lists 7437 plugins, and there is no information about themes. But the theme marketplaces have relatively more Joomla themes available than Drupal themes.
Wordpress
If you consider only the numbers, Wordpress wins this round hands down. With 2176 themes and 28593 plugins available on the official website, it quite clearly shows the might of the community behind Wordpress. Even the marketplaces have many Wordpress themes available. This huge number is also attributed to the popularity Wordpress has over other CMS solutions.
In summary
Wordpress' count is not simply an indicator of how good a CMS is, rather it is an indication of how popular it is. Also, there is catch here: as many opine, Wordpress needs more plugins because there are fewer core CMS features supported by Wordpress out of the box. Features such as user access control (syndication, news feed management etc.) have to be implemented using plugins, probably because it evolved (or still evolving) from a blogging tool to a full fledged CMS. But then, community support and the peace of mind that comes with it, is equally important. With a bigger community you can be assured that tomorrow if there is security loophole uncovered that will get fixed quickly.

Ease of use

This is another important aspect of having a CMS. You know that your CMS has many features, but you will need to use them without having the time to read the user manual. So, how easy or difficult it is to figure out things by yourself matters a lot.
Drupal
Drupal provides some very important features in a very simple and basic user interface (UI). Once you login to the admin account, you have a menu bar on the top, showing all the important aspects of your Drupal site. There is a content link, which shows you a list of all the content and comments on your site and lets you add or manage them. For example, for publish/remove. Other links in the menu are also quite intuitive: Structure, Appearance, People, Modules, Configurations, and Reports. With each name, you can probably guess what’s in there.
Joomla
When you login to the Joomla admin page for the first time, you will probably feel a little lost. With so many menus on the page, both vertical and horizontal, it is a bit difficult to understand what’s what. But then you will recognize the menu on the left side of the page is just a collection of important links from the main menu on the top. As with Drupal, Joomla lists all the major aspects of the site as different menu items, and below each menu item there is a drop down with more links. Overall the interface of Joomla admin is more polished and refined (compared to Drupal) and also provides more fine-tuned control over the website, but the downside is if you are new to Joomla you will find too many buttons and links all over the place, and it may be difficult to understand their use without looking at the documentation.
Wordpress
Wordpress lives up to being simple and easy to use. The interface is minimal and uses easy to understand language which makes a difference, especially to novices. For example, the button in the admin landing page says "Customize Your Site," encouraging users to go ahead and try it. Compared to the Joomla/Drupal interface that uses more technical language, Wordpress definitely has an edge here.
For websites managed by users with little or no technical background, or small websites with frequent updates required, Wordpress is probably the way to go. The interface is very simple, and you don’t really need to hire someone to do the stuff for you. But if you don’t mind playing around a little and learning things along the way, Joomla is a lot more interesting. It has loads and loads of settings and controls, which let you manage the site to a greater extent. Even Drupal lets you do the same, with a more simple but robust looking interface.

Customization and upgrades

How you can customize and upgrade the CMS is another important aspect you will want to think over before deciding which platform to use. With time, any CMS needs to be upgraded for security or functionality or other reasons, and you may not like to be stuck with a system that is difficult to update or maintain. Also, many times the out of the box solution e.g. themes or plugins are not exactly the way you want them to be, but very close to it. So, you may want to customize things yourself in such cases. Although, customization requires a level of technical expertise, user experience makes the difference. Let’s see how easy or difficult it is to customize or upgrade these CMSs.
Drupal
After some research I found that, the only way to upgrade a Drupal installation is to do it manually, i.e. backup old files and data, extract the Drupal latest package, and replace all the old files except /sites folder (contains themes and other data) and any other files added. This may sound like a tough task for someone new to the field, there is a certain degree of risk involved as well, and if anything goes wrong you may loose your website altogether. But, if you are an expert, or don’t mind getting expert help, there is no need to worry. Again, to customize your theme, there is no in-application support and you will need to either install a new plugin, which lets you edit themes, or do the customization offline.
Joomla
Joomla supports upgrading the core from the backend, i.e. you login to the backend, go to Joomla update component (version >= 2.5.4) or Update tab in Joomla Extension Manager (version < 2.5.4), and click install update. That’s it! However, in certain cases, this update method cannot be used. Other methods to update Joomla are Install method, where you select an update file and then tell Joomla to install it and manually update, where you need to manually replace the files. Do remember to always keep a back up before attempting any updates. As far as editing themes is concerned, you need to edit them offline or install the theme editor plugin.
Wordpress
Like Joomla, Wordpress also supports online updates via the admin user interface. Wordpress alerts you whenever there is an update available, if you want to update, just click on update now and Wordpress is updated to latest version! Of course you can take the manual route to update as well. Another interesting feature is the online file editing. It lets you customize your themes or plugins by editing the files in the application itself. Suppose you don’t like an image which is embedded in the theme, and there is no theme setting to change it. Just head over to Administration > Appearance > Editor menu, select the file which you think has that image and edit it. Then you can straightaway review your change as well. Similarly even plugins can be updated; the editor can be found at Administration > Plugins > Editor.
In summary
Wordpress is the winner for customization and upgrades. That means it will be easy if you alone or a small team of people are planning to set up the website. Having said that, Joomla and Drupal can’t be simply written off. Joomla has update features and although Drupal doesn’t offer that right now it has other critical features that make it a leading CMS.

5 Free Tools for Compliance Management

$
0
0
http://www.esecurityplanet.com/open-source-security/5-free-tools-for-compliance-management.html

Most IT pros consider compliance a hassle. Yet the tools of compliance can empower security technologies and simplify risk management. Better yet, some of those tools are free.


Many organizations must comply with regulations such as HIPAA, and the numbers are growing, fueled by constantly evolving legislation that creates new rules, requirements and auditing procedures.
Compliance requirements are often seen as an unnecessary burden that was legislated into existence to protect external entities. However, properly enforced compliance policies can protect organizations from a myriad of problems – ranging from security breaches to lawsuits to corporate espionage.

Compliance's Relationship to Security

Compliance has a symbiotic relationship with the procedures and requirements dictated by computer security. Compliance, like security, is all about managing risk. The risk associated with compliance failures can include financial impact (fines), data loss (intrusions), lost business (customer impacts) or even a suspension of operations.
The Danger Deepens: 2014 Neustar Annual DDoS Attacks and Impact Report

The risks associated with a failure to properly secure IT are similar, if not identical. The only major difference is that most security practices are optional, while compliance practices are required.
While it is easy to see how security and compliance go hand in hand with risk management, the realization does nothing to ease the burdens of compliance and security. It does, however, give some insight into how those burdens can be reduced. Unifying risk management, security management and risk management can lead to an economy of scale, creating efficiencies that lessen the burdens imposed, both in time and budgets.

How Tools Can Help

However, it takes more than an ideology of unification to solve those problems; it takes tangible elements as well – starting with the proper tools. Unified security management tools that offer integration and management modules can often combine risk management, compliance initiatives and security controls into a single managed element, converting compliance to little more than an extension of policy-based security enforcement.
With the proper tool set, compliance management and risk management can become natural extensions of security management, offering managers a clear path to establishing compliance, protecting data and enforcing policy. That holistic approach will reduce costs, while enhancing the benefits of all three.
The market has become all but flooded with compliance tools, yet few of those tools include all of the needed capabilities to combine compliance management with other security capabilities, such as intrusion detection and prevention systems (IDPS),  next generation firewall (NGFW), anti-malware and so on. All of these are rapidly becoming a concern for organizations charged with compliance regulations.
With that in mind, it becomes clear that IT managers may have to build their own solutions and integrate off-the-shelf products with other solutions. Luckily for those choosing a path of self-development, several free tools can become part of an integrated solution. In no particular order, here are five tools that can help IT pros seeking to comply with various regulations:

How to use systemd for system administration on Debian

$
0
0
http://xmodulo.com/2014/07/use-systemd-system-administration-debian.html

Soon enough, hardly any Linux user will be able to escape the ever growing grasp that systemd imposes on Linux, unless they manually opt out. systemd has created more technical, emotional, and social issues than any other piece of software as of late. This predominantly came to show in the heated discussions also dubbed as the 'Init Wars', that occupied parts of the Debian developer body for months. While the Debian Technical Comittee finally decided to include systemd in Debian 8 "Jessie", there were efforts to supersede the decision by a General Resolution, and even threats to the health of developers in favor of systemd.
This goes to show how deep systemd interferes with the way of handling Linux systems that has, in large parts, been passed down to us from the Unix days. Theorems like "one tool for the job" are overthrown by the new kid in town. Besides substituting sysvinit as init system, it digs deep into system administration. For right now a lot of the commands you are used to will keep on working due to the compatibility layer provided by the package systemd-sysv. That might change as soon as systemd 214 is uploaded to Debian, destined to be released in the stable branch with Debian 8 "Jessie". From thereon, users need to utilize the new commands that come with systemd for managing services, processes, switching run levels, and querying the logging system. A workaround is to set up aliases in .bashrc.
So let's have a look at how systemd will change your habits of administrating your computers and the pros and cons involved. Before making the switch to systemd, it is a good security measure to save the old sysvinit to be able to still boot, should systemd fail. This will only work as long as systemd-sysv is not yet installed, and can be easily obtained by running:
# cp -av /sbin/init /sbin/init.sysvinit
Thusly prepared, in case of emergency, just append:
init=/sbin/init.sysvinit
to the kernel boot-time parameters.

Basic Usage of systemctl

systemctl is the command that substitutes the old "/etc/init.d/foo start/stop", but also does a lot more, as you can learn from its man page.
Some basic use-cases are:
  • systemctl - list all loaded units and their state (where unit is the term for a job/service)
  • systemctl list-units - list all units
  • systemctl start [NAME...] - start (activate) one or more units
  • systemctl stop [NAME...] - stop (deactivate) one or more units
  • systemctl disable [NAME...] - disable one or more unit files
  • systemctl list-unit-files - show all installed unit files and their state
  • systemctl --failed - show which units failed during boot
  • systemctl --type=mount - filter for types; types could be: service, mount, device, socket, target
  • systemctl enable debug-shell.service - start a root shell on TTY 9 for debugging
For more convinience in handling units, there is the package systemd-ui, which is started as user with the command systemadm.
Switching runlevels, reboot and shutdown are also handled by systemctl:
  • systemctl isolate graphical.target - take you to what you know as init 5, where your X-server runs
  • systemctl isolate multi-user.target - take you to what you know as init 3, TTY, no X
  • systemctl reboot - shut down and reboot the system
  • systemctl poweroff - shut down the system
All these commands, other than the ones for switching runlevels, can be executed as normal user.

Basic Usage of journalctl

systemd does not only boot machines faster than the old init system, it also starts logging much earlier, including messages from the kernel initialization phase, the initial RAM disk, the early boot logic, and the main system runtime. So the days where you needed to use a camera to provide the output of a kernel panic or otherwise stalled system for debugging are mostly over.
With systemd, logs are aggregated in the journal which resides in /var/log/. To be able to make full use of the journal, we first need to set it up, as Debian does not do that for you yet:
# addgroup --system systemd-journal
# mkdir -p /var/log/journal
# chown root:systemd-journal /var/log/journal
# gpasswd -a $user systemd-journal
That will set up the journal in a way where you can query it as normal user. Querying the journal with journalctl offers some advantages over the way syslog works:
  • journalctl --all - show the full journal of the system and all its users
  • journalctl -f - show a live view of the journal (equivalent to "tail -f /var/log/messages")
  • journalctl -b - show the log since the last boot
  • journalctl -k -b -1 - show all kernel logs from the boot before last (-b -1)
  • journalctl -b -p err - shows the log of the last boot, limited to the priority "ERROR"
  • journalctl --since=yesterday - since Linux people normally do not often reboot, this limits the size more than -b would
  • journalctl -u cron.service --since='2014-07-06 07:00' --until='2014-07-06 08:23' - show the log for cron for a defined timeframe
  • journalctl -p 2 --since=today - show the log for priority 2, which covers emerg, alert and crit; resembles syslog priorities emerg (0), alert (1), crit (2), err (3), warning (4), notice (5), info (6), debug (7)
  • journalctl > yourlog.log - copy the binary journal as text into your current directory
Journal and syslog can work side-by-side. On the other hand, you can remove any syslog packages like rsyslog or syslog-ng once you are satisfied with the way the journal works.
For very detailed output, append "systemd.log_level=debug" to the kernel boot-time parameter list, and then run:
# journalctl -alb
Log levels can also be edited in /etc/systemd/system.conf.

Analyzing the Boot Process with systemd

systemd allows you to effectively analyze and optimize your boot process:
  • systemd-analyze - show how long the last boot took for kernel and userspace
  • systemd-analyze blame - show details of how long each service took to start
  • systemd-analyze critical-chain - print a tree of the time-critical chain of units
  • systemd-analyze dot | dot -Tsvg > systemd.svg - put a vector graphic of your boot process (requires graphviz package)
  • systemd-analyze plot > bootplot.svg - generate a graphical timechart of the boot process


systemd has pretty good documentation for such a young project under heavy developement. First of all, there is the 0pointer series by Lennart Poettering. The series is highly technical and quite verbose, and holds a wealth of information. Another good source is the distro agnostic Freedesktop info page with the largest collection of links to systemd resources, distro specific pages, bugtrackers and documentation. A quick glance at:
# man systemd.index
will give you an overview of all systemd man pages. The command structure for systemd for various distributions is pretty much the same, differences are found mainly in the packaging.

Open source tools: Five outstanding audio editors

$
0
0
http://www.techrepublic.com/blog/five-apps/open-source-tools-five-outstanding-audio-editors

Whether you're producing podcasts or creating highly sophisticated sound recordings, one of these open source apps will suit your needs.
hero
Image: iStockphoto.com/Sergey Nivens
A solid audio editor might not seem to belong at the top of your must-have list. It is, however, a tool that can go a long way toward helping you with your business. How? With an audio editor, you can add audio to your business website, create and edit a podcast to help promote your service or product, record and submit audio for radio ads, and more. But what software titles are available from the open source community? Believe it or not, some of the finest audio editors available are open source and offer power and options you might expect only in costly, proprietary software.
Let's take a look at five open source audio editors and see if there's one that will fit your bill.
Note: This article is also available as an image gallery.

1: Audacity

Audacity (Figure A) is the software I've been using for years to record Zombie Radio. It's a powerful multi-track recording app, and it's easy to use. Audacity allows you to record live audio, record from your desktop, convert old tapes/records, edit various formats, cut/copy/splice/mix audio, add effects, change speed/pitch, and much more. At first blush, you might think Audacity is an out-of-date application. But do not let appearances fool you. Audacity is one of the single best recording apps I've ever used. For features and ease of use, you can't beat this recording tool. Audacity is available for Linux, Windows, and Mac.

Figure A

Figure A

2: Ardour

Now we're talking real recording power. Ardour (Figure B) is a digital audio workstation that isn't for the faint of heart. It is to musicians, engineers, soundtrack editors, and composers what Audacity is to podcasters -- the best tool for the job. Not only can you record audio from multiple inputs, you can cut, move, stretch, copy, paste, delete, align, trim, crossfade, rename, snapshot, zoom, transpose, quantize, swing, drag, and drop. The caveat to all of this power is that Ardour comes with a steep learning curve, and It's overkill for podcasters and those wanting to create simple sound recordings.

Figure B

Figure B
Hundreds of plugins are available for this amazing piece of software. The best way to experience Ardour is by downloading and installing Ubuntu Studio or installing on OS X.

3: Traverso

Traverso (Figure C) leans more toward Audacity, but it relies upon the same underlying system that Ardour does: Jack. So although the interface is vastly easier to use than Ardour's, the foundation for connecting to devices (mics, instruments, etc.) is far more complex than Audacity.

Figure C

Figure C
You can use Traverso for a small scale recording session on a netbook or scale up to recording a full-blown orchestra. One outstanding feature that's built into Traverso is the ability to burn your recording straight to CD from within the UI itself. Once you're finished with a project, just burn it and you're done. Traverso is available only for Linux.

4: QTractor

QTractor (Figure D) is another digital audio workstation that requires the Jack Audio Connection Kit. QTractor is a multi-track audio and MIDI sequencing and recording studio. It requires a much better understanding of Jack than Traverso does. But it also delivers a level of power you won't find with lesser applications.

Figure D

Figure D
QTractor lets you drag, move, drop, cut, copy, paste, paste-repeat, delete, split, and merge. It offers unlimited undo/redo, has a built-in patch bay, and much more. QTractor is a great solution for anyone who wants the power of Jack but not the massive complexity (or flexibility and feature set) of Ardour. QTractor is available only for Linux.

5: Linux Multimedia Studio (LMMS)

Linux Multimedia Studio (Figure E) is geared toward songwriters, offering a beat editor and an FX mixer. LMMS includes an incredible array of effects and an impressive number of instruments. With LMMS you can compose entire songs without plugging in a single instrument. Just drag and drop an instrument plug-in to the song editor and you're good to go.

Figure E

LMMS does have a fairly steep learning curve, so be prepared to spend some time getting up to speed with the interface and tools. The name Linux Multimedia Studio a bit misleading, as it is actually available for both Linux and Windows.

Audio tasks?

If you're looking for an audio editor, and you don't want to shell out the money for proprietary software, you don't have to worry about losing features or power. The five editors listed here will get your job done and done right.
How do you make use of audio? Do you use it for training, marketing, PR? Or is audio yet to make its way into your business plan?

How to set up two-factor authentication for SSH login on Linux

$
0
0
http://xmodulo.com/2014/07/two-factor-authentication-ssh-login-linux.html

With many high-profile password leaks nowadays, there is a lot of buzz in the industry on "multi-factor" authentication. In a multi-factor authentication system, users are required to go through two distinct authentication procedures: providing something they know (e.g., username/password), and leveraging something they have "physical" access to (e.g., one-time passcode generated by their mobile phone). This scheme is also commonly known as two-factor authentication or two-step verification.

To encourage the wide adoption of two-factor authentication, Google released Google Authenticator, an open-source application that can generate one-time passcode based on open standards (e.g., HMAP/time-based). It is available on multiple platforms including Linux, Android, iOS. Google also offers a pluggable authentication module (PAM) for Google Authenticator, allowing it to be integrated with other PAM-enabled applications such as OpenSSH.

In this tutorial, I will describe how to set up two-factor authentication for an SSH server by integrating Google Authenticator with OpenSSH. I am going to use a Android device to generate one-time passcode. In this tutorial, you will need two things: (1) a Linux host where OpenSSH server is running, and (2) an Android device.

Install Google Authenticator on Linux

The first step is to install Google Authenticator on the Linux host where OpenSSH server is running. Follow this guide to install Google Authenticator and its PAM module on your system.
Once Google Authenticator is ready, you need to go through one-time configuration which involves creating an authentication key from this Linux host, and registering it with an Android device. This will be explained next.

Generate an Authentication Key

To start, simply run Google Authenticator on the Linux server host.
$ google-authenticator
You will see a QR code, as well as a secret key underneath it. The displayed QR code simply represents the numeric secret key. You will need either information to finalize configuration with an Android device.


Google Authenticator will ask you several questions. If you are not sure, you an answer "Yes" to all questions. The emergency scratch codes can be used to regain access to the SSH server in case you lose your Android device, and so cannot generate one-time passcode. So it's better to write them down somewhere.

Run Google Authenticator on Android

As we are going to use an Android device for two-factor authentication, you will need to install Google Authenticator app on Android. Go to Google Play to install it on Android.
When you start Google Authenticator on Android, you will see the following configuration menu.

You can choose either "Scan a barcode" or "Enter provided key" option. The first option allows you to enter the security key, simply by scanning the generated QR code. In this case, you will need to install Barcode Scanner app first. If you choose the second option, you can type the security key using Android keyboard as follows.

Once you register a secret key either way, you will see the following screen on Android.

Enable Google Authenticator on SSH Server

The final step is to integrate Google Authenticator with OpenSSH server. For that, you need to edit two files.
First, edit a PAM configuration file, and append the line below.
$ sudo vi /etc/pam.d/sshd
1
auth required pam_google_authenticator.so
Then open an SSH server config file, search for ChallengeResponseAuthentication, and enable it.
$ sudo vi /etc/ssh/sshd_config
1
ChallengeResponseAuthentication yes
Finally, restart SSH server.
On Ubuntu, Debian or Linux Mint:
$ sudo service ssh restart
On Fedora:
$ sudo systemctl restart sshd
On CentOS or RHEL:
$ sudo service sshd restart

Test Two-factor Authentication

Here is how you use two-factor authentication for SSH logins.
Run Google Authenticator app on Android to obtain one-time verification code. Once generated, a given passcode is valid for 30 seconds. Once it expires, Google Authenticator will automatically generate a new one.

Now log in to the SSH server as you normally do.
$ ssh user@ssh_server
When you are asked to enter "Verification code", type in the verification code generated by Android. After successful verification, then you can type in your SSH login password.

To conclude, two-factor authentication can be an effective means to secure password authentication by adding an extra layer of protection. You can use Google Authenticator to secure other logins such as Google account, WordPress.com, Dropbox.com, Outlook.com, etc. Whether you decide to use it or not, it's up to you, but there is a clear industry trend towards the adoption of two-factor authentication.

How To Enable Storage Pooling And Mirroring Using Btrfs For Linux

$
0
0
http://www.makeuseof.com/tag/how-to-enable-storage-pooling-and-mirroring-using-btrfs-for-linux

If you have multiple hard drives in your Linux system, you don’t have to treat them all as different storage devices. With Btrfs, you can very easily create a storage pool out of those hard drives.
Under certain conditions, you can even enable mirroring so you won’t lose your data due to hard drive failure. With everything set up, you can just throw whatever you want into the pool and make the most use of the storage space you have.
There isn’t a GUI configuration utility that can make all of this easier (yet), but it’s still pretty easy to do with the command line. I’ll walk you through a simple setup for using several hard drives together.

What’s Btrfs?

Btrfs (called B-tree filesystem, “Butter FS”, or “Better FS”) is an upcoming filesystem that incorporates many different features at the filesystem level normally only available as separate software packages. While Btrfs has many noteworthy features (such as filesystem snapshots), the two we’re going to take a look at in this article are storage pooling and mirroring.
If you’re not sure what a filesystem is, take a look at this explanation of a few filesystems for Windows. You can also check out this nice comparison of various filesystems to get a better idea of the differences between existing filesystems.
Btrfs is still considered “not stable” by many, but most features are already stable enough for personal use — it’s only a few select features where you might encounter some unintended results.
While Btrfs aims to be the default filesystem for Linux at some point in the future, it’s still best to use ext4 for single hard drive setups or for setups that don’t need storage pooling and mirroring.

Pooling Your Drives

For this example, we’re going to use a four hard drive setup. There are two hard drives (/dev/sdb and /dev/sdc) with 1TB each, and two other hard drives (/dev/sdd and /dev/sde) with 500GB for a total of four hard drives with a total of 3TB of storage.
You can also assume that you have another hard drive (/dev/sda) of some arbitrary size which contains your bootloader and operating system. We’re not concerning ourselves about /dev/sda and are solely combining the other four hard drives for extra storage purposes.

Creating A Filesystem

btrfs gparted   How To Enable Storage Pooling And Mirroring Using Btrfs For Linux

To create a Btrfs filesystem on one of your hard drives, you can use the command:sudo mkfs.btrfs /dev/sdb
Of course, you can replace /dev/sdb with the actual hard drive you want to use. From here, you can add other hard drives to the Btrfs system to make it one single partition that spans across all hard drives that you add. First, mount the first Btrfs hard drive using the command:
sudo mount /dev/sdb /mnt
Then, run the commands:
sudo mkfs.btrfs /dev/sdc mkfs.btrfs /dev/sdd mkfs.btrfs /dev/sde
Now, you can add them to the first hard drive using the commands:
sudo btrfs device add /dev/sdc /mnt btrfs device add /dev/sdd /mnt btrfs device add /dev/sde /mnt
If you had some data stored on the first hard drive, you’ll want the filesystem to balance it out among all of the newly added hard drives. You can do this with the command:
sudo btrfs filesystem balance /mnt
Alternatively, if you know before you even begin that you want a Btrfs filesystem to span across all hard drives, you can simply run the command:
sudo mkfs.btrfs -d single /dev/sdb /dev/sdc /dev/sdd /dev/sde
Of course this is much easier, but you’ll need to use the method mentioned above if you don’t add them all in one go.
You’ll notice that I used a flag: “-d single”. This is necessary because I wanted a RAID 0 configuration (where the data is split among all the hard drives but no mirroring occurs), but the “single” profile is needed when the hard drives are different sizes. If all hard drives were the same size, I could instead use the flag “-d raid0″. The “-d” flag, by the way, stands for data and allows you to specify the data configuration you want. There’s also an “-m” flag which does the exact same thing for metadata.
Besides this, you can also enable RAID 1 using “-d raid1″ which will duplicate data across all devices, so using this flag during the creation of the Btrfs filesystem that spans all hard drives would mean that you only get 500GB of usable space, as the three other hard drives are used for mirroring.
Lastly, you can enable RAID 10 using “-d raid10″. This will do a mix of both RAID 0 and RAID 1, so it’ll give you 1.5TB of usable space as the two 1TB hard drives are paired in mirroring and the two 500GB hard drives are paired in mirroring.

Converting A Filesystem

btrfs harddiskstack   How To Enable Storage Pooling And Mirroring Using Btrfs For Linux

If you have a Btrfs filesystem that you’d like to convert to a different RAID configuration, that’s easily done. First, mount the filesystem (if it isn’t already) using the command:sudo  mount /dev/sdb1 /mnt
Then, run the command:
sudo btrfs balance start -dconvert=raid1 -mconvert=raid1 /mnt
This will change the configuration to RAID 1, but you can replace that with whatever configuration you want (so long as it’s actually allowed — for example, you can’t switch to RAID 10 if you don’t have at least four hard drives). Additionally, the -mconvert flag is optional if you’re just concerned about the data but not the metadata.

If Hard Drive Failure Occurs

If a hard drive fails, you’ll need to remove it from the filesystem so the rest of the pooled drives will work properly. Mount the filesystem with the command:
sudo mount -o degraded /dev/sdb /mnt
Then fix the filesystem with:
sudo btrfs device delete missing /mnt
If you didn’t have RAID 1 or RAID 10 enabled, any data that was on the failed hard drive is now lost.

Removing A Hard Drive From The Filesystem

Finally, if you want to remove a device from a Btrfs filesystem, and the filesystem is mounted to /mnt, you can do so with the command:
sudo btrfs device delete /dev/sdc /mnt
Of course, replace /dev/sdc with the hard drive you want to remove. This command will take some time because it needs to move all of the data off the hard drive being removed, and will likewise fail if there’s not enough room on the other remaining hard drives.

Automatic Mounting

btrfs fstab   How To Enable Storage Pooling And Mirroring Using Btrfs For Linux

If you want the Btrfs filesystem to be mounted automatically, you can place this into your /etc/fstab file:sudo /dev/sdb /mnt btrfs device=/dev/sdb,device=/dev/sdc,device=/dev/sdd,device=/dev/sde 0 0

Mount Options

One more bonus tip! You can optimize Btrfs’s performance in your /etc/fstab file under the mount options for the Btrfs filesystem. For large storage arrays, these options are best: compress-force=zlib,autodefrag,nospace_cache. Specifically, compress=zlib will compress all the data so that you can make the most use of the storage space you have. For the record, SSD users can use these options: noatime,compress=lzo,ssd,discard,space_cache,autodefrag,inode_cache. These options go right along with the device specifications, so a complete line in /etc/fstab for SSD users would look like:
sudo /dev/sdb /mnt btrfs device=/dev/sdb,device=/dev/sdc,device=/dev/sdd,device=/dev/sde,
noatime,compress=lzo,ssd,discard,space_cache,autodefrag,inode_cache 0 0

How Big Is Your Storage Pool?

Btrfs is a fantastic option for storage pooling and mirroring that is sure to become more popular once it is deemed completely stable. It also wouldn’t hurt for there to be a GUI to make configuration easier (besides in some distribution installers), but the commands you have to use in the terminal are easy to grasp and apply.
What’s the biggest storage pool you could make? Do you think storage pools are worthwhile? Let us know in the comments!

Georgia Tech researchers enlist owners of websites -- and website users -- via Encore project

$
0
0
http://www.networkworld.com/article/2450108/security0/open-source-tool-could-sniff-out-most-heavily-censored-websites-georgia-tech-nsf-google.html

Georgia Tech researchers are seeking the assistance of website operators to help better understand which sites are being censored and then figure out how to get around such restricted access by examining the data collected.
The open source Encore [Enabling Lightweight Measurements of Censorship with Cross-Origin Requests] tool involves website operators installing a single line of code onto their sites, and that in turn will allow the researchers to determine whether visitors to these sites are blocked from visiting other sites around the world known to be censored. The researchers are hoping to enlist a mix of small and big websites, and currently it is running on about 10 of them.
Georgia Tech Encore toolGeorgia Tech
The code works in the background after a page is loaded and Georgia Tech’s team claims the tool won’t slow performance for end users or websites, nor does it track browsing behavior.
+Also on NetworkWorld:13 of today's Coolest Network Research Projects+
Featured Resource
Presented by Dell Inc.
Improvements in 10GbE technology, lower pricing, and improved performance make 10GbE for the mid-market
Learn More
"Web censorship is a growing problem affecting users in an increasing number of countries," said Sam Burnett, the Georgia Tech Ph.D. candidate who leads the project, in a statement. "Collecting accurate data about what sites and services are censored will help educate users about its effects and shape future Internet policy discussions surrounding Internet regulation and control."
(Burnett’s adviser is Nick Feamster, whose Internet censorship research we’ve written about in the past. I exchanged email with Feamster to gain additional insight into this new research.)
End users won’t even know the baseline data measurement is taking place, which of course when you’re talking about censorship and privacy, can be a sticky subject. Facebook learned that recently when disclosures erupted regarding its controversial secret study of users’ moods. The Georgia Tech researchers in an FAQ say their tool can indicate to users that their browsers are conducting measurements, and that users can opt out.
"Nothing would pop up [in an end user's browser] but a webmaster has an option to make the measurements known/visible," Feamster says.
"They also assure potential Encore users that the list of censored sites compiled by Herdict does not include pornographic ones, so an end user’s browser won’t be directed to such sites in the name of research.
Encore, which is being funded by a National Science Foundation grant on censorship measurement and circumvention as well as via a Google Focused Research Award, has been submitted in hopes of presenting it at the Internet Measurement Conference in November in Vancouver.

Linux Terminal: inxi – a full featured system information script

$
0
0
http://linuxaria.com/pills/linux-terminal-inxi-a-full-featured-system-information-script

Sometimes it’s useful to know which components you are using on a GNU/Linux computer or server, you can go with the long way, taking a look at the boot message for all the hardware discovered, use some terminal commands such as lsusb,lspci or lshw or some graphical tools such as hardinfo (my favourite graphical tool) or Inex/CPU-G.
But I’ve discovered on my Linux Mint, that, by default, I’ve now a new option: inxi
inxi it’s a full featured system information script wrote in bash, that easily will show on a terminal all the info of your system.


Inxi comes pre-installed with SolusOS, Crunchbang, Epidemic, Mint, AntiX and Arch Linux but as it is a bash script it works on a lot of other distributions. Although it is intended for use with chat applications like IRC it also works from a shell and provides an abundance of information, It is is a fork of locsmif’s largely unmaintained yet very clever, infobash script. inxi is co-developed, a group project, primarily with trash80 on the programming side.
Inxi works on Konversation, Xchat, irssi, Quassel, as well as on most other IRC clients. Quassel includes (usually an older version of) inxi.
Installation is as easy as downloading and chmoding a file.

Installation

Inxi is present in the default repository of most distros so you can install it (if you are missing it) with these commands:
# Ubuntu/Debian users
$ sudoapt-get install inxi
 
# CentOS/Fedora users
$ sudoyum install inxi
 
# Arch
$ sudo pacman -s inxi
If inxi is not present on your distro, then you can install it by following the instructions here
https://code.google.com/p/inxi/wiki/Installation

Basic Usage

Just open a terminal (with a normal user) and give the command inxi, this will show up the basic information of your system (in colors !!), something like this:
linuxaria@mint-desktop ~ $ inxi
 
CPU~Dual core Intel Pentium CPU G620 (-MCP-) clocked at 1600.000 Mhz Kernel~3.13.0-24-generic x86_64 Up~8:20 Mem~2814.4/7959.2MB HDD~644.1GB(16.8% used) Procs~221 Client~Shell inxi~1.8.4
Ok, interesting but what if you would like some more info ?
Don’t worry the commands it’s full of options, some are:
-A Show Audio/sound card information.
-C Show full CPU output, including per CPU clockspeed.
-D Show full hard Disk info, not only model, ie: /dev/sda ST380817AS 80.0GB. See also -x and -xx.
-F Show Full output for inxi. Includes all Upper Case line letters, plus -s and -n.
Does not show extra verbose options like -x -d -f -u -l -o -p -t -r unless you use that argument.
-G Show Graphic card information (card, x type, resolution, glx renderer, version).
-I Show Information: processes, uptime, memory, irc client, inxi version.
-l Show partition labels. Default: short partition -P. For full -p output, use: -pl (or -plu).
-n Show Advanced Network card information. Same as -Nn. Shows interface, speed, mac id, state, etc.
-N Show Network card information. With -x, shows PCI BusID, Port number.
And this is just a short list of all the options you can get, as alternatively you could use the -v (verbosity) flag:
-v Script verbosity levels. Verbosity level number is required. Should not be used with -b or -F
Supported levels: 0-7 Example: inxi -v 4
0 – Short output, same as: inxi
1 – Basic verbose, -S + basic CPU + -G + basic Disk + -I.
2 – Adds networking card (-N), Machine (-M) data, shows basic hard disk data (names only),
and, if present, basic raid (devices only, and if inactive, notes that). similar to: inxi -b
3 – Adds advanced CPU (-C), network (-n) data, and switches on -x advanced data option.
4 – Adds partition size/filled data (-P) for (if present):/, /home, /var/, /boot
Shows full disk data (-D).
5 – Adds audio card (-A); sensors (-s), partition label (-l) and UUID (-u), short form of optical drives,
standard raid data (-R).
6 – Adds full partition data (-p), unmounted partition data (-o), optical drive data (-d), full raid.
7 – Adds network IP data (-i); triggers -xx.
This is an example of output with -v 7
linuxaria@mint-desktop ~ $ inxi -v7-c0
System: Host: mint-desktop Kernel: 3.13.0-24-generic x86_64 (64 bit, gcc: 4.8.2)
Desktop: Xfce 4.11.6 (Gtk 2.24.23) Distro: Linux Mint 17 Qiana
Machine: Mobo: ASRock model: H61M-HVS Bios: American Megatrends version: P1.50 date: 11/04/2011
CPU: Dual core Intel Pentium CPU G620 (-MCP-) cache: 3072 KB flags: (lm nx sse sse2 sse3 sse4_1 sse4_2 ssse3 vmx) bmips: 10377
Clock Speeds: 1: 1600.00 MHz 2: 1600.00 MHz
Graphics: Card: Advanced Micro Devices [AMD/ATI] Park [Mobility Radeon HD 5430] bus-ID: 01:00.0
X.Org: 1.15.1 drivers: ati,radeon (unloaded: fbdev,vesa) Resolution: 1920x1080@60.0hz
GLX Renderer: Gallium 0.4 on AMD CEDAR GLX Version: 3.0 Mesa 10.1.0 Direct Rendering: Yes
Audio: Card-1: Intel 6 Series/C200 Series Chipset Family High Definition Audio Controller driver: snd_hda_intel bus-ID: 00:1b.0
Card-2: Advanced Micro Devices [AMD/ATI] Cedar HDMI Audio [Radeon HD 5400/6300 Series] driver: snd_hda_intel bus-ID: 01:00.1
Sound: Advanced Linux Sound Architecture ver: k3.13.0-24-generic
Network: Card-1: Realtek RTL8101E/RTL8102E PCI Express Fast Ethernet controller
driver: r8169 ver: 2.3LK-NAPI port: d000 bus-ID: 03:00.0
IF: eth0 state: down mac: bc:5f:f4:12:18:d3
Card-2: D-Link DWA-125 Wireless N 150 Adapter(rev.A3)[Ralink RT5370]
driver: rt2800usb ver: 2.3.0 usb-ID: 2001:3c19
IF: wlan0 state: up mac: 28:10:7b:42:3e:82
WAN IP: 87.1.60.128 IF: eth0 ip: N/A ip-v6: N/A IF: wlan0 ip: 192.168.0.4 ip-v6: fe80::2a10:7bff:fe42:3e82
Drives: HDD Total Size: 644.1GB (16.8% used)1: id: /dev/sda model: ST500DM002 size: 500.1GB serial: W2AGA8A2
2: id: /dev/sdb model: SanDisk_SDSSDP12 size: 126.0GB serial: 134736401617
3: id: /dev/sdd model: SD/MMC size: 2.0GB serial: 058F63646476-0:0
4: USB id: /dev/sdc model: DataTraveler_G3 size: 16.0GB serial: 001CC0EC30C8BAB085FE002F-0:0
Optical: /dev/sr0 model: N/A rev: N/A dev-links: cdrom
Features: speed: 12x multisession: yes audio: yes dvd: yes rw: cd-r,cd-rw,dvd-r,dvd-ram state: N/A
Partition: ID: / size: 25G used: 5.1G (22%) fs: ext4 dev: /dev/sdb1
label: N/A uuid: 133f805a-3963-42ef-a3b4-753db11789df
ID: /ssd size: 91G used: 24G (28%) fs: ext4 dev: /dev/sdb2
label: N/A uuid: 4ba69219-75e4-44cc-a2ee-ccefddb82718
ID: /home size: 416G used: 60G (16%) fs: btrfs dev: /dev/sda6
label: N/A uuid: 20d66995-8107-422c-a0d9-f731e1e02078
ID: /media/linuxaria/3634-3330 size: 1.9G used: 1.9G (99%) fs: vfat dev: /dev/sdd1
label: N/A uuid: 3634-3330
ID: /media/linuxaria/KINGSTON size: 15G used: 11G (70%) fs: vfat dev: /dev/sdc1
label: KINGSTON uuid: 25B5-AD6B
ID: swap-1 size: 4.00GB used: 0.00GB (0%) fs: swap dev: /dev/sda5
label: N/A uuid: 85e49559-db67-41a6-9741-4efc3f2aae1f
RAID: System: supported: N/A
No RAID devices detected - /proc/mdstat and md_mod kernel raid module present
Unused Devices: none
Unmounted: ID: /dev/sda1 size: 50.00G label: N/A uuid: a287ff9c-1eb5-4234-af5b-ea92bd1f7351
ID: /dev/sr0 size: 1.07G label: N/A uuid: N/A
Sensors: System Temperatures: cpu: 38.0C mobo: N/A gpu: 52.0
Fan Speeds (in rpm): cpu: N/A
Info: Processes: 219 Uptime: 8:26 Memory: 2611.9/7959.2MB Runlevel: 2 Gcc sys: 4.8.2 Client: Shell inxi: 1.8.4
As you can see this output show a looot more information, you can get a long output also with the option -F (full output).
As last thing, if you are using an Xterm you can choose which color scheme use, and to see which one are available just use the command: inxi -c 94, you’ll get an output similar to this one:
inxi color
Inxi in action:


Viewing all 1407 articles
Browse latest View live


<script src="https://jsc.adskeeper.com/r/s/rssing.com.1596347.js" async> </script>