Quantcast
Channel: Sameh Attia
Viewing all 1417 articles
Browse latest View live

How to Set Up an AI Development Environment on Ubuntu

$
0
0

https://www.tecmint.com/setup-ai-development-environment-on-ubuntu

How to Set Up an AI Development Environment on Ubuntu

Artificial Intelligence (AI) is one of the most exciting and rapidly evolving fields in technology today. With AI, machines are able to perform tasks that once required human intelligence, such as image recognition, natural language processing, and decision-making.

If you’re a beginner and want to dive into AI development, Linux is an excellent choice of operating system, as it is powerful, flexible, and widely used in the AI community.

In this guide, we’ll walk you through the process of setting up an AI development environment on your Ubuntu system.

What You Need to Get Started

Before you begin, let’s go over the essentials that you’ll need to set up an AI development environment on Linux:

  • Basic Command Line Knowledge: You should have some familiarity with the Linux terminal and basic commands, as you’ll need to run commands in it.
  • Python: Python is the most popular language for AI development, as most AI libraries and frameworks are written in Python, so it’s essential to have it installed.

Once you have these ready, let’s begin setting up your environment.

Step 1: Update Your System

The first step in setting up any development environment is to ensure that your system is up-to-date, which will ensure that all the software packages on your system are the latest versions and that you don’t run into any compatibility issues.

To update your system, open your terminal and run the following command:

sudo apt update && sudo apt upgrade -y

Once this process is complete, your system is ready for the installation of AI tools.

Step 2: Install Python in Ubuntu

Python is the go-to language for AI development and most AI frameworks such as TensorFlow and PyTorch, are built with Python, so it’s essential to have it installed on your system.

To check if Python is already installed, run:

python3 --version

If Python is installed, you should see a version number, such as Python 3.x.x. If it’s not installed, you can install it by running:

sudo apt install python3 python3-pip -y

Once Python is installed, you can verify the installation by running:

python3 --version

You should see the Python version number displayed.

Step 3: Install AI Libraries in Ubuntu

With Python installed, we now need to install the AI libraries that will help you build and train machine learning models. The two most popular AI libraries are TensorFlow and PyTorch, but there are others as well.

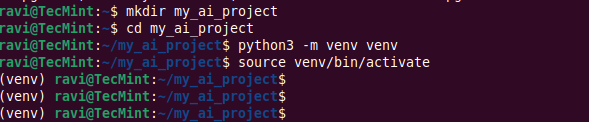
If you’re working on multiple AI projects, it’s a good idea to use virtual environments, as it allows you to isolate the dependencies for each project, so they don’t interfere with each other.

sudo apt install python3-venv
python3 -m venv myenv
source myenv/bin/activate

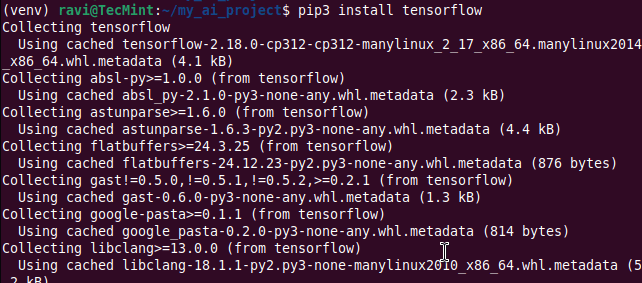
1. Install TensorFlow in Ubuntu

TensorFlow is one of the most widely used AI frameworks, particularly for deep learning, which provides tools for building and training machine learning models.

To install TensorFlow, run the following command:

pip3 install tensorflow

2. Install PyTorch in Ubuntu

PyTorch is another popular AI framework, especially known for its ease of use and dynamic computational graph, which is widely used for research and prototyping.

To install PyTorch, run:

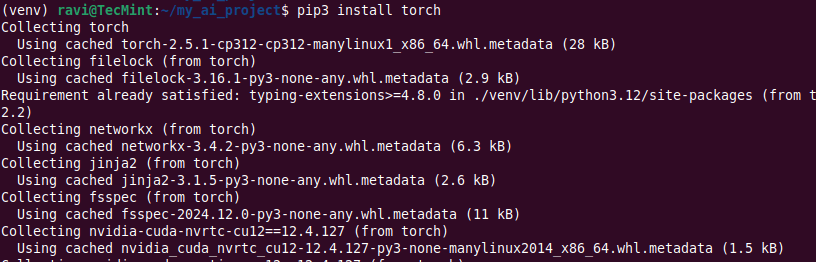
pip3 install torch torchvision

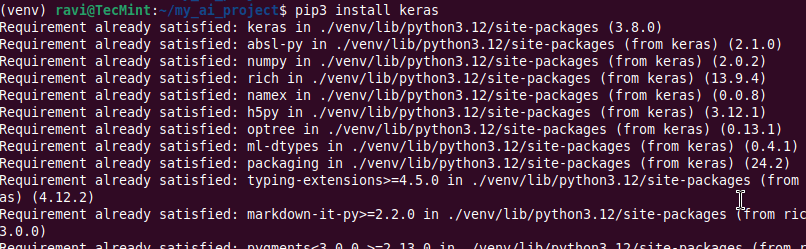
3. Install Keras in Ubuntu

Keras is a high-level neural networks API that runs on top of TensorFlow, which makes it easier to build and train deep learning models by providing a simple interface.

To install Keras, run:

pip3 install keras

Keras is included with TensorFlow 2.x by default, so if you’ve already installed TensorFlow, you don’t need to install Keras separately.

4. Install Scikit-learn

For machine learning tasks that don’t require deep learning, Scikit-learn is a great library, which provides tools for classification, regression, clustering, and more.

To install it, run:

pip3 install scikit-learn

5. Install Pandas and NumPy in Ubuntu

Pandas and NumPy are essential libraries for data manipulation and analysis, as they are used for handling datasets and performing mathematical operations.

To install them, run:

pip3 install pandas numpy

Step 4: Install Jupyter Notebook (Optional)

Jupyter Notebook is a web-based tool that allows you to write and execute Python code in an interactive environment and it is widely used in AI development for experimenting with code, running models, and visualizing data.

To install Jupyter Notebook, run:

pip3 install notebook

After installation, you can start Jupyter Notebook by running:

jupyter notebook

This will open a new tab in your web browser where you can create new notebooks, write code, and see the output immediately.

Step 5: Install GPU Drivers (Optional for Faster AI Development)

If you have a compatible NVIDIA GPU on your system, you can use it to speed up the training of AI models, especially deep learning models, require a lot of computational power, and using a GPU can drastically reduce training time.

To install the necessary GPU drivers for NVIDIA cards, run:

sudo apt install nvidia-driver-460

After the installation is complete, restart your system to apply the changes.

You also need to install CUDA (Compute Unified Device Architecture) and cuDNN (CUDA Deep Neural Network library) to enable TensorFlow and PyTorch to use the GPU.

You can find the installation instructions for CUDA and cuDNN on NVIDIA’s website.

Step 6: Test Your Setup

Now that you have installed Python, the necessary AI libraries, and optionally set up a virtual environment and GPU drivers, it’s time to test your setup.

To test TensorFlow, open a Python interpreter by typing:

python3

Then, import TensorFlow and check its version:

import tensorflow as tf
print(tf.__version__)

You should see the version number of TensorFlow printed on the screen. If there are no errors, TensorFlow is installed correctly.

Next, test PyTorch:

import torch
print(torch.__version__)

If both libraries print their version numbers without any errors, your setup is complete.

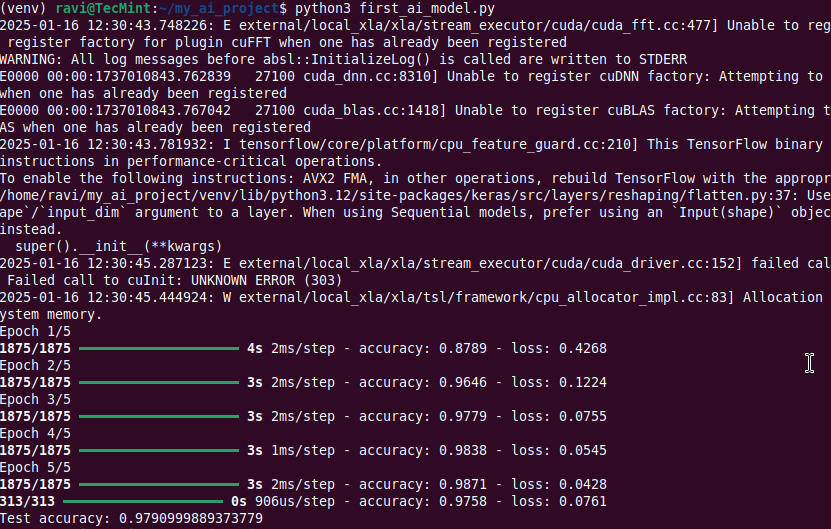
Step 7: Start Building AI Models

With your environment set up, you can now start building AI models. Here’s a simple example of how to create a basic neural network using TensorFlow and Keras.

import tensorflow as tf
from tensorflow.keras.models import Sequential
from tensorflow.keras.layers import Dense

# Define a simple model
model = Sequential([
    Dense(64, activation='relu', input_shape=(784,)),
    Dense(10, activation='softmax')
])

# Compile the model
model.compile(optimizer='adam', loss='sparse_categorical_crossentropy', metrics=['accuracy'])

# Summary of the model
model.summary()

This code defines a simple neural network with one hidden layer and an output layer for classification. You can train this model using datasets like MNIST (handwritten digits) or CIFAR-10 (images of objects).

Conclusion

Congratulations! You’ve successfully set up your AI development environment on Ubuntu with Python, TensorFlow, PyTorch, Keras, and Jupyter Notebook, you now have all the tools you need to start building and training AI models.

As you continue your journey into AI, you can explore more advanced topics such as deep learning, reinforcement learning, and natural language processing. There are many online resources, tutorials, and courses available to help you learn and improve your skills.

Remember, AI development is an exciting field with endless possibilities. Whether you want to build self-driving cars, create intelligent chatbots, or analyze big data, the skills you develop in AI will be valuable in many areas of technology.

Happy coding, and enjoy your AI journey!


How To Build Lightweight Docker Images With Mmdebstrap In Linux

$
0
0

https://ostechnix.com/build-docker-images-with-mmdebstrap

How To Build Lightweight Docker Images With Mmdebstrap In Linux

A Step-by-Step Guide to Create Minimal Debian-based Container Images for Docker using Mmdebstrap

475 views

Building lightweight container images with mmdebstrap for Docker is a great way to create minimal and efficient environments for your applications. This process allows you to leverage the power of Debian while keeping your images small and manageable. In this step-by-step tutorial, we will explain how to build docker images with mmdebstrap in Linux.

This is useful to create optimized, minimal Docker images, such as microservices, CI/CD pipelines, or serverless applications.

Why Use mmdebstrap?

  • Small Base Images: It produces minimal Debian root filesystems, reducing image size.
  • Flexible Output Formats: It can generate tarballs, squashfs, or directory outputs, which can be easily imported into Docker.
  • No Dependencies: It does not require dpkg or apt inside the container.
  • Reproducibility: It supports exact package versions for consistent builds.

Build Docker Images with mmdebstrap

mmdebstrap is a modern, minimal, and dependency-free alternative to debootstrap for creating Debian-based root filesystems. It supports reproducible builds and integrates well with Docker.

Prerequisites

Before you start, ensure you have the following installed:

Make sure Docker is installed and running on your system. if not, use the following links to install Docker on your preferred Linux system.

You can also use Podman if you prefer to run containers in rootless mode.

Next, Install mmdebstrap if you haven't already. You can do this with the following command:

sudo apt update
sudo apt install mmdebstrap

Step 1: Create a Minimal Debian Filesystem

We will first create a basic Debian image using mmdebstrap. This image will serve as the foundation for our Docker container.

1. Choose a Debian Suite:

Decide which Debian release you want to use (e.g., bullseye, bookworm).

2. Create the Image:

Run the following command to create a basic Debian filesystem:

mmdebstrap --variant=minbase --include=ca-certificates,curl stable debian-rootfs.tar

This adds required packages like curl and ca-certificates. You can further customize the container by installing any other additional packages or making configuration changes.

Here,

  • --variant=minbase: Creates a minimal base system without unnecessary packages.
  • --include=ca-certificates,curl: Installs curl and ca-certificates in the debian image.
  • stable: Specifies the Debian release (e.g., stable, bookworm, or bullseye).
  • debian-rootfs.tar: Output tarball for the root filesystem.

You can also clean up package caches and logs inside the tarball before importing:

tar --delete -f debian-rootfs.tar ./var/cache/apt ./var/lib/apt/lists

Step 2: Import the Tarball into Docker

Import the Debian image that you created in the earlier step into docker using command:

cat debian-rootfs.tar | docker import - debian:custom

Here,

  • debian:custom: Assigns a tag to the imported image.

Step 3: Verify the Docker Images

Verify if the docker image is imported into your docker environment using command:

docker images

You will see an output like below:

REPOSITORY                  TAG         IMAGE ID      CREATED         SIZE
localhost/debian            custom      7762908acf49  21 seconds ago  170 MB

Step 4: Run the Container

Finally, run the container with the new image using command:

docker run -it debian:custom /bin/bash

This command starts a new container from your image and opens an interactive terminal.

If you want to run the container in detached mode, use -d flag.

Conclusion

Using mmdebstrap to build lightweight container images for Docker is a straightforward process. By creating a minimal Debian environment, you can ensure that your images are small and efficient.

This method is especially useful for developers looking to create custom Docker images tailored to their applications. With just a few steps, you can have a fully functional and lightweight Debian container ready for your projects.

Related Read:

How to Rename Files Using mmv for Advanced Renaming

$
0
0

https://www.tecmint.com/mmv-command-linux

How to Rename Files Using mmv for Advanced Renaming

Renaming files in Linux is something we all do, whether it’s to organize our files better or to rename files in bulk.

While there are basic tools like mv and rename, there’s an advanced tool called mmv that makes the process much easier, especially when you need to rename multiple files at once.

As an experienced Linux user, I’ve found mmv to be a powerful tool for batch renaming files, and in this post, I’ll show you how to use it effectively.

What is mmv?

mmv stands for multiple move, which is a command-line utility that allows you to rename, move, and copy multiple files at once. Unlike the mv command, which is great for renaming one file at a time, mmv is designed to handle bulk renaming with ease.

To install mmv on Linux, use the following appropriate command for your specific Linux distribution.

sudo apt install mmv         [On Debian, Ubuntu and Mint]
sudo yum install mmv         [On RHEL/CentOS/Fedora and Rocky/AlmaLinux]
sudo emerge -a sys-apps/mmv  [On Gentoo Linux]
sudo apk add mmv             [On Alpine Linux]
sudo pacman -S mmv           [On Arch Linux]
sudo zypper install mmv      [On OpenSUSE]    
sudo pkg install mmv         [On FreeBSD]

Once installed, you’re ready to start renaming your files.

The basic syntax of mmv is:

mmv [options] source_pattern target_pattern
  • source_pattern: This is the pattern that matches the files you want to rename.
  • target_pattern: This is how you want the renamed files to appear.

For example, if you want to rename all .txt files to .md files, you would use:

mmv '*.txt''#1.md'

Here, #1 refers to the part of the filename matched by the * wildcard.

Examples of Using mmv for Advanced Renaming in Linux

Here are some advanced examples of how to use mmv effectively:

1. Renaming Multiple Files with a Pattern

Let’s say you have several files like file1.txt, file2.txt, file3.txt, and so on and you want to rename them to document1.txt, document2.txt, document3.txt, etc.

Here’s how you can do it:

mmv 'file*.txt''document#1.txt'

In this example:

  • file*.txt matches all files starting with file and ending with .txt.
  • document#1.txt renames them to document1.txt, document2.txt, etc.
Renaming Files with a Pattern

2. Renaming Files by Adding a Prefix or Suffix

Let’s say you want to add a prefix or suffix to a group of files. For example, you have files like image1.jpg, image2.jpg, image3.jpg, and you want to add the prefix 2025_ to each file.

Here’s how you do it:

mmv '*.jpg''2025_#1.jpg'

This will rename the files to 2025_image1.jpg, 2025_image2.jpg, etc.

If you wanted to add a suffix instead, you could use:

mmv '*.jpg''#1_2025.jpg'

This will rename the files to image1_2025.jpg, image2_2025.jpg, etc.

Renaming Files with Prefix

3. Renaming Files with Regular Expressions

mmv supports regular expressions, so you can use them to match complex patterns. For example, let’s say you have files like data_01.txt, data_02.txt, data_03.txt, and you want to remove the leading zero in the numbers.

You can do this with:

mmv 'data_0*.txt''data_#1.txt'
Renaming Files with Regular Expressions

4. Renaming Files in Subdirectories

If you have files in subdirectories and want to rename them as well, you can use the -r option to rename files recursively. For example, if you want to rename all .txt files in the current directory and all subdirectories:

mmv -r '*.txt''#1.txt'

This will rename all .txt files in the current directory and its subdirectories.

Conclusion

Renaming files in Linux doesn’t have to be a tedious task. With mmv, you can easily rename multiple files with advanced patterns, saving you time and effort. Whether you need to add a prefix, change extensions, or rename files in bulk, mmv has you covered.

Give it a try, and let me know how it works for you! If you have any questions or need further help, feel free to leave a comment below.


6 AI Tools Every Developer Needs for Better Code

$
0
0

https://www.tecmint.com/best-ai-coding-assistants

6 AI Tools Every Developer Needs for Better Code

In today’s fast-paced world, developers are constantly looking for ways to improve their productivity and streamline their workflows. With the rapid advancements in Artificial Intelligence (AI), developers now have a wide range of AI-powered tools at their disposal to make their coding experience faster, easier, and more efficient.

These tools can automate repetitive tasks, help write cleaner code, detect bugs early, and even assist in learning new programming languages.

In this blog post, we’ll dive deep into some of the best AI tools available for developers. We’ll explore their key features, how they can help boost productivity, and why they are worth considering for your development process.

1. GitHub Copilot

GitHub Copilot is an AI-powered code assistant developed by GitHub and OpenAI, which is designed to assist developers by suggesting code as they type and help you write entire functions, classes, or even entire files based on the context of your code.

GitHub Copilot · Your AI Pair Programmer

Key Features:

  • Code Suggestions: Suggests entire lines or blocks of code based on the current context by using the vast amount of code available on GitHub to provide accurate and relevant suggestions.
  • Multiple Language Support: Supports many programming languages, including Python, JavaScript, Ruby, TypeScript, Go, and more. It can also suggest code for various frameworks like React, Django, and Flask.
  • Context Awareness: It adapts to the code you are writing and understands the context, making its suggestions more relevant and precise.
  • Learning from Your Code: Over time, it learns from your coding style and preferences, tailoring its suggestions to fit your unique way of writing code.

Why It’s Useful:

GitHub Copilot can significantly reduce the time developers spend searching for code snippets or writing repetitive code. By suggesting code based on your current work, it can help you stay focused on the problem you’re solving rather than worrying about the syntax or implementation details.

2. Tabnine

Tabnine is another AI-powered code completion tool that integrates seamlessly with your Integrated Development Environment (IDE) and uses machine learning models to predict and suggest code completions as you type, making coding faster and more efficient.

Tabnine AI Code Assistant

Key Features:

  • Code Autocompletion: Its ability to suggest completions such as variables, functions, and entire code blocks for your code based on what you’re currently typing.
  • Private Models: If you’re working on a proprietary codebase or project, it allows you to use private models, which means the AI can learn from your team’s code and provide more tailored suggestions.
  • Works with Multiple IDEs: It integrates with popular IDEs like Visual Studio Code, IntelliJ IDEA, Sublime Text, and many others.
  • Team Collaboration: It can help teams maintain consistency in coding practices by providing suggestions that align with the team’s coding standards and style.

Why It’s Useful:

Tabnine is a great tool for developers who want to write code faster without sacrificing quality, which can help reduce the need for looking up documentation or searching for code snippets online.

3. Codex by OpenAI

Codex is a powerful AI model developed by OpenAI that can generate code from natural language descriptions. It powers GitHub Copilot and can assist developers in writing code by simply describing what they want to achieve in plain English.

Codex by OpenAI
Codex by OpenAI

Key Features:

  • Natural Language to Code: It can take plain English instructions and convert them into working code. For example, you can tell it “Create a Python function that calculates the Fibonacci sequence”, and it will generate the code for you.
  • Multi-Language Support: It supports a wide range of programming languages, including Python, JavaScript, Ruby, and more. It can also handle various frameworks and libraries.
  • Context-Aware Suggestions: It understands the context of the code you’re writing and provides relevant suggestions, which makes it more accurate and helpful in complex coding scenarios.
  • Code Explanation: It can also explain the code it generates, helping developers understand the logic behind it.

Why It’s Useful:

Codex is a game-changer for developers who are new to programming or learning a new language. It allows you to describe what you want to achieve in simple terms and get code suggestions, which can save a lot of time and help you overcome coding challenges quickly.

4. Sourcery

Sourcery is an AI-powered tool specifically designed for Python developers, which helps improve code quality by automatically suggesting refactorings and improvements to make the code cleaner, more efficient, and easier to maintain.

Sourcery - Instant Code Review
Sourcery – Instant Code Review

Key Features:

  • Code Refactoring: It analyzes your Python code and suggests refactorings to improve its readability and performance by recommending changes like merging duplicate code, simplifying complex expressions, and improving variable names.
  • Code Suggestions: It can suggest improvements in real-time as you write code, which helps you follow best practices and avoid common mistakes.
  • Instant Feedback: It provides instant feedback, allowing you to make improvements as you write code, rather than having to go back and refactor everything at the end.
  • Supports Multiple IDEs: It integrates with popular IDEs like Visual Studio Code and PyCharm, making it easy to use in your existing development environment.

Why It’s Useful:

Sourcery is perfect for Python developers who want to improve the quality of their code without spending too much time on manual refactoring. It ensures your code is clean, efficient, and easy to maintain, which is especially important in larger projects.

5. IntelliCode by Microsoft

IntelliCode is an AI-powered tool developed by Microsoft to enhance the IntelliSense feature in Visual Studio and Visual Studio Code by using machine learning to provide smarter, context-aware code suggestions that help developers write code faster and with fewer errors.

Visual Studio IntelliCode - Microsoft
Visual Studio IntelliCode – Microsoft

Key Features:

  • Smart Code Suggestions: It suggests the most relevant code completions based on the context of your project by learning from the code in your repository and provides suggestions that match your project’s style.
  • Code Style Recommendations: It can recommend code that follows best practices and aligns with your project’s coding style, which can also suggest refactorings to improve code quality.
  • Refactoring Assistance: It can help you refactor your code by suggesting improvements in structure and readability.
  • Multi-Language Support: It supports several languages, including C#, C++, Python, and JavaScript, making it useful for a wide range of developers.

Why It’s Useful:

IntelliCode is ideal for developers who want to write code more efficiently while following best practices, which ensure that your code is consistent with your project’s coding standards and suggest improvements that can make your code more readable and maintainable.

6. DeepCode

DeepCode is an AI-powered code review tool that helps developers identify bugs, security vulnerabilities, and code quality issues in their code by using machine learning to analyze code and suggest improvements.

DeepCode - AI Code Review
DeepCode – AI Code Review

Key Features:

  • Code Analysis: It scans your code for potential issues, such as bugs, security vulnerabilities, and performance bottlenecks.
  • Automated Code Review: It provides automated code reviews, saving you time and effort during the development process.
  • Multi-Language Support: It can analyze code in various programming languages and provide suggestions for improvements.
  • Integration with GitHub and GitLab: It integrates seamlessly with popular version control platforms like GitHub and GitLab, making it easy to add to your workflow.

Why It’s Useful:

DeepCode is an invaluable tool for developers who want to ensure that their code is free from bugs and security vulnerabilities. It helps you catch issues early in the development process, reducing the chances of problems later on.

Conclusion

AI tools are revolutionizing the way developers work, making coding faster, more efficient, and error-free. From code completion and suggestions to automated code reviews, AI tools like GitHub Copilot, Tabnine, Codex, Sourcery, IntelliCode, and DeepCode can significantly boost your productivity as a developer.


How to Convert Markdown (.MD) Files to PDF on Linux

$
0
0

https://www.tecmint.com/convert-md-to-pdf-on-linux

How to Convert Markdown (.MD) Files to PDF on Linux

Markdown(.MD) files are a favorite among developers, writers, and content creators due to their simplicity and flexibility, but what happens when you need to share your beautifully formatted Markdown file with someone who prefers a more universally accepted format, like PDF?

On Linux, you have several tools and methods to achieve this seamlessly and this guide will walk you through the process of converting .MD files to .PDF, ensuring your documents look professional and polished.

Method 1: Using Pandoc – A Document Converter

Pandoc is a powerful command-line tool for converting files between different formats and most Linux distributions have Pandoc available in their repositories.

sudo apt install pandoc         [On Debian, Ubuntu and Mint]
sudo dnf install pandoc         [On RHEL/CentOS/Fedora and Rocky/AlmaLinux]
sudo apk add pandoc             [On Alpine Linux]
sudo pacman -S pandoc           [On Arch Linux]
sudo zypper install pandoc      [On OpenSUSE]    
sudo pkg install pandoc         [On FreeBSD]

Once installed, converting a Markdown file to PDF is as simple as running a single command:

pandoc input.md -o output.pdf
Convert MD File to PDF

Method 2: Markdown Preview in VS Code

Visual Studio Code (VS Code) is a popular text editor that supports Markdown preview and export.

First, install VS Code from your distribution’s repository or download it from the official site and then install the Markdown PDF extension.

Install Markdown PDF Extension

Next, open your .md file in VS Code and press F1 or Ctrl+Shift+P and type export and select markdown-pdf: Export (pdf).

VS Code Convert MD to PDF File

Method 3: Using Grip Tool

Grip is a Python-based tool that renders Markdown in your web browser, which is especially useful for previewing Markdown as it would appear on GitHub.

pip install grip

Once installed, you can run the following command to render your Markdown file:

grip sample.md

Grip starts a local server, open the provided URL in your browser, and then use the browser’s print functionality to save the rendered file as a PDF.

Method 4: Using Calibre eBook Manager

Calibre is a feature-rich eBook management tool that supports various formats, including Markdown.

sudo apt install calibre         [On Debian, Ubuntu and Mint]
sudo dnf install calibre         [On RHEL/CentOS/Fedora and Rocky/AlmaLinux]
sudo apk add calibre             [On Alpine Linux]
sudo pacman -S calibre           [On Arch Linux]
sudo zypper install calibre      [On OpenSUSE]    
sudo pkg install calibre         [On FreeBSD]

Once installed, open Calibre and add your .md file and then right-click on the file and select Convert Books> Convert Individually.

Choose PDF as the output format and click OK.

Convert .md to PDF in Linux
Conclusion

Converting Markdown to PDF on Linux is straightforward and offers multiple methods tailored to your workflow. Whether you prefer the command-line power of Pandoc, the simplicity of VS Code, or the visual rendering of Grip, Linux has you covered.

With these tools, you can create professional, shareable PDFs from your Markdown files in no time.


Beginner’s Guide to Setting Up AI Development Environment on Linux

$
0
0

https://www.tecmint.com/setting-up-linux-for-ai-development

Beginner’s Guide to Setting Up AI Development Environment on Linux

In the previous article, we introduced the basics of AI and how it fits into the world of Linux. Now, it’s time to dive deeper and set up your Linux system to start building your first AI model.

Whether you’re a complete beginner or have some experience, this guide will walk you through installing the essential tools you need to get started on Debian-based systems.

System Requirements for Ubuntu 24.04

Before we begin, let’s make sure your system meets the minimum requirements for AI development.

  • Operating System: Ubuntu 24.04 LTS (or newer).
  • Processor: A 64-bit CPU with at least 2 cores (Intel Core i5 or AMD Ryzen 5 or better recommended for smooth performance).
  • RAM: Minimum 4 GB of RAM (8 GB or more recommended for more intensive AI models).
  • Storage: At least 10 GB of free disk space (SSD is highly recommended for faster performance).
  • Graphics Card (Optional): A dedicated GPU (NVIDIA recommended for deep learning) with at least 4 GB of VRAM if you plan to use frameworks like TensorFlow or PyTorch with GPU acceleration.

Step 1: Install Python on Ubuntu

Python is the most popular programming language for AI development, due to its simplicity, powerful, and huge library of tools and frameworks.

Most Linux systems come with Python pre-installed, but let’s make sure you have the latest version. If Python is installed, you’ll see something like Python 3.x.x.

python3 --version

If Python is not installed, you can easily install it using the package manager.

sudo apt update
sudo apt install python3

Next, you need to install pip (python package manager), which will help you install and manage Python libraries.

sudo apt install python3-pip

Step 2: Install Git on Ubuntu

Git is a version control tool that allows you to track changes in your code and collaborate with others, which is essential for AI development because many AI projects are shared on platforms like GitHub.

sudo apt install git

Verify the installation by typing:

git --version

You should see something like git version 2.x.x.

Install Git in Ubuntu

Step 3: Set Up a Virtual Environment in Ubuntu

A virtual environment helps you manage your projects and their dependencies in isolation, which means you can work on multiple projects without worrying about conflicts between different libraries.

First, make sure you have the python3-venv package installed, which is needed to create a virtual environment.

sudo apt install python3-venv

Next, you need to create a new directory for your project and set up a virtual environment:

mkdir my_ai_project
cd my_ai_project
python3 -m venv venv
source venv/bin/activate

After running the above commands, your terminal prompt should change, indicating that you’re now inside the virtual environment.

Setup Python Virtual Environment

Step 4: Install AI Libraries on Ubuntu

Now that you have Python, Git, and Virtual Environment set up, it’s time to install the libraries that will help you build AI models.

Some of the most popular libraries for AI are TensorFlow, Keras, and PyTorch.

Install TensorFlow in Ubuntu

TensorFlow is an open-source library developed by Google that is widely used for machine learning and AI projects.

pip3 install tensorflow
Install TensorFlow in Ubuntu

Install Keras in Ubuntu

Keras is a high-level neural networks API, written in Python, that runs on top of TensorFlow.

pip3 install keras
Install Keras in Ubuntu

Install PyTorch in Ubuntu

PyTorch is another popular AI library, especially for deep learning.

pip3 install torch
Install PyTorch in Ubuntu

Step 5: Building Your First AI Model

Now that your system is ready, let’s build a simple AI model called a neural network using TensorFlow and Keras to classify handwritten digits from the famous MNIST dataset.

Create a new Python file called first_ai_model.py and open it in your favorite text editor.

sudo nano first_ai_model.py

At the top of the file, add the following imports to import the necessary libraries:

import tensorflow as tf
from tensorflow.keras import layers, models

Next, load the MNIST dataset, which contains 60,000 images of handwritten digits (0-9) to train our model.

(train_images, train_labels), (test_images, test_labels) = tf.keras.datasets.mnist.load_data()

Preprocess the data to normalize the images to values between 0 and 1 by dividing by 255.

train_images, test_images = train_images / 255.0, test_images / 255.0

Build the model by creating a simple neural network with one hidden layer.

model = models.Sequential([
    layers.Flatten(input_shape=(28, 28)),
    layers.Dense(128, activation='relu'),
    layers.Dense(10)
])

Compile the model by specifying the optimizer, loss function, and metrics for evaluation.

model.compile(optimizer='adam',
              loss=tf.keras.losses.SparseCategoricalCrossentropy(from_logits=True),
              metrics=['accuracy'])

Train the model using the training data.

model.fit(train_images, train_labels, epochs=5)

Finally, test the model on the test data to see how well it performs.

test_loss, test_acc = model.evaluate(test_images, test_labels)
print('Test accuracy:', test_acc)

Step 6: Run the AI Model

Once you’ve written the code, save the file and run it in your terminal:

python3 first_ai_model.py

The model will begin training, and after 5 epochs, it will display the test accuracy. The higher the accuracy, the better the model’s performance.

Run AI Model
Run AI Model

Congratulations, you’ve just built your first AI model!

Conclusion

In this guide, we covered how to set up your Linux system for AI development by installing Python, Git, and essential AI libraries like TensorFlow, Keras, and PyTorch.

We also walked through building a simple neural network to classify handwritten digits. With these tools and knowledge, you’re now ready to explore the exciting world of AI on Linux!

Stay tuned for more articles in this series, where we’ll dive deeper into AI development techniques and explore more advanced topics.

How to Set Up SQL Server on Red Hat Enterprise Linux

$
0
0

https://www.tecmint.com/install-sql-server-on-red-hat-linux

How to Set Up SQL Server on Red Hat Enterprise Linux

This guide will walk you through installing SQL Server 2022 on RHEL 8.x or RHEL 9.x, connecting to it using the sqlcmd command-line tool, creating a database, and running basic queries.

Prerequisites

Before starting, ensure the following prerequisites are met:

  • Make sure you’re using a supported version of RHEL (e.g., RHEL 8, or 9).
  • You need sudo or root privileges to install software.
  • At least 2 GB of RAM, 6 GB of free disk space, and a supported CPU architecture (x64).

Step 1: Enable SELinux Enforcing Mode on RHEL

SQL Server 2022 supports running on RHEL 8.x and 9.x. For RHEL 9, SQL Server can run as a confined application using SELinux (Security-Enhanced Linux), which enhances security.

First, you need to enable SELinux (optional but recommended for RHEL 9) to use SQL Server as a confined application.

sestatus
sudo setenforce 1

The command is used to enable SELinux enforcement mode, if SELinux is disabled in the configuration file (/etc/selinux/config), this command won’t work and you will need to enable SELinux in the file and reboot your system.

Open the file located at /etc/selinux/config using any text editor you prefer.

sudo vi /etc/selinux/config

Change the SELINUX=disabled option to SELINUX=enforcing.

Enable SELinux Enforcing Mode

Restart your system for the changes to work.

sudo reboot

After the system reboots, check the SELinux status to confirm it’s in Enforcing mode:

getenforce

It should return Enforcing.

Step 2: Install SQL Server on RHEL

Run the following curl command to download and configure the Microsoft SQL Server Repositoryry:

sudo curl -o /etc/yum.repos.d/mssql-server.repo https://packages.microsoft.com/config/rhel/$(rpm -E %{rhel})/mssql-server-2022.repo

Next, install the SQL Server package using the following command:

sudo yum install -y mssql-server
Install SQL Server on RHEL

If you want to run SQL Server with extra security, you can install the mssql-server-selinux package, which adds special rules to help SQL Server work better with SELinux.

sudo yum install -y mssql-server-selinux

After the installation is done, run the setup script and follow the instructions to set a password for the ‘sa‘ account and pick the edition of SQL Server you want. Remember, these editions are free to use: Evaluation, Developer, and Express.

sudo /opt/mssql/bin/mssql-conf setup
Configure SQL Server on RHEL

After installation, confirm that SQL Server is running.

sudo systemctl status mssql-server
Check Status of SQL Server
Check the Status of the SQL Server

If it’s not running, start it with:

sudo systemctl start mssql-server

To allow remote connections, you need to open the SQL Server port on the RHEL firewall. By default, SQL Server uses TCP port 1433. If your system uses FirewallD for the firewall, run these commands:

sudo firewall-cmd --zone=public --add-port=1433/tcp --permanent
sudo firewall-cmd --reload

Now, SQL Server is up and running on your RHEL machine and is all set to use!

Step 3: Install SQL Server Command-Line Tools

To create a database, you need to use a tool that can run Transact-SQL commands on SQL Server. Here are the steps to install the SQL Server command-line tools such as sqlcmd and bcp utility.

First, download the Microsoft Red Hat repository configuration file.

For Red Hat 9, use the following command:

curl https://packages.microsoft.com/config/rhel/9/prod.repo | sudo tee /etc/yum.repos.d/mssql-release.repo

For Red Hat 8, use the following command:

curl https://packages.microsoft.com/config/rhel/8/prod.repo | sudo tee /etc/yum.repos.d/mssql-release.repo

Next, run the following commands to install mssql-tools18 with the unixODBC developer package.

sudo yum install -y mssql-tools18 unixODBC-devel
Install SQL Server Tools on RHEL

To update to the latest version of mssql-tools, run the following commands:

sudo yum check-update
sudo yum update mssql-tools18

To make sqlcmd and bcp available in the bash shell every time you log in, update your PATH in the ~/.bash_profile file using this command:

echo 'export PATH="$PATH:/opt/mssql-tools18/bin"'>> ~/.bash_profile
source ~/.bash_profile

To make sqlcmd and bcp available in the bash shell for all sessions, add their location to the PATH by editing the ~/.bashrc file with this command:

echo 'export PATH="$PATH:/opt/mssql-tools18/bin"'>> ~/.bashrc
source ~/.bashrc

Step 4: Connect to SQL Server on RHEL

Once SQL Server is installed, you can connect to it using sqlcmd.

Connect SQL Server Locally

sqlcmd -S localhost -U sa -P '<password>' -N -C
  • -S– Specifies the server name (use localhost for local connections).
  • -U– Specifies the username (use sa for the system administrator account).
  • -P– Specifies the password you set during configuration.
  • -N– Encrypts the connection.
  • -C– Trusts the server certificate without validation.

If successful, you’ll see a prompt like this:

1>

Create a New SQL Database

From the sqlcmd command prompt, paste the following Transact-SQL command to create a test database:

CREATE DATABASE TestDB;

On the next line, write a query to return the name of all of the databases on your server:

SELECT Name
FROM sys.databases;

The previous two commands aren’t executed immediately. You must type GO on a new line to execute the previous commands:

GO
Create SQL Database on RHEL

Insert Data into SQL Database

Next, create a new table, dbo.Inventory, and insert two new rows.

USE TestDB;
CREATE TABLE dbo.Inventory (id INT, name NVARCHAR(50), quantity INT, PRIMARY KEY (id));

Insert data into the new table.

INSERT INTO dbo.Inventory VALUES (1, 'banana', 150), (2, 'orange', 154);

Type GO to execute the previous commands:

GO
Insert Data into SQL Database

Query Data into SQL Database

From the sqlcmd command prompt, enter a query that returns rows from the dbo.Inventory table where the quantity is greater than 152:

SELECT * FROM dbo.Inventory WHERE quantity > 152;
GO
Query Data in SQL Database

To end your sqlcmd session, type QUIT:

QUIT

In addition to sqlcmd, you can use the following cross-platform tools to manage SQL Server:

  • Azure Data Studio– A cross-platform GUI database management utility.
  • Visual Studio Code– A cross-platform GUI code editor that runs Transact-SQL statements with the mssql extension.
  • PowerShell Core– A cross-platform automation and configuration tool based on cmdlets.
  • mssql-cli– A cross-platform command-line interface for running Transact-SQL commands.
Conclusion

By following this guide, you’ve successfully installed SQL Server 2022 on RHEL, configured it, and created your first database. You’ve also learned how to query data using the sqlcmd tool.


How to Use Rsync to Sync Files Between Linux and Windows Using (WSL)

$
0
0

https://www.tecmint.com/rsync-files-between-linux-and-windows

How to Use Rsync to Sync Files Between Linux and Windows Using (WSL)

Synchronizing files between Linux and Windows can seem challenging, especially if you’re not familiar with the tools available. However, with the Windows Subsystem for Linux (WSL), this process becomes much simpler.

WSL allows you to run a Linux environment directly on Windows, enabling you to use powerful Linux tools like Rsync to sync files between the two operating systems.

In this article, we’ll walk you through the entire process of using Rsync to sync files between Linux and Windows using WSL. We’ll cover everything from setting up WSL to writing scripts for automated syncing.

By the end, you’ll have a clear understanding of how to efficiently manage file synchronization across these two platforms.

What is Rsync?

Rsync (short for “remote synchronization“) is a command-line tool used to synchronize files and directories between two locations, which is highly efficient because it only transfers the changes made to files, rather than copying everything every time, which makes it ideal for syncing large files or large numbers of files.

Why Use Rsync with WSL?

  • WSL allows you to run Linux commands and tools directly on Windows, making it easier to use Rsync.
  • Rsync only transfers the differences between files, saving time and bandwidth.
  • You can sync files between a Linux machine and a Windows machine effortlessly.
  • Rsync can be automated using scripts, making it perfect for regular backups or syncing tasks.

Prerequisites

Before we begin, ensure you have the following:

  • WSL is supported on versions of Windows 10 and 11.
  • You need to have WSL installed and set up on your Windows machine.
  • Install a Linux distribution (e.g., Ubuntu) from the Microsoft Store.
  • Rsync is usually pre-installed on Linux distributions, but we’ll cover how to install it if it’s not.
  • Rsync uses SSH to securely transfer files between systems.

Step 1: Install and Set Up WSL

If you haven’t already installed WSL, then open PowerShell as administrator by pressing Win + X and selecting “Windows PowerShell (Admin)” or “Command Prompt (Admin)” and run the following command to install WSL.

wsl --install

This command installs WSL and the default Linux distribution (usually Ubuntu). After installation, restart your computer to complete the setup.

Once your computer restarts, open the installed Linux distribution (e.g., Ubuntu) from the Start menu. Follow the on-screen instructions to create a user account and set a password.

Step 2: Install Rsync on WSL

Rsync is usually pre-installed on most Linux distributions. However, if it’s not installed, you can install it using the following commands.

sudo apt update
sudo apt install rsync
rsync --version

This should display the installed version of Rsync.

Step 3: Set Up SSH on WSL

To enable SSH on WSL, you need to install the OpenSSH server.

sudo apt install openssh-server

Next, start and enable the SSH service to start automatically every time you launch WSL.

sudo service ssh start
sudo systemctl enable ssh

Verify that the SSH service is running.

sudo service ssh status

Step 4: Sync Files from Linux (WSL) to Windows

Now that Rsync and SSH are set up, you can start syncing files. Let’s say you want to sync files from your WSL environment to a directory on your Windows machine.

Launch your Linux distribution (e.g., Ubuntu) and identify the Windows directory, which typically mounted under /mnt/. For example, your C: drive is located at /mnt/c/.

Now run the following command to sync files from your WSL directory to a Windows directory:

rsync -avz /path/to/source/ /mnt/c/path/to/destination/

Explanation of the command:

  • -a: Archive mode (preserves permissions, timestamps, and symbolic links).
  • -v: Verbose mode (provides detailed output).
  • -z: Compresses data during transfer.
  • /path/to/source/: The directory in your WSL environment that you want to sync.
  • /mnt/c/path/to/destination/: The directory on your Windows machine where you want to sync the files.

Step 5: Sync Files from Windows to Linux (WSL)

If you want to sync files from a Windows directory to your WSL environment, you can use a similar command:

rsync -avz /mnt/c/path/to/source/ /path/to/destination/

Explanation of the command:

  • /mnt/c/path/to/source/: The directory on your Windows machine that you want to sync.
  • /path/to/destination/: The directory in your WSL environment where you want to sync the files.

Step 6: Automate Syncing with a Script

To make syncing easier, you can create a bash script to automate the process.

nano sync.sh

Add the following lines to the script:

#!/bin/bash
rsync -avz /path/to/source/ /mnt/c/path/to/destination/

Save the file and make the script executable:

chmod +x sync.sh

Execute the script to sync files.

./sync.sh

You can use cron to schedule the script to run at specific intervals. For example, to run the script every day at 2 AM, add the following line to your crontab:

0 2 * * * /path/to/sync.sh
Conclusion

Using Rsync with WSL is a powerful and efficient way to sync files between Linux and Windows. By following the steps outlined in this article, you can easily set up Rsync, configure SSH, and automate file synchronization.


How To Safely Edit Hosts File In Linux: A Beginners Guide

$
0
0

https://ostechnix.com/edit-hosts-file-in-linux

How To Safely Edit Hosts File In Linux: A Beginners Guide

Have you ever wanted to test a website locally, block annoying ads, or create shortcuts for devices on your network? The Linux hosts file is a powerful tool that can help you do all this and more! Located at /etc/hosts, this simple text file lets you map hostnames to specific IP addresses, giving you control over how your system resolves domain names. In this guide, we will learn why and how to safely edit the hosts file in Linux, along with real-world examples.

What is the Hosts File?

The /etc/hosts file is a local text file used by the operating system to map hostnames to IP addresses before querying a DNS (Domain Name System) server. It provides a way to override DNS resolution for specific domain names.

Why Edit the Hosts File?

  1. Local Development: Developers use it to point domain names to local servers (e.g., 127.0.0.1 example.com).
  2. Block Websites: You can redirect unwanted domains to 0.0.0.0 or 127.0.0.1 (loopback address) to prevent access.
  3. Network Troubleshooting: You can bypass DNS to test connectivity to a specific server.
  4. Custom Domain Mapping: You can assign friendly names to IP addresses in a private network.
  5. Speeding Up Access to Websites: The hosts file is checked before the internet’s DNS system. If a website is in your hosts file, your computer doesn’t have to look it up online, making it load faster.

Precautions When Editing /etc/hosts File

  • Do not remove existing system entries like 127.0.0.1 localhost.
  • Ensure there are no duplicate entries for the same hostname.
  • If a hostname is defined in /etc/hosts, it will override DNS resolution.

I’ll break down each precaution in simple terms so you can understand why they matter.

1. Do Not Remove Existing System Entries Like 127.0.0.1 localhost

Your system relies on 127.0.0.1 localhost for internal processes. Removing or modifying this line can cause software or system services to break.

Example of a default /etc/hosts entry:

127.0.0.1   localhost
::1         localhost

Reason:

Many programs, including servers and networking tools, assume localhost always maps to 127.0.0.1. If this is missing, some software may fail to work properly.

2. Ensure There Are No Duplicate Entries for the Same Hostname

If you add the same hostname multiple times with different IP addresses, your system might get confused.

Example of a bad/etc/hosts file:

127.0.0.1   mywebsite.local
192.168.1.100 mywebsite.local

Reason:

The system will use the first entry it finds, and the second one will be ignored. This can cause unexpected behavior when trying to reach mywebsite.local.

3. If a Hostname Is Defined in /etc/hosts, It Will Override DNS Resolution

The /etc/hosts file is checked before the system queries external DNS servers. If a domain is listed in /etc/hosts, the system will use the IP address from this file, even if a different address is available in public DNS.

Example:

127.0.0.1   example.com
  • Normally, example.com resolves to an IP address from a DNS server.
  • With this entry, your computer will always resolve example.com to 127.0.0.1, regardless of the real IP address.

Reason:

If you accidentally override an important hostname, you might block access to legitimate websites or services.

Key Takeaways:

  • Always backup the file before editing.
  • Never remove or change system default entries.
  • Avoid duplicate entries to prevent confusion.
  • Understand that /etc/hostsoverrides DNS, which can affect website access.

How to Edit the Hosts File in Linux

1. Backup the Hosts File

Backing up the /etc/hosts file before making changes is a good practice. If something goes wrong, you can easily restore the original file.

Let us make a backup of /etc/hosts file using command:

sudo cp /etc/hosts /etc/hosts.bak

This creates a copy named hosts.bak in the same directory.

2. Open the Hosts File

Since /etc/hosts is a system file, editing it requires root privileges.

Use a text editor like nano or vim:

sudo nano /etc/hosts

or

sudo vim /etc/hosts

3. Understand the hosts File Format

Each entry in /etc/hosts follows this format:

<IP Address> <Hostname> [Alias]

Example:

127.0.0.1   localhost
192.168.1.100  myserver.local myserver
  • 127.0.0.1 is mapped to localhost (default).
  • 192.168.1.100 is assigned to myserver.local, with myserver as an alias.

4. Adding a Custom Domain

To map a domain to a local server:

127.0.0.1   mywebsite.local

Now, when you access mywebsite.local, it will resolve to 127.0.0.1 (localhost).

5. Blocking a Website

To block a website (e.g., example.com):

0.0.0.0 www.example.com

or,

127.0.0.1 www.example.com

This prevents access to www.example.com by redirecting it to a non-routable address.

6. Save and Exit

  • In Nano, press CTRL + X, then Y, and hit Enter.
  • In Vim, press ESC, type :wq, and hit Enter.

7. Flush DNS Cache (if needed)

Some Linux distributions cache DNS lookups. To apply changes immediately, clear the DNS cache:

sudo systemctl restart systemd-resolved

or for nscd:

sudo systemctl restart nscd

Related Read: How To Clear Or Flush DNS Cache In Linux

8. Verify Changes

Test the changes using command:

ping mywebsite.local

or

getent hosts mywebsite.local

9. Restore from Backup (if needed)

If something breaks, you can restore the original file:

sudo cp /etc/hosts.bak /etc/hosts

10. Verify the File Integrity

After restoring, check if the file has the correct entries:

cat /etc/hosts

or

getent hosts localhost

Conclusion

In this step-by-step tutorial, we explained how to safely edit hosts file in Linux. By editing the hosts file, you gain fine-grained control over hostname resolution, which can be useful for development, testing, and network management.


Run0 vs Sudo: What’s the Difference?

$
0
0

https://www.maketecheasier.com/run0-vs-sudo-whats-the-difference

Run0 vs Sudo: What’s the Difference?


16 Top Python Hacks for Data Scientists to Improve Productivity

$
0
0

https://www.tecmint.com/python-tricks-data-scientists

16 Top Python Hacks for Data Scientists to Improve Productivity

As a data scientist, you likely spend a lot of your time writing Python code, which is known for being easy to learn and incredibly versatile and it can handle almost any task you throw at it.

But even if you’re comfortable with the basics, there are some advanced tricks that can take your skills to the next level and help you write cleaner, faster, and more efficient code, saving you time and effort in your projects.

In this article, we’ll explore 10 advanced Python tricks that every data professional should know. Whether you’re simplifying repetitive tasks, optimizing your workflows, or just making your code more readable, these techniques will give you a solid edge in your data science work.

1. List Comprehensions for Concise Code

List comprehensions are a Pythonic way to create lists in a single line of code. They’re not only concise but also faster than traditional loops.

For example, instead of writing:

squares = []
for x in range(10):
    squares.append(x**2)

You can simplify it to:

squares = [x**2 for x in range(10)]

This trick is especially useful for data preprocessing and transformation tasks.

2. Leverage Generators for Memory Efficiency

Generators are a great way to handle large datasets without consuming too much memory. Unlike lists, which store all elements in memory, generators produce items on the fly.

For example:

def generate_numbers(n):
    for i in range(n):
        yield i

Use generators when working with large files or streaming data to keep your memory usage low.

3. Use zip to Iterate Over Multiple Lists

The zip function allows you to iterate over multiple lists simultaneously, which is particularly handy when you need to pair related data points.

For example:

names = ["Alice", "Bob", "Charlie"]
scores = [85, 90, 95]
for name, score in zip(names, scores):
    print(f"{name}: {score}")

This trick can simplify your code when dealing with parallel datasets.

4. Master enumerate for Index Tracking

When you need both the index and the value of items in a list, use enumerate instead of manually tracking the index.

For example:

fruits = ["apple", "banana", "cherry"]
for index, fruit in enumerate(fruits):
    print(f"Index {index}: {fruit}")

This makes your code cleaner and more readable.

5. Simplify Data Filtering with filter

The filter function allows you to extract elements from a list that meet a specific condition.

For example, to filter even numbers:

numbers = [1, 2, 3, 4, 5, 6]
evens = list(filter(lambda x: x % 2 == 0, numbers))

This is a clean and functional way to handle data filtering.

6. Use collections.defaultdict for Cleaner Code

When working with dictionaries, defaultdict from the collections module can save you from checking if a key exists.

For example:

from collections import defaultdict
word_count = defaultdict(int)
for word in ["apple", "banana", "apple"]:
    word_count[word] += 1

This eliminates the need for repetitive if-else statements.

7. Optimize Data Processing with map

The map function applies a function to all items in an iterable.

For example, to convert a list of strings to integers:

strings = ["1", "2", "3"]
numbers = list(map(int, strings))

This is a fast and efficient way to apply transformations to your data.

8. Unpacking with *args and **kwargs

Python’s unpacking operators (*args and **kwargs) allow you to handle variable numbers of arguments in functions.

For example:

def summarize(*args):
    return sum(args)

print(summarize(1, 2, 3, 4))  # Output: 10

This is particularly useful for creating flexible and reusable functions.

9. Use itertools for Advanced Iterations

The itertools module provides powerful tools for working with iterators. For example, itertools.combinations can generate all possible combinations of a list:

import itertools
letters = ['a', 'b', 'c']
combinations = list(itertools.combinations(letters, 2))

This is invaluable for tasks like feature engineering or combinatorial analysis.

10. Automate Workflows with contextlib

The contextlib module allows you to create custom context managers, which are great for automating setup and teardown tasks.

For example:

from contextlib import contextmanager

@contextmanager
def open_file(file, mode):
    f = open(file, mode)
    try:
        yield f
    finally:
        f.close()

with open_file("example.txt", "w") as f:
    f.write("Hello, World!")

This ensures resources are properly managed, even if an error occurs.

11. Pandas Profiling for Quick Data Exploration

Exploring datasets can be time-consuming, but pandas_profiling makes it a breeze, as this library generates a detailed report with statistics, visualizations, and insights about your dataset in just one line of code:

import pandas as pd
from pandas_profiling import ProfileReport

df = pd.read_csv("your_dataset.csv")
profile = ProfileReport(df, explorative=True)
profile.to_file("report.html")

This trick is perfect for quickly understanding data distributions, missing values, and correlations.

12. F-Strings for Cleaner String Formatting

F-strings, introduced in Python 3.6, are a game-changer for string formatting. They’re concise, readable, and faster than older methods like % formatting or str.format().

For example:

name = "Alice"
age = 30
print(f"{name} is {age} years old.")

You can even embed expressions directly:

print(f"{name.upper()} will be {age + 5} years old in 5 years.")

F-strings make your code cleaner and more intuitive.

13. Lambda Functions for Quick Operations

Lambda functions are small, anonymous functions that are perfect for quick, one-off operations. They’re especially useful with functions like map(), filter(), or sort().

For example:

numbers = [1, 2, 3, 4, 5]
squared = list(map(lambda x: x**2, numbers))

Lambda functions are great for simplifying code when you don’t need a full function definition.

14. NumPy Broadcasting for Efficient Computations

NumPy broadcasting allows you to perform operations on arrays of different shapes without explicitly looping.

For example:

import numpy as np
array = np.array([[1, 2, 3], [4, 5, 6]])
result = array * 2  # Broadcasting multiplies every element by 2

This trick is incredibly useful for vectorized operations, making your code faster and more efficient.

15. Matplotlib Subplots for Multi-Plot Visualizations

Creating multiple plots in a single figure is easy with Matplotlib’s subplots function.

For example:

import matplotlib.pyplot as plt

fig, axes = plt.subplots(2, 2)  # 2x2 grid of subplots
axes[0, 0].plot([1, 2, 3], [4, 5, 6])  # Plot in the first subplot
axes[0, 1].scatter([1, 2, 3], [4, 5, 6])  # Scatter plot in the second subplot
plt.show()

This is perfect for comparing multiple datasets or visualizing different aspects of your data side by side.

16. Scikit-learn Pipelines for Streamlined Machine Learning

Scikit-learn’s Pipeline class helps you chain multiple data preprocessing and modeling steps into a single object, which ensures reproducibility and simplifies your workflow.

For example:

from sklearn.pipeline import Pipeline
from sklearn.preprocessing import StandardScaler
from sklearn.linear_model import LogisticRegression

pipeline = Pipeline([
    ('scaler', StandardScaler()),
    ('classifier', LogisticRegression())
])
pipeline.fit(X_train, y_train)

Pipelines are a must-have for organizing and automating machine learning workflows.

Final Thoughts

These advanced Python tricks can make a big difference in your data science projects. So, the next time you’re working on a data science project, try implementing one or more of these tricks. You’ll be amazed at how much time and effort you can save!

If you’re looking to deepen your data science skills, here are some highly recommended courses that can help you master Python and data science:

By enrolling in these courses, you’ll gain the knowledge and skills needed to excel in data science while applying the advanced Python tricks covered in this article.

Disclaimer: Some of the links in this article are affiliate links, which means I may earn a small commission if you purchase a course through them. This comes at no extra cost to you and helps support the creation of free, high-quality content like this.

Thank you for your support!


Understanding the Linux /proc Filesystem: A Beginners Guide

$
0
0

https://ostechnix.com/linux-proc-filesystem

Understanding the Linux /proc Filesystem: A Beginners Guide

The Linux /proc filesystem is a virtual filesystem that provides detailed real-time information about the system, including processes, memory, CPU, and network activity. Unlike traditional filesystems, /proc does not store data on a disk. Instead, it dynamically generates files and directories based on the current state of the Linux kernel.

What is the /proc Filesystem?

The /proc filesystem is a special directory in Linux that serves as an interface between the kernel and userspace. It allows users and system administrators to retrieve system information without the need for specialized tools. By reading files inside /proc, you can access system details such as CPU usage, memory status, running processes, and more.

The /proc filesystem is useful for:

  • Real-time Monitoring:/proc provides up-to-date system status, such as CPU usage, memory usage, and more.
  • Debugging Tool: Helps troubleshoot performance and process-related issues.
  • Process Management: Displays information about active processes.
  • Network Configuration: Shows networking details, including active connections.
  • Configuration: Modify certain kernel parameters at runtime.
  • Learning: Understand how your system works under the hood.

Exploring /proc Files and Directories

The /proc directory contains various files and subdirectories. Some of the most important ones include:

System Information Files

FileDescription
/proc/cpuinfoDetails about the CPU (model, cores, speed)
/proc/meminfoMemory usage (total, free, buffers)
/proc/statSystem statistics (CPU, interrupts, context switches)
/proc/uptimeSystem uptime and idle time
/proc/loadavgCPU load averages over 1, 5, and 15 minutes
/proc/versionKernel version and build details
/proc/cmdlineKernel parameters passed during boot

Filesystems and Storage

FileDescription
/proc/mountsLists mounted filesystems and their types
/proc/filesystemsShows supported filesystem types
/proc/swapsInformation about active swap spaces
/proc/diskstatsDisk I/O statistics (reads, writes, time)

Networking Information

FileDescription
/proc/net/devNetwork interface statistics (RX/TX packets, bytes, errors)
/proc/net/tcpLists active TCP connections (addresses, ports, queues)
/proc/net/routeDisplays the kernel's IPv4 routing table
/proc/net/sockstatSocket statistics (allocated, orphaned sockets)
/proc/sys/net/ipv4/conf/eth0/IPv4 settings of the eth0 network interface

Process-Specific Information

Each running process in Linux has a directory inside /proc, named after its Process ID (PID). For example, a process with PID 1234 will have a directory /proc/1234/ containing:

FileDescription
/proc/[PID]/cmdlineCommand-line arguments used by the process
/proc/[PID]/statusProcess details (state, memory, threads)
/proc/[PID]/ioI/O statistics of the process
/proc/[PID]/fd/Open file descriptors used by the process
/proc/[PID]/net/Network-related details of the process

How to Use /proc Commands in Linux

You can use basic Linux commands to explore the /proc filesystem:

1. View CPU Information:

cat /proc/cpuinfo

2. Check Available Memory:

cat /proc/meminfo

3. Monitor System Uptime:

cat /proc/uptime

4. List Mounted Filesystems:

cat /proc/mounts

5. Display Running Processes:

ls /proc | grep "^[0-9]"

Linux /proc Filesystem Cheatsheet

Here’s a handy cheatsheet summarizing the key files and directories in /proc filesystem:

File/DirectoryDescription
cat /proc/cpuinfoCPU details (model, cores, speed).
cat /proc/meminfoMemory usage (total, free, used).
cat /proc/uptimeSystem uptime and idle time.
cat /proc/loadavgAverage system load over 1, 5, and 15 minutes.
cat /proc/versionKernel version and build information.
cat /proc/cmdlineKernel parameters passed during boot.
cat /proc/mountsList of mounted filesystems.
cat /proc/swapsInformation about active swap spaces.
cat /proc/net/devNetwork interface statistics.
cat /proc/net/tcpActive TCP connections.
cat /proc/net/routeKernel’s IPv4 routing table.
ls /proc/[PID]List information about a process
cat /proc/PID/cmdlineCommand-line arguments for a specific process.
cat /proc/PID/statusDetailed status of a process.
cat /proc/PID/ioI/O statistics for a process.
ls /proc/PID/fd/File descriptors opened by a process.
ls /proc/sys/Kernel settings that can be modified at runtime.
cat /proc/statView system statistics

Print this cheatsheet and keep it near your desk.

Conclusion

The /proc filesystem is an essential tool for Linux users, system administrators, and developers. By understanding its structure and key files, you can monitor system performance, debug issues, and retrieve important system information in real time.

Start exploring /proc today to learn the inner workings of your Linux system!


How to Install DeepSeek Locally with Ollama LLM in Ubuntu 24.04

$
0
0

https://www.tecmint.com/run-deepseek-locally-on-linux

How to Install DeepSeek Locally with Ollama LLM in Ubuntu 24.04

Running large language models like DeepSeek locally on your machine is a powerful way to explore AI capabilities without relying on cloud services.

In this guide, we’ll walk you through installing DeepSeek using Ollama on Ubuntu 24.04 and setting up a Web UI for an interactive and user-friendly experience.

What is DeepSeek and Ollama?

  • DeepSeek: An advanced AI model designed for natural language processing tasks like answering questions, generating text, and more. .
  • Ollama: A platform that simplifies running large language models locally by providing tools to manage and interact with models like DeepSeek.
  • Web UI: A graphical interface that allows you to interact with DeepSeek through your browser, making it more accessible and user-friendly.

Prerequisites

Before we begin, make sure you have the following:

  • Ubuntu 24.04 installed on your machine.
  • A stable internet connection.
  • At least 8GB of RAM (16GB or more is recommended for smoother performance).
  • Basic familiarity with the terminal.

Step 1: Install Python and Git

Before installing anything, it’s a good idea to update your system to ensure all existing packages are up to date.

sudo apt update && sudo apt upgrade -y

Ubuntu likely comes with Python pre-installed, but it’s important to ensure you have the correct version (Python 3.8 or higher).

sudo apt install python3
python3 --version

pip is the package manager for Python, and it’s required to install dependencies for DeepSeek and Ollama.

sudo apt install python3-pip
pip3 --version

Git is essential for cloning repositories from GitHub.

sudo apt install git
git --version

Step 2: Install Ollama for DeepSeek

Now that Python and Git are installed, you’re ready to install Ollama to manage DeepSeek.

curl -fsSL https://ollama.com/install.sh | sh
ollama --version

Next, start and enable Ollama to start automatically when your system boots.

sudo systemctl start ollama
sudo systemctl enable ollama

Now that Ollama is installed, we can proceed with installing DeepSeek.

Step 3: Download and Run DeepSeek Model

Now that Ollama is installed, you can download the DeepSeek model.

ollama run deepseek-r1:7b

This may take a few minutes depending on your internet speed, as the model is several gigabytes in size.

Install DeepSeek Model Locally

Once the download is complete, you can verify that the model is available by running:

ollama list

You should see deepseek listed as one of the available models.

List DeepSeek Model Locally

Step 4: Run DeepSeek in a Web UI

While Ollama allows you to interact with DeepSeek via the command line, you might prefer a more user-friendly web interface. For this, we’ll use Ollama Web UI, a simple web-based interface for interacting with Ollama models.

First, create a virtual environment that isolates your Python dependencies from the system-wide Python installation.

sudo apt install python3-venv
python3 -m venv ~/open-webui-venv
source ~/open-webui-venv/bin/activate

Now that your virtual environment is active, you can install Open WebUI using pip.

pip install open-webui

Once installed, start the server using.

open-webui serve

Open your web browser and navigate to http://localhost:8080– you should see the Ollama Web UI interface.

Open WebUI Admin Account

In the Web UI, select the deepseek model from the dropdown menu and start interacting with it. You can ask questions, generate text, or perform other tasks supported by DeepSeek.

Running DeepSeek on Ubuntu

You should now see a chat interface where you can interact with DeepSeek just like ChatGPT.

Step 5: Enable Open-WebUI on System Boot

To make Open-WebUI start on boot, you can create a systemd service that automatically starts the Open-WebUI server when your system boots.

sudo nano /etc/systemd/system/open-webui.service

Add the following content to the file:

[Unit]
Description=Open WebUI Service
After=network.target

[Service]
User=your_username
WorkingDirectory=/home/your_username/open-webui-venv
ExecStart=/home/your_username/open-webui-venv/bin/open-webui serve
Restart=always
Environment="PATH=/home/your_username/open-webui-venv/bin:/usr/local/sbin:/usr/local/bin:/usr/sbin:/usr/bin:/sbin:/bin"

[Install]
WantedBy=multi-user.target

Replace your_username with your actual username.

Now reload the systemd daemon to recognize the new service:

sudo systemctl daemon-reload

Finally, enable and start the service to start on boot:

sudo systemctl enable open-webui.service
sudo systemctl start open-webui.service

Check the status of the service to ensure it’s running correctly:

sudo systemctl status open-webui.service

Running DeepSeek on Cloud Platforms

If you prefer to run DeepSeek on the cloud for better scalability, performance, or ease of use, here are some excellent cloud solutions:

  • Linode– It provides affordable and high-performance cloud hosting, where you can deploy an Ubuntu instance and install DeepSeek using Ollama for a seamless experience.
  • Google Cloud Platform (GCP)– It offers powerful virtual machines (VMs) with GPU support, making it ideal for running large language models like DeepSeek.
Conclusion

You’ve successfully installed Ollama and DeepSeek on Ubuntu 24.04. You can now run DeepSeek in the terminal or use a Web UI for a better experience.


5 of the Best Productivity Plugins for Tmux

$
0
0

https://www.maketecheasier.com/best-productivity-plugins-for-tmux

Tmux is a great terminal multiplexer that can consolidate and manage different console sessions. While its core features cover most use cases, it also has a plugin framework that allows you to shape the program for your needs. In this article, I will go through some of the best plugins for Tmux that can help optimize your terminal workflow.

1. tmux-menus

If you’re new to Tmux, learning every keybind can be tricky and daunting. With its unintuitive chorded shortcuts, it’s easy to forget the keybinds to lesser-known Tmux features such as copy mode and pane marking.

A terminal showing a multi-pane Tmux setup with a marked pane and a pane in copy mode.

Tmux-menus is a simple plugin that addresses this issue. It provides a clean and intuitive TUI-based menu that you can access by pressing Ctrl + \ (Backslash). Inside, it comes with every Tmux function, allowing you to visually select what you need instead of memorizing their keyboard shortcuts.

A terminal showing the tmux-menus plugin working.

Apart from making Tmux accessible, one quality that I like about Tmux-menus is configurability. Every menu item inside the plugin is just a link to a shell script. This means that with a little Bash know-how, you can easily include custom functions to Tmux-menus.

A terminal showing the custom "on-the-fly" config menu for tmux-menus.

2. tmux-resurrect

One of the biggest pain points of Tmux is that it’s a stateless program. This means it won’t remember anything about the session when you close it. Personally, I find this frustrating as it forces me to redo my Tmux layout whenever I restart my computer.

A terminal showing the a Tmux session abruptly disconnected.

Tmux-resurrect is a tool that can help solve this problem. It’s a no-frills plugin that preserves entire Tmux environments, including window order and pane layout. It also stores incremental snapshots of your sessions, meaning you can “go back in time” and load different versions of your Tmux setup.

A terminal showing the internals of a Tmux layout.

Another feature that I like about Tmux-resurrect is that it can save the state of a running program. Granted, the implementation isn’t perfect, and the feature only covers a handful of apps. However, the plugin handles it well enough to make your Tmux setup more seamless.

A terminal showing the restore process in tmux-resurrect that includes recovering the program state.

Good to know: interested in how Tmux-resurrect does its magic? Take a deep dive on how Tmux manages windows and panes in a session.

3. tmux-notify

Keeping track of background programs can be difficult if you’re juggling multiple Tmux panes and sessions. In my experience, this led to moments where I forgot that I had a command running in the background and accidentally closed Tmux.

A terminal showing recently closed Tmux sessions.

Tmux-notify is a plugin that sends a notification when it detects a finished process. It works by checking any active Tmux pane that just transitioned to a Bash shell prompt. The plugin then sends a libnotify message, which can either be a visual terminal bell or an audible ping.

A terminal showing the libnotify toast notification for the running Tmux task.

While that notification style works for most users, Tmux-notify also offers support for Telegram bots, Pushover alerts, and custom commands. This makes it possible to integrate Tmux-notify on just about any workflow, making it an attractive option for tinkerers who want to tune their terminal setup.

On a side note: are you new to the command line? Start your journey on the right foot by checking out our beginner’s guide to using the Linux terminal.

4. tmux-jump

Buffer navigation is arguably one of the clunkiest parts of Tmux. The multiplexer provides no built-in keyboard shortcuts for movement outside of copy mode and window focus. As someone who uses Tmux for daily productivity tasks, I find this odd quirk both tedious and frustrating, especially for long terminal sessions.

Tmux-jump solves this issue by making Tmux pane navigation both easy and intuitive. Taking inspiration from Vimium, it uses keyword hints to create “jump points” inside your Tmux windows. These allow you to move quickly inside Tmux without relying on its complex shortcuts.

A terminal showing the keyword hints in Tmux-jump.

Tmux-jump shines the most when you combine it with plugins like EasyMotion for Vim. In my case, this setup creates a consistent workflow where the terminal and text editor follow the same movement keybinds. This makes them behave similar to an IDE, which is hard to replicate for full-suite programs like Emacs.

A terminal showing the keyword hints working in a multi-pane Tmux setup.

5. treemux

Treemux is a powerful plugin that seamlessly integrates Neovim’s tree-style file browser with Tmux. It can navigate folders, open files, and even display the current working directory. This makes it an invaluable plugin if you want to create a Neovim-based IDE inside Tmux.

A terminal showing the Treemux plugin working on one Tmux pane.

The developer of Treemux also designed the plugin to be as unobtrusive as possible. It doesn’t show up by default and adjusts its size according to the pane it’s attached to. As such, Treemux is an excellent plugin if you prefer a “zen-like” terminal with minimal distractions.

A terminal showing the Treemux plugin working on individual panes.

Lastly, Treemux has a couple of Neovim extensions that expand the plugin’s default feature set. Tmuxsend.vim adds support for sending the full path from Treemux to Tmux, making file references quick and easy. Meanwhile, nvim-tree-remote.nvim allows you to open files in Treemux by double-clicking it with the mouse.

At the end of the day, Tmux is just a multiplexer program and these plugins will only extend what it currently does. If you’re looking to expand on what the terminal can do for you, check out how my colleague enhanced his terminal with a handful of great apps.

Image credit: Grok via x.ai. All alterations and screenshots by Ramces Red.


How to Lock a File for Renaming/Deleting in Linux

$
0
0

https://www.tecmint.com/prevent-file-deletion-linux

How to Lock a File for Renaming/Deleting in Linux

If you’ve ever worked with sensitive files on Linux, you might have wanted to prevent others (or even yourself) from accidentally renaming or deleting them. Thankfully, Linux provides a few methods to “lock” a file, making sure it stays safe from unwanted changes.

In this guide, we’ll show you how to lock a file to prevent renaming or deleting it using simple commands and tools available in Linux. We’ll also walk through an example to demonstrate each method.

Let’s assume we have a file called important.txt located in the /home/user/ directory, and we want to protect this file from being renamed or deleted.

Method 1: Using chattr to Make a File Immutable

One of the simplest and most effective ways to protect a file from renaming or deletion is to use the chattr command, which changes file attributes in Linux.

First, let’s check the attributes of important.txt using the lsattr command, which will list the attributes of files and directories:

lsattr /home/user/important.txt

If the file is not locked, you should see nothing or just - in the output.

Check File Attributes

To make important.txt immutable (unable to be renamed or deleted), run the following command:

sudo chattr +i /home/user/important.txt
lsattr /home/user/important.txt

Now, you should see an i in the output next to the file name, indicating it’s locked.

Lock File in Linux
Lock File in Linux

Attempting to rename or delete the file will now fail.

mv /home/user/important.txt /home/user/important_backup.txt

Similarly, if you try to delete the file.

rm /home/user/important.txt

You will get an error saying “Operation not permitted“.

Delete File in Linux

To remove the immutability and allow changes to the file, use:

sudo chattr -i /home/user/important.txt

Now, you can rename or delete the file as usual.

Method 2: Using File Permissions to Restrict Deleting

Another way to prevent file deletion is by changing the file’s permissions by using the chmod command, which sets permissions that make a file unreadable or uneditable by other users.

To prevent everyone (including yourself) from deleting or modifying the file, use:

chmod a-w /home/user/important.txt

You can check the file’s permissions with:

ls -l /home/user/important.txt

You should see something like this, where the w (write) permission has been removed, which indicates that no one can modify or delete the file.

File Deletion Control with Permissions

To allow yourself to delete or modify the file again:

chmod +w /home/user/important.txt

Method 3: Using chown to Change Ownership

If you’re the only person who should be able to modify or delete the file, you can change the ownership of the file.

sudo chown yourusername:yourgroup /home/user/important.txt

Replace yourusername and yourgroup with your actual username and group.

Now, you can check the file’s owner and group with:

ls -l /home/user/important.txt

You should see something like:

-r--r--r-- 1 yourusername yourgroup 0 Feb 3 10:00 /home/user/important.txt

Now, only you can modify or delete the file.

Conclusion

Locking a file in Linux can help prevent accidental changes like renaming or deletion, which is especially useful when dealing with important files.

The methods we’ve discussed – using chattr to make a file immutable, adjusting file permissions, and changing file ownership are easy to use and can provide the security you need.


How to Install LXD on Linux (with Pro’s Practical Examples)

$
0
0

https://linuxtldr.com/installing-lxd

How to Install LXD on Linux (with Pro’s Practical Examples)

LXD (pronounced lex-dee) is a lightweight container manager that allows you to run Linux containers (LXC), a type of container similar to VMware that maintains its state even after a system reboot and uses the host system kernel.

The LXC container creation process is similar to Docker containers, but they have their differences. First, as we discussed earlier, LXC containers can retain their state after a system reboot, unlike Docker containers, which wipe out all data.

Another difference between Docker and LXD is the way they handle processes, which varies between them. When using multiple processors, LXD is faster than Docker for managing applications, whereas Docker is faster than LXD when using a single processor.

Ezoic

Surprisingly, most Docker images can be seamlessly managed by LXD. However, a few might not run because LXD operates all containers in non-superuser mode, like Podman, which restricts users from performing certain actions.

This article will show you how to install LXD on your desired Linux system, as well as how to create and manage your first LXC container.

Ezoic

Table of Contents

Tutorial Details

DescriptionLXD
Difficulty LevelModerate
Root or Sudo PrivilegesYes (for installation)
OS CompatibilityUbuntu, Fedora, etc.
Prerequisites
Internet RequiredYes

How to Install LXD on Linux

The installation of LXD is divided into multiple parts: first, you need to install the Snap on your Linux system, then install the LXD Snap package, and finally, add the current user to the “lxd” group to use the “lxc” command without needing root or sudo privileges. So, let’s start with…

Step 1: Install Snap on Linux

The LXD is a product of Canonical (other products include Ubuntu) and is shipped as a Snap package. Therefore, if you are using Ubuntu, you already have Snap installed; however, you need to manually install Snap for other Linux systems such as Debian, Pop!_OS, Fedora, or AlmaLinux.

Ezoic

So, to install Snap on your desired Linux system, open your terminal and execute one of the following commands, depending on your Linux distribution:

# On Debian, Ubuntu, Min, Pop!_OS, etc.
$ sudo apt install snapd

# On Redhat, Fedora, AlmaLinux, CentOS, etc.
$ sudo dnf install snapd

Once done, check that Snapd is running in the background by using the systemctl command:

$ sudo systemctl status snapd

Output:

checking the status of snapd

If Snapd is not active in your system, use the following command to enable the Snapd (autostart daemon on system boot) and restart it.

$ sudo systemctl enable snapd
$ sudo systemctl restart snapd

Output:

enabling and restarting the snapd

Step 2: Install the LXD Snap Package

The LXD comes as a Snap package, so to install it on your Linux system, use the following command:

$ sudo snap install lxd

Output:

install lxd snap package

After installation is complete, you can use the snap command with grep to locate the LXD Snap package in the list of installed Snap packages.

$ snap list | grep lxd

Output:

check lxd in snap list

Step 3: Add the User to the LXD Group

To manage the containers without needing root or sudo privileges, you need to add your current user to the “lxd” group. The “lxd” group is automatically created at the time of installing the LXD Snap package. Therefore, you don’t have to create one; just use the usermod command to add the user to the “lxd” group.

📝
Make sure to replace “linuxtldr” with your own username; if you’re unsure, use the “echo $USER” command to display the current username.
$ sudo usermod -aG lxd linuxtldr

Output:

add user to lxd group

Once completed, you must update the changes to the “lxd” group. For this purpose, you can either restart your system or simply use the newgrp command to reflect the change immediately.

Ezoic
$ newgrp lxd

Output:

refresh the lxd group

To verify that the current user is added to the “lxd” group, run the groups command:

$ groups

Output:

check the user groups

Step 4: Initializing LXD

Now that LXD is installed, you need to initialize it. This is a one-time process that will configure your LXD networking and storage options, such as directory, ZFS, Btrfs, and more:

$ lxd init

When initializing, it will prompt various questions about configuring the LXD, such as storage and networking options. If you’re a beginner, feel free to opt for default settings (except for the storage backend, where you should choose “dir“) by pressing “enter” for each question.

initializing lxd server

That’s it. Now you have successfully installed and configured LXD on your Linux system. You can begin creating and managing containers using the “lxc” command.

Ezoic

How to Use LXD on Linux

After installing and configuring LXD on your Linux system, you can start creating and managing containers. However, to do this, you must use the “lxc” command that comes with the LXD package. So, let’s start with our first example…

List All the Remote Server

When setting up a container from an image, the image is pulled from a server, and the list of servers from which the image will be pulled can be listed using the following command:

$ lxc remote list

Output:

check lxc list of remote server

If you’re familiar with Docker, then you can compare it to Docker Hub, so when searching for an image or pulling it using the “lxc” command, it will look for the requested image on this remote server.

Ezoic

Search for LXD Images

To pull your desired LXD image, you need to first ensure it’s available on the remote server. For that purpose, you can use the following command to list all the images on the mentioned remote server:

# The following command will list all the images from the "images" server.
$ lxc image list images:

# The following command will list all the images from the "ubuntu" server.
$ lxc image list ubuntu:

# The following command will list all the images from the "ubuntu-daily" server.
$ lxc image list ubuntu-daily:

Output:

checking the list of images on the remote server

The above output quickly becomes too long, so to quickly locate your desired image, if you have any specific image in mind, you can specify it by its name with or without version and architecture.

# Search for "Debian" image from the "image:" server.
$ lxc image list images: debian

# Search for "Debian 12" image.
$ lxc image list images: debian 12

# Search for "Debian 12" image with 64-bit architecture.
$ lxc image list images: debian 12 amd64

# Search for "Ubuntu 24.04" image.
$ lxc image list images: ubuntu 24.04

# Search for "Ubuntu Noble" image.
$ lxc image list images: ubuntu noble

# Search for "Fedora 40" image.
$ lxc image list images: fedora 40

Output:

list debian images in lxd remote server

Create a Container from the LXD Image

Creating a container is straightforward; all you need to do is fill in the basic information about your image, such as the distro, version, arch, and container name, in the following command:

Ezoic
$ lxc launch images:<distro>/<version>/<arch><container-name-here>

Remember, the “<distro>” and “<container-name-here>” parameters are important, but other parameters such as “<version>” and “<arch>” can be skipped, and if they are not specified, the latest image based on your system will be picked.

To assist you, I’ve provided a few commands below to create containers using different images in different ways:

# Create container named "Debian" with "Debian 12"  image from the "image:" server.
$ lxc launch images:debian/12 debian

# Create container named "Debian" with "Debian 12 amd64"  image from the "image:" server.
$ lxc launch images:debian/12/amd64 debian

# Create container named "Fedora" with "Fedora 40"  image from the "image:" server.
$ lxc launch images:fedora/40 fedora

The following is a picture of a “Debian” container with a “Debian 12” image.

creating debian container in lxd

List All the Containers

For checking the list of all containers, including their information such as container name, state, IPv4, IPv6, type, and snapshots, use the following command:

$ lxc list

Output:

listing all the lxd containers

You can see above the “Debian” container we created in the previous method listed here.

Execute Commands Inside the Container

Once the container is ready and in a running state, you can directly execute a command inside it by specifying the container name to the “lxc exec” command and passing your desired command after the “--” separator.

For example, I’m running an Ubuntu system on the host machine and have configured a Debian container to demonstrate that we were able to successfully execute the command inside our container. I am checking the “/etc/os-release” file on both using the following commands:

Ezoic
# The following command will run on host machine.
$ cat /etc/os-release

# The following command will run on Debian container.
$ lxc exec debian -- cat /etc/os-release

Output:

executing command in lxd container

You can see that we were able to successfully execute the command inside our Debian container.

If you want to install any packages inside your Debian container, you can do so by simply replacing the command after the double dash “--” with the package installation command. For example, the following command will install the Nginx package in my Debian container.

$ lxc exec debian -- apt install nginx

Output:

install package in lxd container

Once the installation is complete, you can access your Nginx server from your desired browser or by using the curl command with the IPv4 address of your Debian container, which can be found using the “lxc list” command.

Stop the Container

To stop a running container, you can specify the container name you want to stop in the following command:

# Stop the container.
$ lxc stop debian

# Check the state of container.
# lxc ls

Output:

stop lxd container

Start the Container

To start the stopped container, you can specify the container name you wish to start in the following command:

# Start the container.
$ lxc start debian

# Check the state of container.
# lxc ls

Output:

start lxd container

Restart the Container

If your container is not working correctly, you can try restarting it, although there is no way to monitor the status of the container while it is restarted. You can specify the container name you wish to restart in the following command:

Ezoic
$ lxc restart debian

Output:

restart lxd container

Push a File to the Container

Pushing files from the host machine to the container is very easy; you can do so with the following command:

$ lxc file push </path/to/file><continer-nane>/path/to/dest/dir/

For demonstration, I have a “file.txt” in my home directory on my host machine. To push it to the home directory on my container, the command would look like below:

$ lxc file push file.txt debian/home/

The following is a picture of checking the existence of a file on the host machine, pushing it into the container, and then checking its existence on the container:

pushing file to the lxd container

Pull a File from the Container

To pull the file from the container to the host machine, you can use the following command:

$ lxc file pull <continer-nane>/<path/to/file></path/to/local/dest>

For example, to pull the “file.txt” from the home directory in my container to the “~/Documents” directory on the host machine, the command would look like this:

Ezoic
$ lxc file pull debian/home/file.txt ~/Documents/

Output:

Pulling file from lxd container

Managing Snapshots of Containers

The LXD container provides support for snapshots, which makes life way easier. If you are not familiar with the term “Snapshot“, then if you have used VMware, a snapshot in LXD is almost the same as in VMware.

In layman’s terms, a snapshot is a complete copy of your container, so if you are going to perform any task that might damage your container, you can take a snapshot. If something goes wrong in the future, you can restore your container from the previously created snapshot.

In LXD, you can easily create a snapshot for your container and assign a unique name to it. For example, the following command will create a snapshot of the Debian container with the name “mysnap1“.

Ezoic
$ lxc snapshot debian mysnap1

Output:

creating lxd container snapshot

See, creating a snapshot in LXD is so much easier. This way, you can create any number of snapshots for your containers, and to check the count of snapshots, you can use the following command:

$ lxc list

Output:

checking the count of total snapshot

The above output shows you the number of snapshots, but if you forget the name of your snapshot, you can’t restore or delete it. So, to get a detailed list of snapshots created with their names, taken time, expiry date, and state, use the following command:

$ lxc info debian

Output:

checking detail info of lxd container snapshots

This way, you can easily create and list snapshots, and in the future, when you want to restore the container state to the created snapshot, simply specify the container name and snapshot name, as shown in the following command:

Ezoic
$ lxc restore debian mysnap1

Output:

restoring snapshot in lxd container

Finally, to delete the snapshot, you can specify the container name and snapshot name that are to be deleted.

$ lxc delete debian/mysnap1

Output:

deleting snapshot in lxd container

Delete the Container

To delete your containers, first stop them, and then delete them as shown in the following command.

$ lxc stop debian
$ lxc delete debian

Output:

deleting lxd container

To verify that the container is successfully deleted, you can check the list of all containers.

$ lxc list

Output:

list running lxd containers

Bonus Tip: Advanced Configuration of LXD Containers

In LXD, you have different ways to configure various aspects of your containers. To demonstrate a few, the following command will set the container to use only 1GB of memory.

$ lxc config set <container-name> limits.memory 1GB

If you have multiple containers, such as one for PHP and another for MySQL, you must start MySQL before PHP. Therefore, you can use the following command to set an order for each of these containers, ensuring they start sequentially instead of randomly:

# This container will start first.
$ lxc config set <mysql-container> boot.autostart 1

# This container will start second.
$ lxc config set <php-container> boot.autostart 2

Instead of specifying the order of the container, you can also set a delay time on container launch by using the following command:

# The following container will start after 30 seconds.
$ lxc config set <container-name> boot.autostart.delay 30

This way, you can set many custom configurations for your container, and to check an existing configuration applied to your container, you can use the following command:

Ezoic
$ lxc config show <container-name>

To get a complete list of all types of configurations that can be set for your containers, refer to the LXD instance configuration documentation.

Final Word

Here comes the end of this article; we discussed everything from basic to advanced ways of managing the LXD container. Well, I hope you find this article helpful; if you have any questions or queries related to the topic, then do let me know in the comment section.

Till then, peace!


How To List All Running Daemons In Linux

$
0
0

https://ostechnix.com/list-all-running-daemons-in-linux

How To List All Running Daemons In Linux

Find Running Daemons on Linux (Systemd, SysVinit, OpenRC)

968 views

A daemon is a background process that runs without direct user interaction. Linux systems use different init (initialization) systems to manage daemons. The common ones are Systemd, SysVinit, and OpenRC. In this tutorial, we will explain different ways to list all running daemons for each init system in Linux.

Understanding Daemons, Processes and Init Systems

Before getting into the topic, allow me to briefly explain the following key terminologies, as they are important for understanding the rest of the tutorial.

  1. Daemon,
  2. Process,
  3. Init system.

If you want to manage services (like starting or stopping a web server), you need to understand daemons and the init system.

If you want to monitor or troubleshoot your system, you need to understand processes.

1. What is a Daemon?

A daemon is a background process that runs continuously on a Linux system, usually without direct user interaction.

Daemons provide essential services to the system or other programs. For example:

  • sshd manages SSH connections.
  • cron schedules tasks.
  • apache2 serves web pages.

Daemons typically start when the system boots and keep running until the system shuts down.

Example:

If you’re using a web server, the apache2 or nginx daemon runs in the background to handle web requests.

Fun fact: Daemon names often end in "d" (like sshd, crond).

2. What is a Process?

A process is any program or task that is currently running on your system.

Types of Processes:

  • Foreground Processes: These are started by the user and interact directly with the user (e.g., a web browser or text editor).
  • Background Processes: These run without user interaction (e.g., a file download or system update).
  • Daemons: A special type of background process that provides system services.

You can list all processes using commands like ps or top.

ps aux

You can the check a specific process's (E.g. nano) PID using command:

ps aux | grep nano

Example:

When you open a terminal, a bash process starts. If you run a command like ls, a new process is created to execute that command.

Related Read:

3. What is an Init System?

The init system is the first process that starts when a Linux system boots (with Process ID 1, or PID 1). It manages all other processes and services on the system.

The init system is responsible for:

  • Starting and stopping system services (daemons).
  • Managing dependencies between services.
  • Handling system shutdown and reboot.

Some of the Common Init Systems are:

  • Systemd: The most widely used init system in modern Linux distributions (e.g., Ubuntu, Fedora, Debian). Commands to manage systemd are systemctl, and journalctl.
  • SysVinit: An older init system used in traditional Linux distributions. Commands to manage SysVinit are service, /etc/init.d/.
  • OpenRC: A modern, flexible, and lightweight init system, often used in GentooAlpine Linux, and Artix Linux.
  • Upstart: A transitional init system used in some older Ubuntu versions. Command to manage is initctl. It is now obsolete, as most recent Ubuntu distributions have moved to systemd.

Example:

When you boot your system, the init system starts essential daemons like sshd (for SSH) and cron (for scheduled tasks).

The init system starts and manages daemons (background services). Both daemons and regular programs (like a web browser) are types of processes. You can list all processes using tools like ps, but you need init-specific commands (e.g., systemctl) to manage daemons.

To check your init system, run:

ps --pid 1

Example Output:

PID TTY      TIME     CMD
1 ?        00:00:00 systemd

This means the system uses Systemd.

Summary Table

TermDefinitionExample
DaemonA background process that provides system services.sshd, cron, apache2.
ProcessAny running program or task on the system.bash, ls, sshd.
Init SystemThe first process that starts at boot and manages all other processes/services.systemd, SysVinit, OpenRC, Upstart.

Processes vs. Daemons

As I already noted, a process is any running program or task on your system (like a text editor, web browser, or background service).

A daemon is a special type of process that runs in the background without user interaction, usually providing system services (like handling network connections, logging, or scheduling tasks).

Here's the key differences between processes and daemons:

FeatureProcessDaemon
Runs in background?No (usually runs in foreground)Yes
Attached to terminal?Yes (when launched by user)No (detached from terminal)
Examplefirefox, nano, htopsshd, cron, systemd-journald
Managed byThe user or systemInit system (systemd, SysVinit, OpenRC)

Alright. I hope you now have a good understanding of daemons, processes, and init systems. Now, let's learn how to list daemons for each init system.

First, let us start with Systemd.

1. List All Running Daemons using Systemd

Systemd uses services to manage daemons. Systemd is the default init system in many modern Linux distros like Arch Linux, Debian, Fedora, RHEL, and Ubuntu.

You can check running services with:

systemctl list-units --type=service --state=running

Explanation:

  • systemctl→ The main command for managing services in Systemd.
  • list-units→ Lists active system units.
  • --type=service→ Filters the output to show only services.
  • --state=running→ Shows only currently running services.

Example Output:

  UNIT                      LOAD   ACTIVE SUB     DESCRIPTION                                            
  accounts-daemon.service   loaded active running Accounts Service
  avahi-daemon.service      loaded active running Avahi mDNS/DNS-SD Stack
  bluetooth.service         loaded active running Bluetooth service
  bolt.service              loaded active running Thunderbolt system service
  colord.service            loaded active running Manage, Install and Generate Color Profiles
  cron.service              loaded active running Regular background program processing daemon
  cups-browsed.service      loaded active running Make remote CUPS printers available locally
[...]  
List All Running Daemons using systemd Command in Linux

2. Display All Running Daemons using SysVinit

SysVinit uses init scripts stored in /etc/init.d/. It is used in older versions of Linux distros such as Debian 7, CentOS 6.

To list running services:

service --status-all | grep "+"

Explanation:

  • service --status-all→ Lists all services and their statuses.
  • grep "+"→ Filters out only running services (services with [ + ] in the output).

Example Output:

 [ + ]  cron
 [ + ]  networking
 [ - ]  apache2

Here, cron and networking are running, while apache2 is stopped.

3. View Running Daemons using OpenRC

OpenRC manages services using rc-status in some linux distributions such as Alpine Linux, and Gentoo.

To list active daemons:

rc-status

Example Output:

Runlevel: default
 sshd                                                           [  started  ]
 crond                                                          [  started  ]

Cheatsheet for Listing Running Daemons in Linux

Init SystemCommand to List Running Daemons
Systemdsystemctl list-units --type=service --state=running
SysVinitservice --status-all
OpenRCrc-status

Conclusion

In this tutorial, we discussed the concepts of processesdaemons, and init systems, and the key differences between processes and daemons to clarify their roles in a Linux system.

We also covered how to list running daemons across different init systems, such as Systemd, SysVinit, and Upstart, along with practical examples.

We hope this guide has been helpful!


Access Local PC With a Domain Name Using Cloudflare Tunnels

$
0
0

https://linuxtldr.com/setup-cloudflare-tunnel-for-webserver

Access Local PC With a Domain Name Using Cloudflare Tunnels

Do you want to access your localhost over the internet (without static IP, without a router, without port forwarding) using the HTTPS protocol, remotely access your PC via SSH, or have you set up an FTP server on your system and want to access it for downloading and uploading files from anywhere?

This can all be achieved at once without needing static IP, router, or port forwarding on Linux, Windows, macOS, or Raspberry Pi by simply following the ten simple steps mentioned in this article.

Pre-requisite

The following are a few requirements that must be fulfilled in order for everything to work properly:

  • System with active access to the internet.
  • A running web server, SSH server, or FTP server on their default port.
  • Cloudflare account with one purchased domain name that has subdomain access.

Access Localhost With a Domain Name Using Cloudflare Tunnels

To demonstrate how to reverse proxy with a dynamic IP using Cloudflare, I’ll use my Cloudflare account with my purchased domain name that I’ve already added and configured with nameserver, accessing my PC that has a Nginx server running at port 80 via my domain name.

Ezoic
📝
The article focuses on accessing the local web server over the internet, but the same steps with slight variations that will be discussed later can also allow you to access your FTP or SSH server on the internet.

So, let’s begin.

1. First, I’ll show you that the Nginx server is already running on my local PC on the default port 80.

checking the status of nginx server

Now, I’ll show you how to access the above localhost page over the internet with a domain name using Cloudflare.

2. Login to your Cloudflare account, and you will then be redirected to the following page, where you can see I have one domain name added to my account. Therefore, you must also have at least one. Now, in the sidebar, click on the “Zero Trust” option.

cloudflare dashboard

3. Now, you will be redirected to the following Zero Trust dashboard: Here, you must first click on the down arrow key next to “Networks“ and then click on the “Tunnels” option.

Ezoic
cloudflare zero trust dashboard

4. On the Tunnel page, click on the “Add a tunnel” button.

tunnel page in cloudflare zero trust

5. Select “Cloudflared” as the connector to link your resources (e.g., web server, SSH server, FTP server, etc.) to the Cloudflare global network, then click on the “Next” button.

creating tunnel

6. Name your tunnel, which will help you identify which system is linked to it in the future, and then click on the “Save Tunnel” button.

Ezoic
naming the tunnel

7. Choose the local system environment for the connector. For example, if you’re using an Ubuntu system operating on a 64-bit architecture, opt for “Debian” as the “operating system” and “64-bit” as the “architecture“, and then proceed to click and copy the provided command.

📝
If you are running a Windows system, choose “Windows” as the “operating system“, select your architecture, and you will be provided with an installer that you can simply install as a regular program.
choosing connector environment

8. Open your terminal, paste, and execute the previously copied command to install and configure the Cloudflare service.

installing and configuring cloudflared

9. Once the installation is complete, return to your browser, scroll down, and click on the “Next” button.

adding the connector

10. It’s time to add the public hostname (the purchased domain in your Cloudflare account) to your tunnel and link the hostname to the Cloudflared service (installed in your system in step eight). For example, for the hostname subdomain, I’ll name it “linuxtldr“, select the domain in the “Domain” dropdown, and leave the “Path” field empty.

Then, under service, as I am running an Nginx server at port 80 on my system, I will select “HTTP” for “Type“, set the “URL” as “localhost“, and then click on the “Save Tunnel” button.

Ezoic
📝
This list of protocols, “HTTP, HTTPS, UNIX, TCP, SSH, RDP, UNIX+TLS, SMB, HTTP_STATUS, BASTION” can only be used for “Type“.
adding hostname to tunnel

If, while adding the hostname, you encounter the following error:

hostname error

Then make sure that the specified subdomain is neither already created nor reserved by any other record in the domain’s DNS records.

11. Once the hostname is successfully created, you will be redirected back to the “Tunnels” page, where you can view the status of the tunnel.

tunnel created

12. Once the tunnel status turns “HEALTHY“, open your browser and visit the domain you used as a hostname for the tunnel.

accessing the local pc using cloudflared

Tada!! You have successfully set up a Cloudflare tunnel on your local PC and can now access the web server over the internet via a domain name.

If you’re interested in learning more, do let me know in the comment section; there’s a lot more you can do with Cloudflare Tunnel.

Ezoic

Till then, peace!


Best Linux Tools for AI Development in 2025

$
0
0

https://www.tecmint.com/linux-tools-for-ai-development

Best Linux Tools for AI Development in 2025

Artificial Intelligence (AI) is rapidly transforming industries, from healthcare and finance to creative fields like art and music. Linux, with its open-source nature, customizability, and performance, has become a leading platform for AI development.

This article explores essential Linux tools for AI development, catering to both beginners and experienced developers.

Why Linux for AI Development?

Linux’s popularity in AI stems from several key advantages:

  • Open-Source Nature: Allows for modification and customization, crucial for the iterative nature of AI development.
  • Stability and Performance: Handles demanding workloads and complex model training efficiently.
  • Strong Community Support: A vast and active community provides ample resources and troubleshooting assistance.
  • Compatibility with AI Frameworks: Optimized for major frameworks like TensorFlow and PyTorch.
  • Command-Line Interface: Offers powerful and efficient control over system resources.

Essential Linux Tools for AI Development

To make it easier to navigate, we’ve grouped the tools into categories based on their primary use cases.

1. Deep Learning Frameworks

These frameworks are the backbone of AI development, enabling you to build, train, and deploy machine learning models.

TensorFlow

Developed by Google, TensorFlow is a powerful framework for building and training machine learning models, particularly deep learning. Its versatility makes it suitable for research and production deployments.

Keras, a high-level API, simplifies model building, while TensorFlow Extended (TFX) supports production-level deployments.

To install TensorFlow on Linux, use pip package manager.

pip install tensorflow

PyTorch

Developed by Facebook’s AI Research lab (FAIR), PyTorch is favored by researchers for its dynamic computation graphs, which offer flexibility in model experimentation and debugging. TorchScript enables model optimization for production.

To install PyTorch on Linux, run:

pip install torch

2. Data Science and Machine Learning

These tools are essential for data preprocessing, analysis, and traditional machine learning tasks.

Scikit-learn

Scikit-learn is a comprehensive library for various machine learning algorithms, including classification, regression, clustering, and dimensionality reduction. It’s an excellent tool for both beginners and experienced practitioners.

To install Scikit-learn on Linux, run:

pip install scikit-learn

XGBoost/LightGBM/CatBoost

These gradient boosting libraries are known for their performance and accuracy, which are widely used in machine learning competitions and real-world applications.

To install XGBoost/LightGBM/CatBoost on Linux, run:

pip install xgboost lightgbm catboost

3. Development Environment and Workflow

These tools help you write, test, and debug your code efficiently.

Jupyter Notebooks/Lab

Jupyter provides an interactive environment for coding, data visualization, and documentation, making it ideal for exploring data and prototyping models.

To install Jupyter on Linux, run:

pip install jupyterlab  
or 
pip install notebook

Integrated Development Environments (IDEs)

Popular IDEs like VS Code (with Python extensions) or PyCharm offer features like code completion, debugging, and version control integration.

These are excellent IDEs for managing large AI projects.

4. Containerization and Deployment

These tools help you package and deploy AI applications efficiently.

Docker

Docker simplifies packaging AI applications and their dependencies into containers, ensuring consistent execution across different environments, which is essential for portability and deployment.

To install Docker on Linux, run:

sudo apt install docker.io

Kubernetes

Kubernetes is a powerful container orchestration platform for managing and scaling containerized AI applications, which is crucial for deploying models in production at scale.

To install Kubernetes on Linux, run:

curl -LO "https://dl.k8s.io/release/$(curl -L -s https://dl.k8s.io/release/stable.txt)/bin/linux/amd64/kubectl"

Kubeflow

Kubeflow streamlines machine learning workflows on Kubernetes, from data preprocessing to model training and deployment.

To install Kubeflow on Linux, run:

kubectl apply -k "github.com/kubeflow/pipelines/manifests/kustomize/cluster-scoped-resources?ref=<version>"

5. Data Processing and Big Data

These tools are essential for handling large datasets and distributed computing.

Apache Spark

Apache Spark is a powerful distributed computing framework that’s widely used for big data processing and machine learning in AI development. Its MLlib library provides scalable algorithms.

To install Spark on Linux, run:

wget https://downloads.apache.org/spark/spark-3.5.4/spark-3.5.4-bin-hadoop3.tgz
tar -xvf spark-3.5.4-bin-hadoop3.tgz
sudo mv spark-3.5.4-bin-hadoop3 /opt/spark
echo -e "export SPARK_HOME=/opt/spark\nexport PATH=$PATH:$SPARK_HOME/bin">> ~/.bashrc && source ~/.bashrc
spark-shell
pip install pyspark

6. Computer Vision

These tools are essential for AI projects involving image and video processing.

OpenCV

OpenCV (Open Source Computer Vision Library) is a must-have tool for AI developers working on computer vision projects, as it offers a wide range of functions for image and video processing, making it easier to build applications like facial recognition, object detection, and more.

To install OpenCV on Linux, run:

pip install opencv-python

7. Other Important Tools

These tools enhance productivity and streamline the AI development lifecycle.

Anaconda/Miniconda

Anaconda (or its lighter version, Miniconda) simplifies Python and R package management, especially for data science and AI. It provides a convenient way to manage dependencies and create isolated environments.

To install Anaconda on Linux, run:

wget https://repo.anaconda.com/archive/Anaconda3-2024.10-1-Linux-x86_64.sh
bash Anaconda3-2024.10-1-Linux-x86_64.sh

Hugging Face Transformers

Hugging Face has revolutionized natural language processing (NLP) with its Transformers library that provides access to pre-trained transformer models for NLP tasks, simplifying tasks like text generation, translation, and sentiment analysis.

To install Hugging Face Transformers on Linux, run:

pip install transformers

MLflow

MLflow is an open-source platform for managing the machine learning lifecycle, including experiment tracking, model packaging, and deployment.

To install MLflow on Linux, run:

pip install transformers

If you’re interested in diving deeper into AI development on Linux, check out these related articles:

  • AI for Linux Users– Discover how Linux users can leverage AI tools and frameworks to enhance productivity and solve real-world problems.
  • Setting Up Linux for AI Development– A step-by-step guide to configuring your Linux environment for AI development, including essential tools and libraries.
  • Run DeepSeek Locally on Linux– Learn how to set up and run DeepSeek, a powerful AI tool, on your Linux machine for local development and experimentation.

These articles will help you get the most out of your Linux system for AI development, whether you’re a beginner or an experienced developer.

Conclusion

The AI landscape is constantly evolving, and Linux provides a robust and versatile platform for developers. By mastering these essential tools, developers can effectively build, train, and deploy AI models, staying at the forefront of this exciting field.

Remember to consult the official documentation for each tool for the most up-to-date information and installation instructions.


Run Windows 11 in a Docker Container (Access it via the Browser)

$
0
0

https://linuxtldr.com/windows-docker-container

Run Windows 11 in a Docker Container (Access it via the Browser)

The Windows Docker container is gaining significant popularity, allowing users to easily deploy Windows 11, 10, 8.1, XP, etc., as a container and later access it via a browser (with VNC).

Before you confuse it with just a container, let me clarify that it uses Docker to download Windows images from the Microsoft server and then automatically configure it for installation, but behind the scenes, the downloaded image will be running in KVM (virtual emulator).

So, you need to ensure that virtualization is enabled in your BIOS settings, but the question arises: why do you need to run Windows in a Docker container then? The answer is quite simple. I’ve written a few points below that explain the advantages of running Windows in a Docker container.

Ezoic
  • It is completely free, open-source, and legal.
  • Automatically download the chosen Windows image from the Microsoft Server (for the latest Windows) or Bob Pony (for legacy Windows).
  • Easy access to Windows 11, 10, 8.1, 7, Vista, XP, or Windows Server 2022, 2019, 2016, 2012, 2008, and more.
  • It automatically configures the image and installs Windows, eliminating the need for going through manual installation. So, you can just run the Docker command and wait for your system to boot up.
  • Access your RAM, storage, GPU, USB devices, etc., within the container.
  • Easily delete and reinstall Windows like a sandbox.
  • Access Windows locally or remotely via a browser.
  • Use keyboard shortcuts through the remote desktop.
  • Access the Windows applications and games that Wine cannot handle properly.

Now, there are certain things (consider them cons) that you need to take care of; thus, they are.

  • Make sure that virtualization is enabled in the BIOS settings for Windows running in the Docker container, which uses KVM.
  • The Windows within the container remains unactivated (though activation is possible through a purchased license key).
  • Hardware devices like PCI and WiFi adapters cannot function (instead, opt for virtual machines).
  • It demands the same system requirements as the original Windows (thus, less RAM results in slower speeds).

So, let’s see how you can install and set up the Windows 11 Docker container and access it via a web browser in Linux (such as Debian, Ubuntu, Arch, RedHat, Fedora, etc.).

Table of Contents

How to Setup a Windows 11 Docker Container on Linux

To set up a Windows 11 Docker container, you need to ensure that Docker and Docker Compose are installed and configured on your system, after which you can follow one of the below-mentioned methods to set it up based on your preference.

Ezoic
  • Using a single “docker run” command (ease of use).
  • Using the “docker-compose.yml” file (customization options are available).

I’ll explain how to set it up using both of these methods, so you can decide which is the perfect choice for you. Starting with…

Method 1: Using the Docker Run Command

This method is quite easy to follow because all you need to do is run the following command:

$ docker run -it --rm --name windows -v /var/win:/storage -p 8006:8006 -p 3389:3389 --device=/dev/kvm --cap-add NET_ADMIN --stop-timeout 120 dockurr/windows

Whereas:

  • docker run -it --rm“: This is a Docker command to initiate a container in interactive mode, and with the “--rm” option, the container will be removed once terminated.
  • --name windows“: This sets the name of the container (which you can verify using the “docker ps” command).
  • -v /var/win:/storage“: The downloaded image and configuration files will be stored here, so later, when the container is reinitialized, you do not have to start from scratch.
  • -p 8006:8006 -p 3389:3389“: This exposes port 8006 for browser access through VNC and port 3389 for remote desktop. If you do not plan to use remote desktop, then remove the “-p 3389:3389” part.
  • --device=/dev/kvm“: Specifies the KVM file.
  • --cap-add NET_ADMIN“: Grants additional network capabilities to the container.
  • --stop-timeout 120“: Specifies a grace period in seconds (in this case, 120) for a running container to shut down gracefully before it is forcefully terminated.
  • dockurr/windows“: This is the image of the container.

Once you issue the command, you can check the status of the Windows 11 container by visiting “http://localhost:8006” in your browser.

Method 2: Using Docker Compose File

This method is for advanced users, as it requires a few manual steps to create the Windows 11 container using a compose file. So, to begin, first create a directory, and inside it, create a compose file with the following commands:

Ezoic
$ mkdir ~/Windows-Docker && cd ~/Windows-Docker
$ touch docker-compose.yml

Now, within the compose file, you can copy and paste the following compose template, which I manually adjusted while keeping customization and ease of use in mind. Feel free to change the highlighted red values according to your preferences.

version: "3"
services:
  windows:
    image: dockurr/windows
    container_name: windows
    devices:
      - /dev/kvm
    cap_add:
      - NET_ADMIN
    ports:
      - 8006:8006
      - 3389:3389/tcp
      - 3389:3389/udp
    stop_grace_period: 2m
    restart: on-failure
    environment:
      VERSION: "win11"
      RAM_SIZE: "4G"
      CPU_CORES: "4"
      DISK_SIZE: "64G"
    volumes:
      - /var/win:/storage

In the above compose template, most of the stuff is the same as the previously mentioned “docker run” command in method 1, so if you are directly visiting this method, make sure to first check that out.

The remaining options, which are new and consist of environment parameters such as “RAM_SIZE“, “CPU_CORES“, and “DISK_SIZE“, can be adjusted based on your preference and ensure that your system has the specified resources.

Ezoic

Now, once you have copied and pasted the provided compose template into the compose file, you can save, close the file, and execute the following command to start the container.

$ docker compose up -d

How to Access Windows 11 Running on a Docker Container

Once the container is initialized, it will begin downloading the mentioned Windows image, extracting it, and building it. You can open your favorite Firefox or Chrome browser and visit “http://localhost:8006” to monitor the status of your container.

The following is a picture of when the Windows 11 image is being downloaded.

window image is downloading

Once the download process is complete, it will automatically begin installing Windows 11 in a Docker container without requiring any manual steps.

windows 11 is installed in docker container

This process will take a few minutes, so you can take a coffee break and come back when you see the following Windows 11 home screen.

Ezoic
windows 11 home screen

Congratulations! You have successfully set up a Windows 11 Docker container on your Linux system. Now, below, I’ve attached a few images of running different applications to give you an idea of how they look.

The following is an image of Notepad running on a Windows 11 Docker container:

running notepad in windows 11 docker container

The following is an image of File Explorer on a Windows 11 Docker container:

file explorer in windows 11

The following is an image of the Control Panel on a Windows 11 Docker container:

control panel in windows 11 container

That’s it. Now you can use it like your regular Windows 11 machine on your Linux system without a virtual machine. Once you’re done using it, you can terminate it from your terminal.

Additional Tips on Using Windows on a Docker Container

Instead of accessing the Windows 11 Docker container from your browser through VNC, I would suggest you first enable remote desktop from Windows settings and then access it via a remote desktop client application to easily use keyboard shortcuts and achieve a proper screen view.

Ezoic

Now, in this article, we focus on setting up a Windows 11 container, but you can set up different Windows versions, such as 10, 8.1, 7, XP, or Windows Server, by simply replacing “win11” from “VERSION: "win11"” under environment in the compose file with the value mentioned in the following tables.

ValueDescriptionSourceTransferSize
win11Windows 11 ProMicrosoftFast6.4 GB
win10Windows 10 ProMicrosoftFast5.8 GB
ltsc10Windows 10 LTSCMicrosoftFast4.6 GB
win81Windows 8.1 ProMicrosoftFast4.2 GB
win7Windows 7 SP1Bob PonyMedium3.0 GB
vistaWindows Vista SP2Bob PonyMedium3.6 GB
winxpWindows XP SP3Bob PonyMedium0.6 GB
2022Windows Server 2022MicrosoftFast4.7 GB
2019Windows Server 2019MicrosoftFast5.3 GB
2016Windows Server 2016MicrosoftFast6.5 GB
2012Windows Server 2012 R2MicrosoftFast4.3 GB
2008Windows Server 2008 R2MicrosoftFast3.0 GB
core11Tiny 11 CoreArchive.orgSlow2.1 GB
tiny11Tiny 11Archive.orgSlow3.8 GB
tiny10Tiny 10Archive.orgSlow3.6 GB

Final Word

I find it very interesting to use a Windows machine within a Docker container, with the added benefit of its automatic installation process eliminating the need for manual steps. However, you can opt for manual installation by specifying “MANUAL: "Y"” in the environment.

Another great aspect of using it is running legacy games on your system that require older versions of Windows, or free games shipped with Windows XP and 7. It’s better for running most applications that the Windows compatibility layer (such as Wine) can’t handle.

Ezoic

However, I want to know if you find it interesting and, if so, what you plan to use it for. Let me know in the comment section.

Till then, peace!


Viewing all 1417 articles
Browse latest View live


<script src="https://jsc.adskeeper.com/r/s/rssing.com.1596347.js" async> </script>